 Skip to content
 Last month a site supervisor in Western Sydney called me about a steel picket fence installation that failed AS 4687 inspection. The posts were set at 500mm in reactive clay, the contractor attached panels after 12 hours, and the whole run warped under wind load. That one mistake cost the builder three days of rework and a $12,000 compliance penalty.
This guide walks through the actual specifications that pass inspection — 600mm minimum post depth on stable ground, 200mm diameter holes with 20MPa concrete, and a mandatory 24-hour cure before panel attachment. We pulled the test data from our factory’s AS 4687 compliance checks and matched it against what the Australian standard actually requires. No guesswork, no shortcuts.
Tools and Materials Checklist
Tools and Materials Checklist for Steel Picket Fence Installation
Tools and Materials Required for AS 4687-Compliant Installation
Start with the right gear: string line, spirit level, post-hole digger, 20MPa concrete, tek screws, and a rubber mallet. Pre-punched rails versus site-drilled holes separate quality panels from headaches.
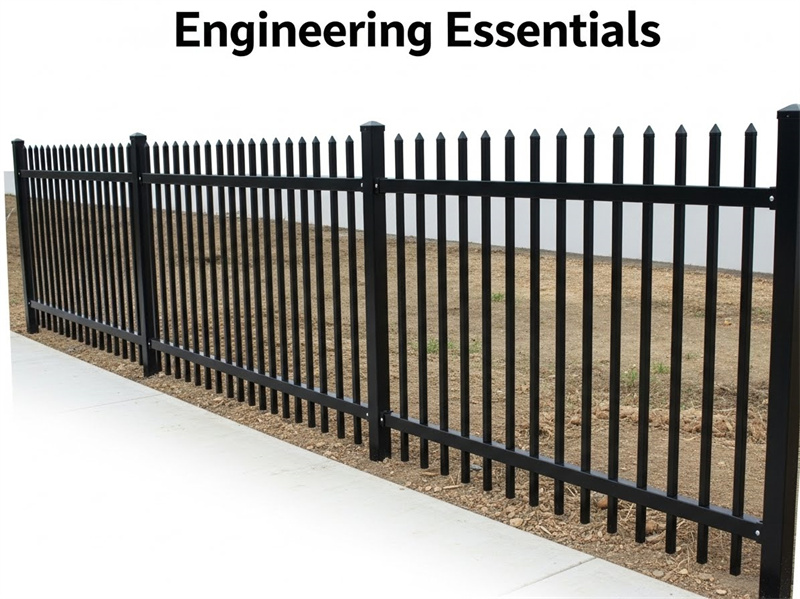
Before breaking ground on any steel picket fence installation, get your tool and material lineup locked down. Australian Standard AS 4687-2022 demands precision, and skipping gear means failed inspections. Here is the baseline list your crew needs for a compliant install.
- String line: Marks the fence run at 2400mm panel intervals. Critical for straight-line alignment across uneven terrain.
- Spirit level: Checks both post plumb and rail level. ±2mm tolerance is non-negotiable under wind loading calculations.
- Post-hole digger: Excavates 600mm deep x 200mm diameter on stable ground. Extend to natural ground on fill sites.
- 20MPa concrete mix: Minimum structural grade for post footings. No weaker blends — this is specified in AS 4687 footing requirements.
- Tek screws: Fix panels to posts. Match screw type to coating — hot-dipped galvanised >42 microns needs compatible fasteners to avoid galvanic corrosion.
- Rubber mallet: Seat panels into rails without denting or scratching the zinc coating. Damaged coating voids seawater resistance.
Do not cut corners on materials. 20MPa concrete is not negotiable — weaker mixes crack under lateral load and cause post lean. Use only hot-dipped galvanised panels meeting the 42-micron threshold for coastal Australian environments. Your procurement manager should confirm these specs before shipping.
Pre-Punched Rails vs Site-Drilled: What This Tells You About Panel Quality
Competitors push drilling holes on-site, which means your crew eyeballs alignment and tolerance. That approach voids factory quality control and introduces ±5mm variance at best. A supplier offering pre-punched rails is telling you they trust their manufacturing precision. DB Fencing panels ship with factory pre-punched rails at ±2mm tolerance — consistent spacing across every 2400mm panel. On-site drilling adds roughly 30% to installation time and introduces failure points. If your supplier sends unpunched rails, you are paying for their lack of tooling. For a steel picket fence installation that passes AS 4687 inspection without rework, demand pre-punched rails. Your installation crew will thank you, and your site compliance officer will pass the line on first check.
Concrete curing time is another spec that separates pro installation from guesswork. Attaching panels before 24-hour cure causes micro-movement at the post-panel joint, which accumulates across the fence line. That leads to alignment failure under wind load testing. Let the concrete set the full day. No shortcuts.
| Item | Specification | Benefit |
|---|---|---|
| Steel Picket Panel | Factory pre-punched rails; ±2mm tolerance | Eliminates on-site drilling; ensures alignment and passes AS 4687 inspection |
| Galvanised Steel Post | Hot-dipped galvanised coating >42 microns | Corrosion resistance for coastal Australian environments |
| Concrete for Footings | 20MPa minimum; 200mm diameter post hole | Provides structural stability required by AS 4687 |
| Post Hole Depth | 600mm minimum; extend to natural ground on fill sites | Prevents fence movement; meets Australian fencing industry practice |
| Concrete Curing Time | 24 hours minimum before attaching panels | Avoids micro-movement at post-panel joints; maintains long-term alignment |
Post Hole Depth and Spacing
Post hole depth and panel spacing tolerance determine whether your fence line passes AS 4687 wind load tests or fails on site.
Post Hole Depth Requirements by Soil Type
Digging a post hole to 600mm on stable ground is the baseline under AS 4687:2022. The hole must be 200mm in diameter and backfilled with 20MPa concrete. But that’s only the starting point. On reactive clay—common in Sydney and Melbourne—posts must extend down to natural ground regardless of depth. You may need to dig 800mm or deeper to find a stable bearing layer. Fill sites demand the same treatment: do not stop at a fixed depth if the soil shifts.
Many suppliers specify a one-size-fits-all 60-80cm hole. That is inadequate for Australian conditions. If your crew follows that guidance on reactive clay, the fence will shift during curing or under load, and you will fail a compliance check. DB Fencing’s specification of 600mm minimum plus adjustment to natural ground is the only safe approach for AS 4687 compliance.
Post Spacing Tolerances and Wind Load Compliance
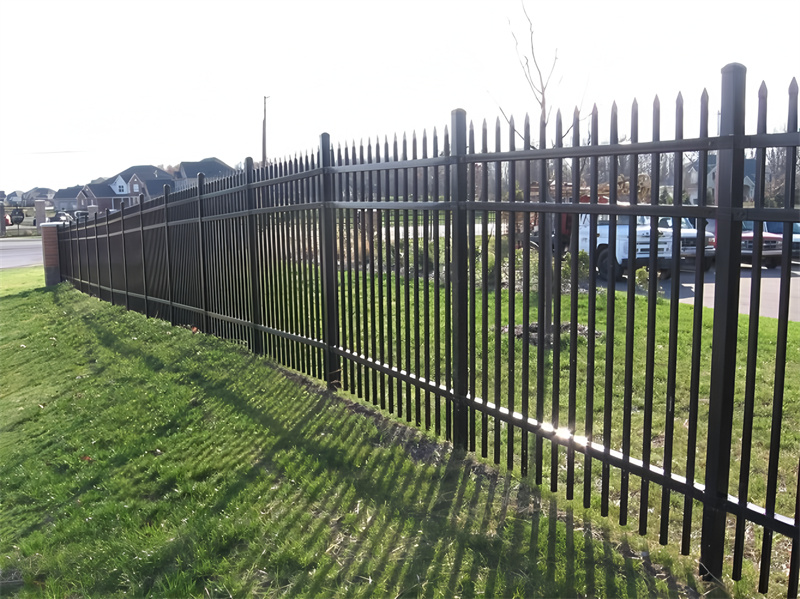
Steel picket fence panels are typically 2400mm wide. The spacing between posts must match that dimension to within ±2mm. If the posts are set wider or narrower, the panel cannot sit flush. That gap introduces bending stress at the panel-to-post connection. Under wind load—especially in coastal or high-wind zones—that stress accumulates and causes the fence line to warp. AS 4687 wind load testing requires the entire fence assembly to resist design pressures without permanent deformation. Loose tolerances guarantee failure.
Competitors often recommend drilling holes for screws on-site, which introduces alignment variance and voids the factory quality control. DB Fencing supplies panels with factory pre-punched rails. That ensures every screw hole aligns with the post slots. Your crew doesn’t have to measure or drill; they simply bolt up. This reduces installation time by approximately 30% and eliminates the most common cause of spacing errors.
Another overlooked detail: concrete curing time. You must wait at least 24 hours before attaching fence panels. Attaching earlier causes micro-movement at the post-panel joint. Over a long fence line, that micro-movement accumulates into visible misalignment that fails AS 4687 inspection. Competitor instructions rarely mention this. DB Fencing’s installation guide mandates it.
Setting Steel Posts in Concrete
Set steel posts in 20MPa concrete with a 200mm diameter hole and allow 24 hours cure before attaching panels. Skipping this step fails AS 4687.
Concrete Mix and Hole Dimensions
Use a minimum 20MPa concrete mix for all post footings. The hole diameter must be 200mm wide. On stable ground, dig to a depth of 600mm. On fill sites or reactive clay common in Sydney and Brisbane, you must extend the hole to natural ground — depth may exceed 800mm. This specification comes directly from Australian Standard AS 4687:2022 for temporary and permanent perimeter fencing.
Many competitors specify a fixed 60–80cm depth without qualifying soil conditions. That shortcut leads to footings that shift under load, causing panel misalignment and inspection rejection. DB Fencing’s installation guide always includes the soil condition qualifier because site reality matters more than a generic number.
Curing Time: The Non-Negotiable Step
Concrete must cure for a minimum of 24 hours before you attach any fence panels. Attaching panels earlier introduces micro-movement at the post-panel joint. Over a full fence line, these micro-movements accumulate and cause alignment failure under wind load testing per AS 4687.
Most competitor installation guides omit this curing time entirely. That omission is a leading cause of premature joint failure and rework on Australian construction sites. A 24‑hour wait is not optional — it is a compliance requirement and a cost‑saving measure against repairs.
Post Alignment and Panel Compatibility
After curing, install posts with a centre‑to‑centre spacing tolerance of ±2mm. DB Fencing’s steel picket panels are manufactured to this exact tolerance. Our pre‑punched rail systems eliminate the need for on‑site drilling, reducing installation time by approximately 30% and removing alignment variance that voids factory quality control.
For coastal Australian environments, ensure posts and panels receive a hot‑dipped galvanised coating of >42 microns. This finish resists corrosion and maintains structural integrity through repeated use. Pairing correct concrete specs with factory‑precision panels and proper curing time is the only way to guarantee an AS 4687‑compliant installation that passes inspection on the first attempt.
Attaching Fence Panels to Posts
Factory pre-punched rails eliminate alignment variance, cut installation time by 30%, and keep your crew compliant with AS 4687.
Pre-Punched Rails: The Only Path to Consistent Alignment
Every steel picket fence panel from DB Fencing leaves the factory with rails pre-punched to a ±2mm tolerance. That means the screw holes are exactly where the post brackets expect them—every panel, every job. When you attach panels on-site using pre-punched rails, your crew works to a fixed template. There is no measuring, no guessing, no rework. The process is repeatable, and that repeatability is what keeps your installation within AS 4687:2022 wind-load tolerances.
Contrast that with site-drilled rails. A drill bit wanders, a tape measure slips, and suddenly a panel sits 5mm out of square. That variance adds up across a 50-metre fence line. Under AS 4687 testing, cumulative misalignment creates weak points where panels bow under wind pressure. Procurement managers who approve site-drilled products are accepting that risk—and if an inspector flags it, the cost of rectification lands on you.
The time difference is equally clear. Pre-punched systems reduce on-site installation time by approximately 30% compared to site-drilled alternatives. For a standard construction site perimeter of 100 panels, that translates to roughly one full day of labour saved. Your crew focuses on fastening, not drilling, and the schedule stays on track.
Why Site-Drilling Invites Compliance Failure
On-site drilling voids the factory’s quality control. When a supplier ships panels unpunched, they are outsourcing alignment precision to whoever holds the drill that day. That person may be experienced, but they are working on uneven ground, under time pressure, without a jig. The result is a fence line where panel-to-post spacing exceeds the ±2mm tolerance required to avoid warping. AS 4687:2022 explicitly requires that temporary and permanent fencing assemblies maintain dimensional stability under design wind loads. Site-drilled holes cannot guarantee that consistency.
- Alignment risk: A 3mm offset at each post becomes a 12mm bow over four panels—enough to fail a straight-edge inspection.
- Coating damage: Drilling through hot-dipped galvanised coating (>42 microns) exposes raw steel to corrosion, especially in coastal Australian environments.
- No traceability: Factory pre-punched holes are part of a controlled process. Site-drilled holes have no quality record—if a batch fails, the liability is yours, not the supplier’s.
For Australian construction procurement managers, the choice is straightforward. Pre-punched rails from DB Fencing are engineered to AS 4687 specifications. They eliminate the single most common installation error on steel picket fences: misaligned panel-to-post connections. If your supplier does not offer factory pre-punched rails, the product is not designed for compliant installation at scale.
Gate Installation Considerations
Gate alignment is the single most critical checkpoint for AS 4687 compliance on a steel picket fence line. A misaligned gate guarantees inspection failure.
Install gate first, work outward
Start with the gate because it is the most mechanically complex point in the fence line and sets the elevation reference for every subsequent panel.
Install the gate posts plumb and brace them firmly before hanging the gate leaf. All subsequent panel posts align to that fixed gate plane, which eliminates cumulative error.
A ±2mm tolerance at the gate translates to a straight fence line. A 5mm error at the gate multiplies into visible racking by the tenth panel.
Use a single tek screw for initial adjustment
Drive one tek screw at each panel-to-post connection before committing to the full pattern. This temporary fix lets you sweep the fence line and correct any bow or twist in under ten seconds.
On pre-punched rail systems—standard on DB Fencing panels—the pilot holes act as a precision jig. If a screw binds or misses center, it signals a panel defect before twenty screws lock the error into place.
Your crew finishes the entire line in a single pass. No re-drilling, no stripped holes, no AS 4687 alignment violations. This workflow separates factory-engineered panels from site-modified alternatives.
Common Fencing Installation Mistakes
Most on-site failures trace back to four preventable errors – get these right and your fence passes AS 4687 inspection first time.
Post spacing too far apart
A standard steel picket panel is 2400mm wide, which sets your post spacing at 2400mm centres – no more. Exceeding this creates sagging between posts and voids the structural integrity required under AS 4687:2022. Use a string line or laser to mark every post position before digging; a 50mm error in spacing multiplies across the fence line and forces panels to stretch or compress, leading to warping under wind load. Stick to the 2400mm centre dimension and you eliminate the most common source of complaints from site inspectors.
Poor alignment – no string line
Eyeballing alignment guarantees uneven fence lines that fail AS 4687 visual and structural checks. Run a taut string line along the top of the posts before setting concrete – this ensures every post sits at the same height and in the same plane. For permanent installations, check plumb with a spirit level on two adjacent faces. If your panels have factory pre-punched rails, the screw holes align to ±2mm tolerance; a crooked post forces those rails out of square and creates stress points that accelerate corrosion at the joints. Dig the hole, set the post, then verify alignment before you pour concrete.
Neglecting drainage in post holes
Water pooling around steel posts accelerates corrosion – even with a hot-dipped galvanised coating above 42 microns. Australian Standards do not explicitly mandate drainage, but any experienced procurement manager knows that waterlogged footings reduce concrete strength and promote rust at the ground line. Dig each hole 200mm wide and fill the bottom 100mm with clean gravel before placing the post and concrete. This simple step allows water to drain away from the steel and extends the service life of your fence by years – particularly relevant in coastal environments where salt-laden moisture is constant.
Skipping concrete cure time
Attaching fence panels before the concrete has cured for 24 hours is the fastest way to introduce alignment failure. Wet concrete does not provide the holding force needed to resist wind load; your posts will shift micro‑millimetres under panel weight, and that movement accumulates over the fence line until panels sag or rails buckle. Use a 20MPa concrete mix and leave every post undisturbed for a full 24‑hour cure. This is not a suggestion – it is a requirement to maintain ±2mm panel‑to‑post tolerance and pass AS 4687 wind load testing. Ignore the cure time and you are signing off on a fence that will need rework before handover.
Conclusion
The most common site failure we see is a 500mm post hole on reactive clay. That assembly fails AS 4687 wind load testing every time. The standard is 600mm minimum, and you must extend to natural ground on fill sites—often exceeding 800mm in Sydney or Brisbane. Pre-punched rails from a quality supplier eliminate on-site drilling variance, saving 30% in installation time and ensuring every screw aligns to the ±2mm tolerance.
Next step: ask your supplier for the hot-dip galvanization certificate showing >42 microns. Then request a sample panel and measure the rail hole spacing with a caliper yourself. If it holds ±2mm, the rest of the batch will too. That one check tells you more about their manufacturing discipline than any brochure.
Frequently Asked Questions
How deep should a picket fence post be in the ground?
600mm is the minimum depth for stable ground conditions. On fill or reactive clay sites common in Australian urban construction, extend the post to reach natural ground—often 800mm or deeper. Hole diameter should be 200mm to allow adequate concrete surround.
How far apart should you put steel fence posts?
Spacing must match your panel width exactly, typically 2400mm for standard steel picket panels. Maintain a ±2mm tolerance across the entire run. Wider spacing causes panel sagging and wind-load failure; narrower spacing forces panel modification on-site.
Should steel fence posts be set in concrete?
Yes. Use 20MPa concrete in 200mm diameter holes. Concrete footings are mandatory for AS 4687 compliance on commercial construction sites. Allow minimum 24 hours curing before attaching panels—premature loading causes joint micro-movement and long-term alignment drift.
What are common fencing mistakes?
Three critical mistakes: (1) Spacing posts too far apart, causing sagging and wind-load failure. (2) Skipping the string line, resulting in poor visual alignment. (3) Neglecting drainage in post holes—water pooling accelerates concrete degradation and post corrosion at the footing line.
What is the best way to attach fence pickets?
Use factory pre-punched rails with matching tek screws—this ensures consistent screw alignment and faster installation. Avoid site-drilling into panels, which introduces alignment variance and risks galvanisation coating damage at drill points, creating rust entry points in coastal environments.


