 Skip to content
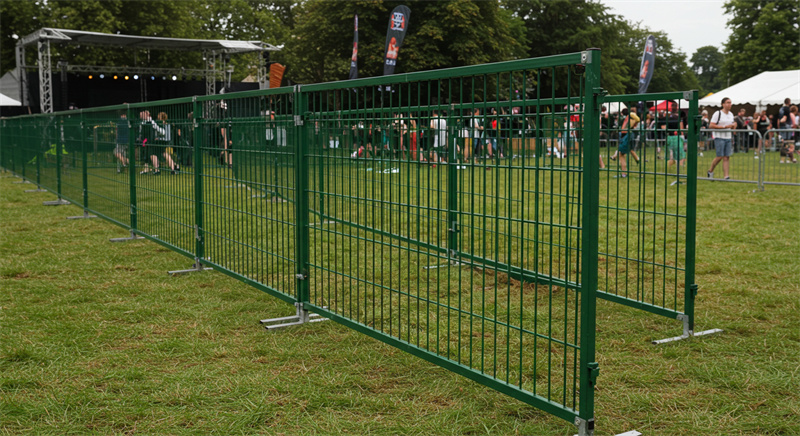
If you’re wondering how temporary fencing can safeguard your construction site or manage crowds at events, you’re in the right place! I’m Frank Zhang, the founder of DB Fencing, and with over 15 years of experience in the fencing industry, I’ve seen firsthand how essential proper installation is for achieving safety and compliance.
In this guide, I’m excited to share my best practices for installing temporary fencing. We’ll cover everything from site preparation to choosing the right fence type for your specific needs. By the end, you’ll understand how to set up a fence that not only meets regulations but also stands firm against environmental challenges. Let’s dive in and ensure your fencing installation is both effective and reliable!
Introduction to Temporary Fencing
When it comes to securing sites temporarily, installing temporary fence systems is a critical solution across multiple industries. As someone who has spent over 15 years in the fencing business, I’ve witnessed firsthand how proper temporary fence installation can make the difference between a secure site and one vulnerable to various risks. This introduction will help you understand why temporary fencing matters and how to approach installation effectively.
Importance of Temporary Fencing in Various Industries
Temporary fencing serves as the first line of defense in numerous sectors. From my experience working with clients across 55 countries, I’ve seen how installing temporary fence solutions has become essential in maintaining site integrity. The construction industry particularly relies on these systems to secure perimeters, protect equipment, and ensure public safety.
Industry-Specific Temporary Fencing Applications
| Industry | Primary Fencing Need | Common Installation Challenges |
|---|---|---|
| Construction | Site security and public safety barriers | Uneven terrain, extended perimeters |
| Events and Festivals | Crowd control and area designation | Rapid deployment, temporary anchoring |
| Agriculture | Livestock containment | Rural locations, weather exposure |
| Residential | Property marking during renovations | Limited space, aesthetic concerns |
Typical Applications: Construction, Events, and More
The versatility of temporary fencing makes it suitable for numerous applications. In construction, these fences prevent unauthorized access while complying with safety regulations. For events, they help manage crowds and create secure perimeters. Understanding how to install temporary fencing correctly for each application ensures maximum effectiveness.
At DB Fencing, we’ve supplied temporary fencing for major construction projects, agricultural applications, and large-scale events. Each scenario demands specific consideration for proper installation, which we’ll explore throughout this guide.
Key Benefits: Safety, Compliance, and Security
The importance of temporary fencing for safety cannot be overstated. Properly installed fencing provides multiple benefits that extend beyond simple boundary marking:
Safety Benefits of Proper Installation
When temporary fencing is correctly installed, it creates a reliable barrier that prevents accidents and keeps unauthorized personnel away from hazardous areas. This is particularly important on construction sites where heavy machinery operates or where there are falling hazards.
From my years of experience, I’ve learned that many safety incidents could have been prevented with properly secured temporary fencing. The initial investment in quality installation pays dividends in accident prevention.
Regulatory Compliance
Many jurisdictions require temporary fencing as part of their safety regulations. Understanding these requirements before beginning your temporary fence installation ensures you remain compliant with local laws and industry standards, avoiding potential fines and work stoppages.
What many don’t realize is that proper site assessment before installation is just as important as the physical setup process. Evaluating ground conditions, weather factors, and regulatory requirements creates the foundation for a successful installation.
Throughout this guide, I’ll share insights from my 15 years of experience in the fencing industry to help you master the art of temporary fence installation. From preparation to final inspection, you’ll learn everything needed to create secure, compliant, and effective temporary barriers for any application.

Assessing Your Installation Site
Before driving that first stake into the ground, assessing site for temporary fencing is a critical first step that many installers unfortunately rush through. In my 15 years of experience with DB Fencing, I’ve seen how proper site evaluation prevents costly mistakes and ensures a secure installation. Let me guide you through the essential aspects of evaluating your site before setting up temporary fencing.
Analyzing Site Conditions
The foundation of successful site preparation begins with a thorough analysis of ground conditions. Different soil types require different anchoring methods – what works in clay won’t necessarily work in sandy soil. I always recommend conducting a preliminary walkthrough of the entire perimeter where fencing will be installed.
Ground Assessment Factors
| Ground Type | Installation Considerations | Recommended Base Support |
|---|---|---|
| Soft Soil/Grass | Easier stake insertion, potential sinking | Standard stakes with deeper insertion |
| Hard/Rocky Ground | Difficult stake insertion, stable foundation | Pre-drilling or concrete blocks |
| Asphalt/Concrete | No penetration possible | Self-supporting bases or ballast weights |
| Sloped Terrain | Uneven fence height, drainage issues | Stepped installation with additional bracing |
Weather patterns significantly impact your fencing stability. When assessing site for temporary fencing, I always check local weather forecasts for the installation period and the duration the fence will be in place. Wind exposure is particularly important – a fence installed in an open field faces different stresses than one protected by buildings.
Identifying Obstacles and Hazards
Thoroughly identifying potential obstacles before installation prevents mid-project complications. Underground utilities represent the most serious hazard – always contact local utility companies to mark underground lines before any ground penetration.
During my site assessments, I’ve encountered numerous hidden obstacles that could have damaged equipment or caused project delays if not identified early:
Common Site Obstacles Checklist
Tree roots, irrigation systems, and property boundary markers often go unnoticed until they interfere with stake placement. Additionally, consider overhead obstacles like low-hanging branches or power lines that might impede fence panel transportation or installation.
One client nearly struck a fiber optic line because they rushed their site assessment. The resulting repair costs would have exceeded their entire fencing budget had we not performed a proper evaluation beforehand.
Planning for Accessibility and Visibility
Understanding how to assess site for temporary fencing installation includes planning for practical access points. Every temporary fence requires gates or removable sections for personnel, equipment, and emergency access. I recommend mapping these locations during your assessment phase.
Consider visibility needs from both inside and outside the fenced area. For construction sites, you may need clear lines of sight to monitor equipment. For events, crowd flow and emergency evacuation routes must remain unobstructed.
The most successful installations I’ve overseen have included detailed documentation of the site assessment. Take photographs, measure distances, and note potential problem areas. This documentation proves invaluable during installation and when addressing any future issues that might arise.
Essential Tools and Materials
Having the right tools for installing temporary fence systems can make the difference between a smooth, efficient project and a frustrating experience. Through my 15 years in the fencing industry, I’ve refined the list of essential equipment needed for professional installations. This chapter will guide you through everything you’ll need, from basic components to specialized tools for challenging environments.
Common Tools: Fencing Panels, Bases, and Anchors
At the core of any temporary fencing installation are the primary components: fence panels, fence bases, and securing mechanisms. The quality of these fundamentals directly impacts the stability and security of your installation.
Temporary Fencing Component Comparison
| Component | Types Available | Best Application | Tools Required for Installation |
|---|---|---|---|
| Fence Panels | Welded mesh, chain link, hoarding panels | Security perimeters, crowd control | Gloves, panel lifters (for heavier panels) |
| Fence Bases | Concrete, plastic, recycled PVC, steel | Hard surfaces, soft ground reinforcement | Base lifting tools, level |
| Coupling Clamps | Anti-tamper, standard, security | Panel-to-panel connections | Spanner, screwdriver, anti-tamper tools |
| Stabilizing Struts | Diagonal, horizontal, corner braces | Wind resistance, extra stability | Hammer, mallet, spanner |
For basic installations, a hammer, mallet, and adjustable wrench will handle most assembly needs. However, professional installers typically carry specialized panel lifters that reduce strain and prevent injuries when handling heavy fence panels.
Specialized Equipment for Different Terrains
Different installation environments demand specialized tools. One of the most common challenges I’ve encountered is varying ground conditions, which significantly impact the anchoring method.
Terrain-Specific Installation Tools
For hard surfaces like concrete or asphalt, you’ll need a hammer drill with appropriate concrete bits to pre-drill holes for anchors. In contrast, soft ground installations benefit from post drivers or augers to create proper support for fence posts.
In my experience, having adaptable anchoring options is crucial. I always recommend carrying both ground stakes for soil installation and concrete blocks or water-filled bases for hard surfaces. This versatility has saved numerous projects when ground conditions weren’t as expected.
Supplies Checklist for Installation
A complete list of tools for installing temporary fencing should be prepared before starting any project. Based on my years of experience supplying fencing to construction sites worldwide, here’s what I consider essential:
Basic Installation Toolkit
Safety equipment comes first: gloves, safety boots, high-visibility vests, and eye protection are non-negotiable for professional installations. Next are the hand tools: hammers, rubber mallets, measuring tape (at least 30m/100ft), spirit level, and adjustable wrenches.
Don’t overlook the importance of marking tools. Spray paint, marking flags, and string lines ensure straight, professional-looking installations. These simple items are often missing from basic tools for installing temporary fence lists but make a significant difference in the final appearance and function.
For larger projects, power tools become essential. A portable generator, cordless drill with various bits, and a small angle grinder for adjustments can dramatically increase efficiency. My installation teams always carry bolt cutters and wire cutters for making on-site adjustments when needed.
Transportation tools are equally important – fence panel trolleys and dollies prevent injury and speed up the installation process. Remember that temporary fencing is heavy, and manual handling is both slow and potentially dangerous.
Having the right tools not only speeds up installation but significantly improves safety and the quality of the finished installation. In my experience, professionals who invest in proper equipment complete projects in half the time with better results than those who try to improvise.
Step-by-Step Installation Guide
Following a step-by-step guide to installing temporary fencing ensures your fence will be secure, stable, and compliant with safety regulations. After 15 years in the fencing industry, I’ve refined this process to maximize efficiency while maintaining the highest safety standards. Let me walk you through the installation process that we use at DB Fencing for all our professional installations.
Preparing the Area for Installation
Proper preparation is the foundation of successful fence installation. Before placing a single panel, ensure you’ve completed these critical preparation steps:
Site Preparation Checklist
| Preparation Task | Purpose | Tools Needed |
|---|---|---|
| Clear debris and vegetation | Creates level installation surface | Rake, shovel, pruning tools |
| Mark fence line with string or spray paint | Ensures straight, precise installation | String, stakes, measuring tape, marking paint |
| Identify underground utilities | Prevents service disruption and hazards | Utility location service contact information |
| Prepare base locations | Stabilizes fence in appropriate positions | Measuring tape, marking tools |
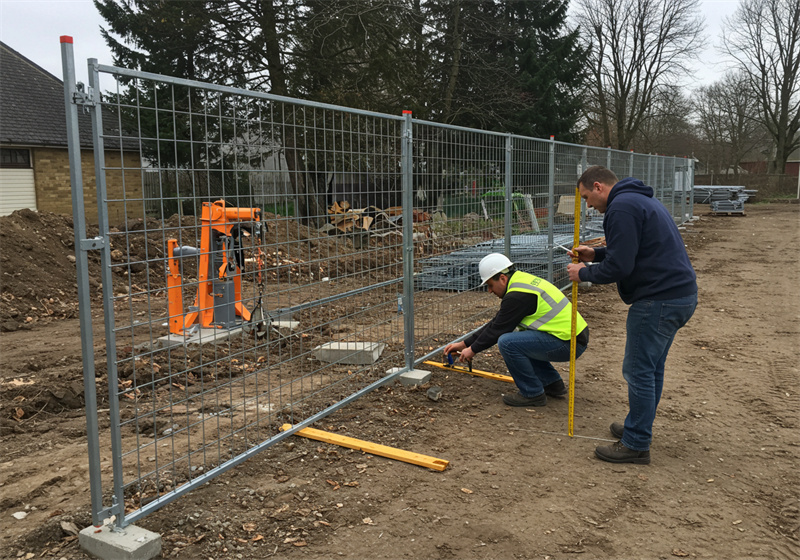
I’ve found that marking the entire perimeter before beginning installation saves considerable time and prevents misalignment. For construction sites, always maintain the required distance from excavations – typically at least 1.8 meters (6 feet) from the edge of any trench or pit.
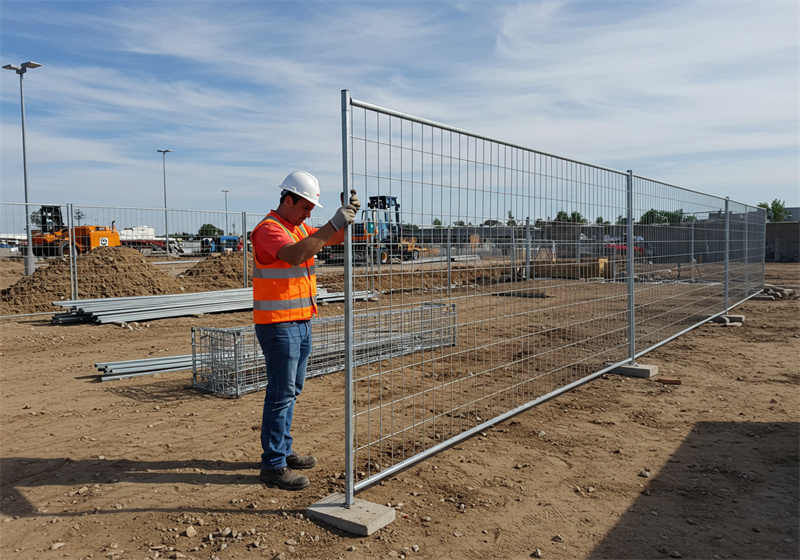
Erecting the Fencing Panels
When learning how to install temporary fencing, proper panel handling and placement is crucial. Start at corners or ends of your perimeter for the most stable beginning point. This creates an anchor for the remaining fence line.
Panel Installation Process
Position the first fence base at your starting point, ensuring it’s on firm, level ground. Insert the panel into the base, but don’t fully tighten connections yet. This allows for adjustments as you progress. Continue placing bases at appropriate intervals (typically 2.5-3.5 meters apart, depending on panel width).
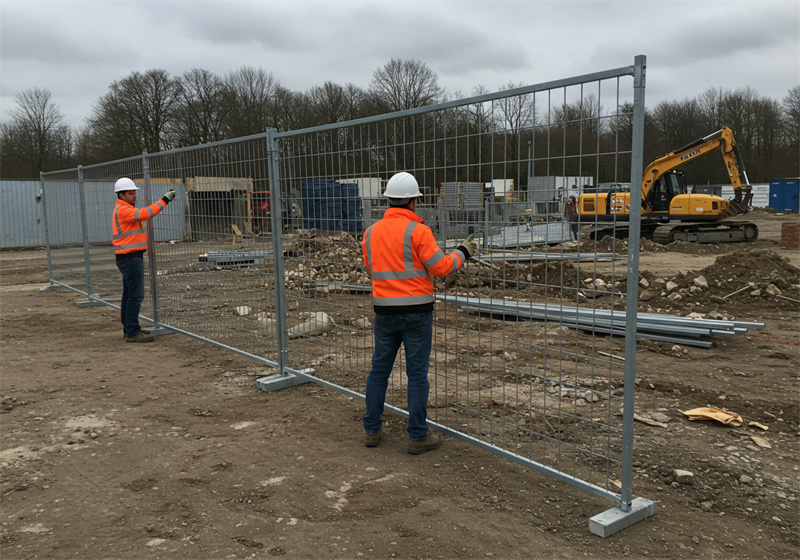
One of the most effective fence installation techniques I recommend is to have two people work together – one holding panels while the other secures bases and connections. This method dramatically improves both speed and safety during installation.
Spacing and Securing Panels for Stability
Proper spacing and securing are critical aspects of a step-by-step guide to installing temporary fencing. Panels that are improperly spaced or inadequately secured become hazards rather than safety measures.
When connecting panels, overlap them according to manufacturer specifications (typically 200-300mm). Secure each connection with at least two coupling clamps – one near the top and one near the bottom of the overlap. For areas with high wind exposure, additional middle clamps provide crucial reinforcement.
Stability Enhancement Techniques
For maximum stability, I always recommend adding bracing to fence sections every 25-30 meters and at corners. These step-by-step instructions for temporary fence setup wouldn’t be complete without emphasizing the importance of additional stabilization in vulnerable areas.
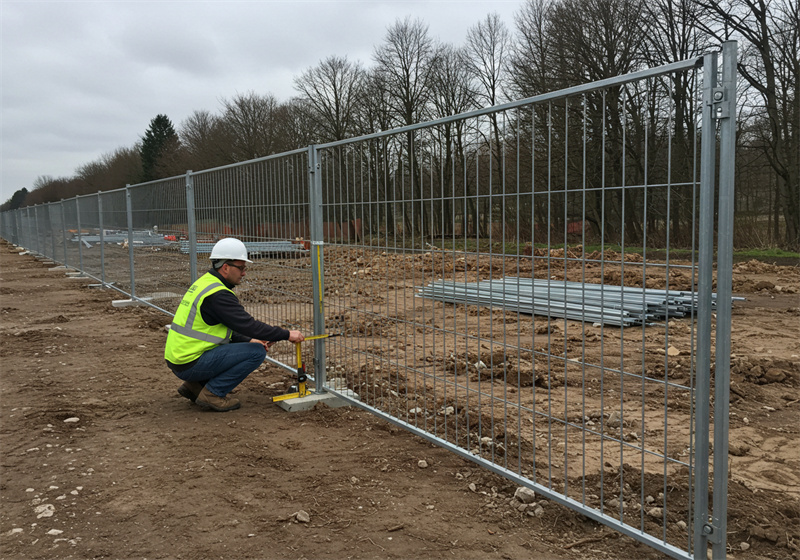
In my experience, the most common installation failure occurs when bases aren’t properly secured. For soft ground installations, drive metal stakes through base holes into the ground. For hard surfaces, use sandbags or concrete blocks as counterweights on bases.
Once all panels are erected and initially secured, perform a final walkthrough to check and tighten all connections. Test fence stability by applying moderate pressure at various points – a properly installed fence should resist movement and maintain its position.
Remember that weather conditions significantly impact installation. In high-wind areas, reduce panel spacing and add additional bracing. In soft or muddy conditions, use larger bases or additional ground anchoring to prevent sinking or movement.
Securing and Stabilizing the Fence
After setting up your temporary fence line, securing temporary fence structures properly becomes the critical next step. In my 15 years of experience supplying fencing across 55 countries, I’ve seen how inadequate stabilization can lead to collapsed fences, damaged property, and even injuries. This chapter will guide you through proven methods to ensure your temporary fencing remains upright and functional regardless of conditions.
Importance of Stability in Temporary Fencing
Temporary fencing that isn’t properly secured defeats its primary purpose – providing security and safety. Beyond the obvious risk of collapse, unstable fencing creates liability issues and may violate safety regulations at construction sites or events. Understanding proper stability techniques isn’t optional – it’s essential for both compliance and effectiveness.
Stability Risk Assessment
| Stability Factor | Risk Level Without Proper Securing | Recommended Minimum Stabilization |
|---|---|---|
| Wind Exposure | High – Potential complete collapse | Bracing every 3-4 panels + weighted bases |
| Uneven Ground | Medium – Panel separation and tilting | Additional base supports + ground staking |
| Public Interface | Medium – Deliberate tampering | Anti-tamper clamps + security ties |
| Extended Duration | High – Progressive destabilization | Regular inspection + reinforced connections |
Techniques for Securing Fencing: Anchors and Weights
The method for securing temporary fence panels depends greatly on your surface type. For soft ground installations, steel stakes driven through fence bases provide excellent anchoring. In my experience, stakes should penetrate at least 30cm (12 inches) into the ground for adequate stability.
For hard surfaces like concrete or asphalt, weighted bases become essential. At DB Fencing, we recommend concrete blocks (minimum 25kg/55lbs) or water/sand-filled bases. Place these weights on both sides of the base for counterbalancing, particularly at corners and gate areas where stress is highest.
Advanced Securing Methods
For superior stability, employ diagonal bracing struts at regular intervals along your fence line. These should be installed at least every 10 meters (30 feet) and at every corner or directional change. This simple addition dramatically increases wind resistance and overall fence integrity.
Connection points between panels are often overlooked weak points. I always recommend using at least two coupling clamps per panel junction – one near the top and one near the bottom. For high-security areas or windy conditions, add a middle clamp for triple-point security.
Adapting Techniques for Different Weather Conditions
Understanding weather considerations is critical when planning your stabilization strategy. High winds are the most common cause of fence failure that I’ve encountered in my years of experience.
Implementing best practices for securing temporary fencing against wind includes reducing panel spacing in exposed areas, using additional counterweights, and installing wind-slicing mesh instead of solid coverings when possible. For sites with sustained winds over 30km/h (20mph), double the number of braces and consider adding temporary guy wires to corner posts.
In areas with freezing temperatures, standard water-filled bases may crack if the water freezes and expands. Either use antifreeze solutions in water-filled bases or switch to solid concrete weights during winter months. Conversely, in extremely hot conditions, check that plastic components haven’t weakened or warped, as this can compromise structural integrity.
Remember that proper stabilization is not a one-time effort – it requires ongoing monitoring and adjustment, particularly after adverse weather events.
Post-Installation Inspection and Maintenance
Once your temporary fence is installed, the job isn’t complete. Post-installation inspection of temporary fencing is critical to ensure continued functionality and safety. In my 15 years leading DB Fencing, I’ve found that proper maintenance extends fence lifespan by up to 40% while significantly reducing liability risks. Let me share the inspection and maintenance protocols we recommend to our clients across 55 countries.
Regular Inspection Routines
Establishing a consistent inspection schedule is the foundation of effective fence maintenance. The frequency of these inspections should be determined by environmental conditions, usage intensity, and project duration.
Recommended Inspection Schedule
| Scenario | Inspection Frequency | Key Focus Areas |
|---|---|---|
| Standard Construction Site | Weekly | Panel connections, base stability, alignment |
| High Wind Areas | Every 2-3 days + after weather events | Bracing integrity, counterweight position |
| Public-Facing Events | Daily | Security clamps, anti-tamper devices, gates |
| Long-Term Installations | Bi-weekly + after severe weather | Rust/corrosion, ground erosion, structural integrity |
Document each inspection with dated photographs and written notes. This documentation not only helps track maintenance needs but provides crucial evidence of due diligence for compliance and insurance purposes.
Identifying Signs of Wear or Instability
Knowing what to look for during post-installation checks prevents small issues from becoming major problems. Based on my experience supplying temporary fencing to major construction projects, here are critical warning signs that require immediate attention:
Visual Inspection Checklist
The most obvious signs of potential failure include leaning panels, gaps between connected sections, and visible damage to the mesh or frame. Less obvious but equally important are signs of ground erosion near bases, rust at connection points, and loose or missing clamps.
Pay special attention to high-stress areas such as corners, gates, and sections facing prevailing winds. These locations typically show the first signs of instability. One maintenance tip I always emphasize is to check that the fence line remains straight – any deviation often indicates shifting bases or compromised connections.
Maintaining Compliance with Local Regulations
Inspecting temporary fencing for safety and compliance goes beyond physical stability. Many jurisdictions have specific requirements regarding temporary fence installation, signage, and maintenance that must be continuously met.
Regulatory requirements typically cover minimum height specifications, visibility standards for public areas, and specific stability requirements based on expected wind loads. Always document your compliance with these standards during each inspection.
Implementing Corrective Actions
When issues are identified, address them immediately using these maintenance tips:
For loose connections, replace damaged clamps rather than simply tightening existing ones that may have been compromised. When repositioning shifted bases, check the ground beneath for erosion or settling before resetting. If mesh panels are damaged, replace them entirely rather than attempting repairs that may compromise structural integrity.
In my experience, the most effective post-installation inspection of temporary fencing isn’t just about finding problems – it’s about implementing standardized correction protocols. Train all maintenance personnel to follow specific fix methodology rather than improvising solutions that may not meet safety standards.
Remember that proper maintenance is an investment, not an expense. The cost of regular inspections and minor repairs is insignificant compared to the potential liability and project delays resulting from fence failure.
Understanding Permits and Regulations
Throughout my 15 years in the fencing industry, I’ve learned that understanding temporary fencing permits is just as crucial as mastering the physical installation. Many clients focus entirely on the technical aspects and overlook the legal considerations until they face fines or project delays. Let me guide you through the regulatory landscape based on my experience supplying temporary fencing to construction sites worldwide.
Do You Need a Permit for Temporary Fencing?
The requirement for permits varies significantly by location, project type, and fence duration. While some jurisdictions exempt truly temporary installations (those in place for less than 30 days), most construction projects require proper permitting regardless of timeline.
Permit Requirements by Project Type
| Project Type | Typical Permit Requirement | Common Exemptions |
|---|---|---|
| Commercial Construction | Almost always required | Emergency situations only |
| Residential Construction | Required for major projects | Minor repairs, projects under specific square footage |
| Public Events | Required for large gatherings | Small, short-duration events in designated areas |
| Emergency Response | Post-installation notification | Immediate safety threats allow install-first approach |
From my experience working with clients across 55 countries, I’ve found that urban areas typically have stricter requirements than rural locations. However, even in seemingly relaxed jurisdictions, failing to secure proper permits can result in significant penalties.
Understanding Local Regulations and Compliance
Regulatory compliance extends beyond simply obtaining a permit. Height restrictions, setback requirements, and material specifications all play important roles in the approval process. At DB Fencing, we always recommend researching these specifics before purchasing or installing temporary fencing.
Key Compliance Factors
Most jurisdictions regulate fence height, typically limiting temporary construction fencing to 6-8 feet (1.8-2.4 meters). Some locations require specific visibility features, such as gaps in the fencing or transparent sections at corners to maintain sightlines for traffic safety.
Many clients don’t realize that temporary fencing on construction sites must often comply with workplace safety regulations in addition to building codes. These regulations may specify minimum distances from excavations, required signage, and structural stability standards.
Best Practices for Navigating the Permit Process
Knowing how to navigate permits for installing temporary fencing can save significant time and prevent costly delays. I always advise clients to start the permit process at least 2-3 weeks before planned installation.
Begin by contacting the local building department or permitting office directly. Many jurisdictions now offer online resources for temporary fencing permits, but speaking with an official can uncover nuances not apparent in written guidelines.
Prepare detailed site plans showing proposed fence locations, heights, and materials. Include information about installation duration and purpose. The more comprehensive your submission, the less likely you’ll face requests for additional information that delay approval.
When working with international clients, I’ve found that partnering with local contractors familiar with regional regulatory compliance significantly streamlines the permitting process. Their established relationships and knowledge of local requirements can turn a potentially frustrating experience into a smooth process.
Choosing the Right Type of Temporary Fence
After spending 15 years in the fencing industry and supplying temporary fencing to clients across 55 countries, I’ve learned that choosing the right temporary fence is crucial for project success. The correct fence not only provides adequate security but also optimizes your budget and timeline. Let me guide you through the various options and help you make an informed decision based on your specific requirements.
Types of Temporary Fencing: Chain Link, Plastic, Panel
Each type of temporary fencing serves specific purposes with distinct advantages. Understanding these differences is the first step in effective fence type selection.
Temporary Fence Type Comparison
| Fence Type | Best Application | Durability | Security Level |
|---|---|---|---|
| Chain Link | Long-term construction, storage yards | High | Medium-High |
| Plastic Mesh | Short-term projects, crowd control | Low | Low |
| Welded Panel | Construction sites, event security | High | High |
| Hoarding/Privacy | Urban construction, dust control | Medium | High |
From my experience at DB Fencing, welded panel systems offer the best combination of security and reusability for most construction applications. However, chain link remains popular for longer-term installations due to its adaptability and cost-effectiveness over time.
Factors to Consider for Your Application
When evaluating temporary fence options, several critical factors should guide your decision. I’ve found that many clients initially focus solely on price, overlooking crucial considerations that impact overall performance.
Project Duration
Short-term projects (under 30 days) may benefit from lightweight systems that prioritize easy installation over maximum durability. For projects extending beyond several months, invest in higher-quality fencing that won’t require frequent repairs or replacement.
Security requirements vary significantly between applications. A construction site with valuable materials requires more robust fencing than a marathon route or temporary parking area. Assess your security needs honestly – underestimating can lead to theft or liability issues.
Cost Implications and Value Analysis
Understanding the true cost of choosing the right temporary fence extends beyond the initial purchase or rental price. At DB Fencing, we help clients analyze total cost of ownership, including installation labor, maintenance requirements, and removal expenses.
For projects lasting more than six months, purchasing often proves more economical than renting, particularly if you anticipate future projects where the fencing can be reused. However, rental eliminates storage concerns and maintenance responsibilities.
Hidden Cost Considerations
When determining how to choose the best temporary fence for your project, factor in these often-overlooked costs:
Transportation expenses can significantly impact total cost, especially for larger projects or remote locations. Heavier fencing systems like concrete-based panels cost substantially more to transport than lightweight alternatives.
Installation labor varies dramatically between fence types. A plastic mesh fence might require minimal labor but need frequent repairs, while panel systems demand more initial installation time but remain stable throughout the project.
From my experience working with clients in varying environmental conditions, weather exposure should influence your selection. In high-wind areas, the cheapest option often becomes the most expensive after factoring in repair and replacement costs following weather events.

Conclusion
In conclusion, effectively installing temporary fencing is an essential practice across various industries, from construction to event management. By adhering to best practices—from site assessment and choosing the right materials to ensuring regulatory compliance—we can significantly enhance safety and security. My experience in the fencing industry has proven that when installed properly, temporary fencing acts as a daunting barrier against unauthorized access and environmental challenges.
At DB Fencing, we pride ourselves on providing high-quality, reliable fencing solutions tailored to meet specific needs. With over 15 years of expertise, I encourage you to prioritize proper installation techniques and maintenance to protect your investment and ensure safety. Let us guide you towards effective fencing solutions that stand the test of time.


