 Skip to content
 Installing temporary fencing in Canada isn’t just about throwing up panels and hoping they stay put. This comprehensive guide walks you through every aspect of professional temporary fence installation, from navigating provincial bylaws and choosing weather-resistant components to mastering installation techniques that actually withstand Canadian winters. You’ll learn the engineering principles behind fence stability, discover why privacy screening can destroy your fence in high winds, and get a maintenance strategy that prevents costly failures year-round.
Key Takeaways
- Plan Before You Place: A successful fence installation begins with a thorough site assessment that accounts for terrain, ground conditions, and local Canadian bylaws before any materials arrive.
- Components are Your First Defense: The quality of your panels, bases, and clamps—specifically hot-dipped galvanized steel and heavy-duty bases—is your primary defense against weather and wear.
- Anchoring is Not Optional: You must adapt your anchoring method to the surface, using ballast on frozen ground and proper bracing for long runs to counteract wind forces.
- Understand the Hidden Forces: Adding privacy screening dramatically increases wind load, and fences in public areas must also resist pedestrian pressure, factors that standard installations often ignore.
- Maintenance is a Year-Round Job: A fence’s stability is not permanent. Regular inspections, especially during spring thaws and after winter storms, are essential for maintaining safety and liability control.
The Planning Wing: Site Assessment for Canadian Conditions
Success comes down to homework. Walk your site like an engineer, map every challenge, and understand local rules before the first panel hits the ground—because fixing problems after installation costs ten times more than preventing them.
Think of your project site as having its own personality. Each location has unique quirks that will either work with you or against you. Before your first panel gets unloaded from the truck, you need to become intimately familiar with this ground. This upfront investment in planning prevents those expensive “oh crap” moments and ensures your temporary fencing actually does its job for the entire project duration.
How to Map Your Perimeter and Identify Hazard Zones
Walk every inch of your proposed fence line with a critical eye. You’re creating a boundary that needs to completely contain your work area while allowing smooth workflow. Mark where you’ll need vehicle gates and pedestrian access points, but think beyond just getting in and out. Consider how materials will flow, where equipment will move, and how the site will evolve over time.
Pay extra attention to high-risk zones that need beefed-up protection. Areas near public sidewalks, schools, or busy roads where curious folks might lean on your fence require stronger installation. Same goes for spots near deep excavations or material storage areas. Here’s a pro tip: think three months ahead. Will you need a new gate when the project shifts to a different phase? Planning for easy reconfiguration now saves serious headaches later.
Is Your Ground Ready? Analyzing Terrain from Frozen Soil to Soft Muskeg
Canadian ground conditions are notoriously unpredictable, and your temporary fencing strategy needs to adapt accordingly. Solid asphalt demands a completely different anchoring approach than soft soil, loose gravel, or the concrete-hard frozen ground you’ll face during prairie winters. Each surface type presents its own stability challenges that you can’t ignore.
Check your topography carefully. Slopes, dips, and uneven ground will fight against your fence alignment and create weak spots prone to failure. A fence that battles the natural landscape is destined to lose that fight. Before you even think about ground-penetrating anchors like spikes or T-bars, you absolutely must arrange for utility locates. Hitting buried pipes or cables isn’t just expensive—it’s dangerous and potentially deadly.
Decoding Local Regulations: Beyond the National Building Code
Federal guidelines give you a starting point, but temporary fencing in Canada gets heavily regulated at the provincial and municipal level. These local rules add layers of complexity you can’t afford to ignore. Cities like Toronto and Vancouver have strict rules about fence height, privacy screening, and maintaining sight lines at intersections.
Build yourself a simple compliance checklist for your specific region. Note requirements for signage—some areas demand bilingual signs while others have specific hazard warning formats. This is also your chance to plan company branding elements. Here’s a quick reference for major Canadian regions to get you started.
| Province/Major City | Minimum Height | Privacy Screen Rules | Special Notes |
|---|---|---|---|
| Ontario (Toronto) | 1.8m (6 ft) | Permit often required for solid hoarding. | Stricter rules for sites adjacent to public walkways. |
| British Columbia (Vancouver) | 1.8m (6 ft) standard; 2.4m (8 ft) in high-risk zones. | Allowed, but wind load bracing is critical. | Focus on public safety and aesthetic appearance in downtown cores. |
| Alberta (Calgary/Edmonton) | 1.8m (6 ft) | Commonly used; must be secured for high winds. | Winter installations require ballast systems due to frozen ground. |
| Quebec (Montreal) | 1.8m (6 ft) | Subject to local borough approval. | Bilingual (French/English) safety signage is mandatory. |
The Armory: Assembling Your Weather-Ready Toolkit
Your hardware choices make or break the installation. Cheap panels rust out in one season, lightweight bases blow over in the first windstorm, and flimsy clamps fail when you need them most—invest in quality components that actually survive Canadian weather.
Quality temporary fencing hardware isn’t just about looking professional—it’s about creating a barrier that won’t fail when conditions get tough. Every component, from the steel gauge in your panels to the weight distribution in your bases, directly impacts how well your portable temporary fence performs against road salt, freeze-thaw cycles, high winds, and snow loads.
What Are the Best Fence Panels for Cold Weather and Durability?
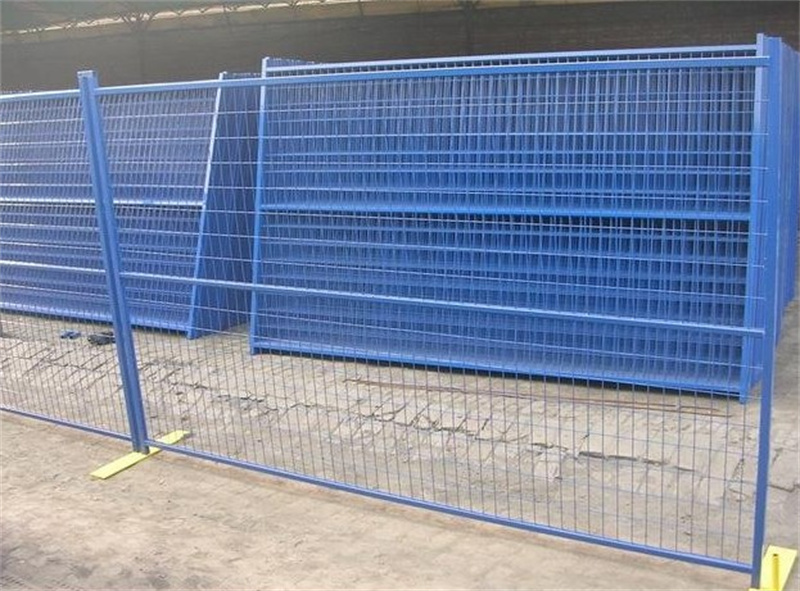
Start with panels made from galvanized steel, but not just any galvanized finish. Hot-dipped galvanized coating over 42 microns thick gives you real protection against road salt spray and constant moisture during spring thaws. Powder-coated panels might look nice initially, but they won’t survive Canadian weather conditions.
Pay close attention to weld quality at connection points where mesh meets frame. These spots take the most stress from wind and impacts. Quality temporary fence panels feature 360-degree welds that create much stronger joints compared to simple spot welds that can fail under pressure. Standard anti-climb mesh design with small rectangular openings adds rigidity while deterring unauthorized access.
Choosing Your Foundation: A Guide to Temporary Fence Bases
High-visibility plastic or rubber bases work well for most applications. They handle freeze-thaw cycles without cracking and resist impact damage from site equipment. For maximum stability on hard surfaces like pavement, concrete-filled bases provide the extra weight you need.
Weight becomes critical during winter projects. Lightweight bases let your fence “walk” or topple when hit by strong winds. Target bases weighing at least 25kg (55 lbs) for reliable performance. This mass provides the inertia needed to keep your portable temporary fence upright when unexpected forces hit.
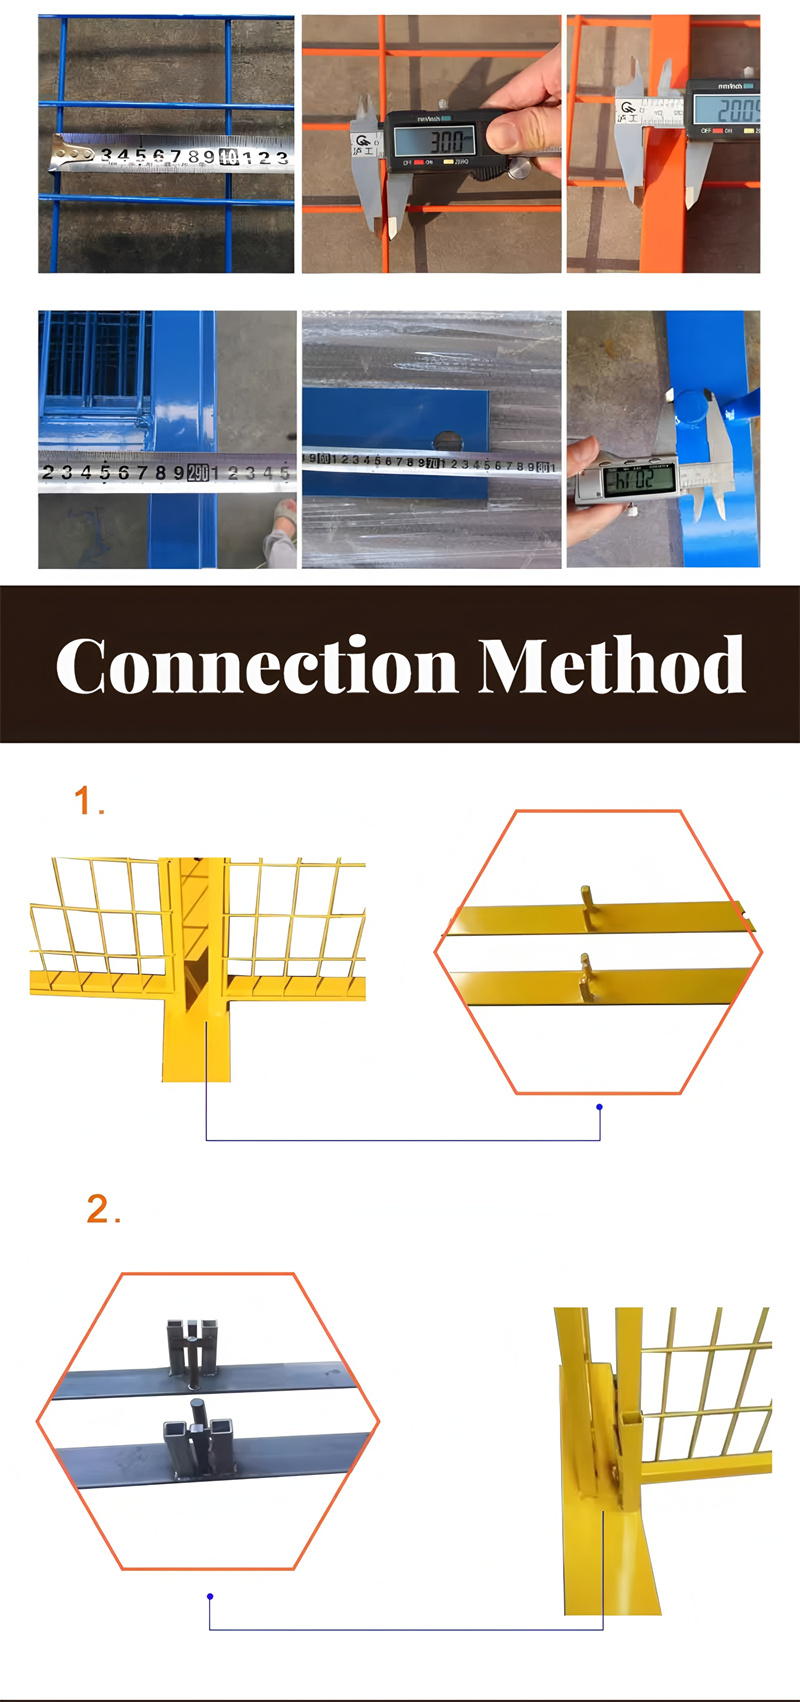
The Connectors: Why Clamps and Bracing are Your Most Critical Safety Components
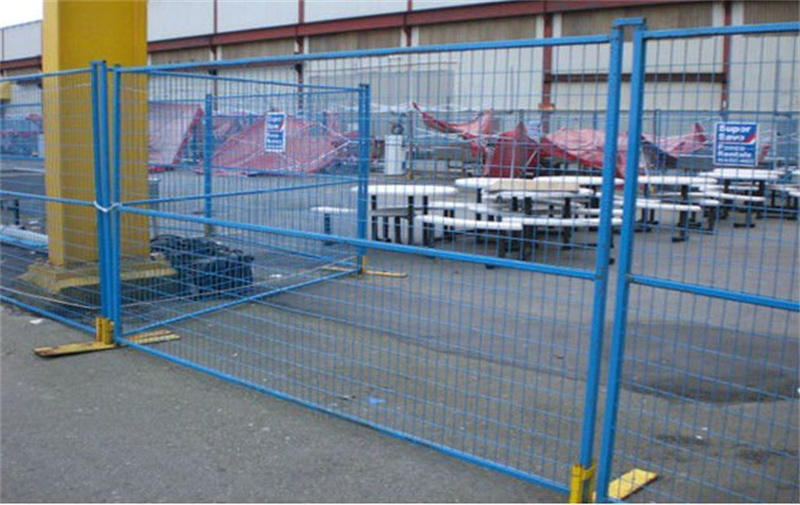
Clamps might seem like minor components, but they hold your entire system together. Heavy-duty clamps with hot-dipped galvanized finish prevent rust and must be sized correctly for your fence panel pipe diameter. Proper fit eliminates rattling and creates secure connections that won’t work loose over time.
Wind bracing and stays are absolutely essential for any long fence run or installation using privacy screening. These support arms connect fence panels to weighted anchor points on the ground, creating triangular structures that dramatically increase resistance to overturning. Specialty hardware like gate wheels, heavy-duty hinges, and reliable locking mechanisms complete your toolkit.
Reliable Portable Temporary Fencing Built for Canada
DB Fencing offers durable, weather-resistant temporary fence panels designed for quick installation and strong security across Canadian construction sites and events. Benefit from factory-direct pricing, fast response, and customizable solutions that keep your project safe and on track.
The Main Gallery: The Complete Installation Process (Step-by-Step)
Installation success comes from working methodically. Rush the process and you’ll spend twice as long fixing problems, but follow a systematic approach and your temporary fencing goes up fast and stays put.
With your planning complete and quality components ready, it’s time to turn strategy into structure. Following a methodical installation process speeds up the work while ensuring every panel gets installed for maximum strength and stability from day one.
Step 1: Pre-Staging and Layout
Efficiency starts with smart preparation. Distribute your panels, bases, and clamps along the planned fence line before connecting anything. This simple pre-staging eliminates unnecessary hauling and backtracking. Position bases with their longest edge perpendicular to the fence line, creating a wider, more stable footprint that resists overturning forces.
Step 2: Panel & Base Assembly
Start at one end of your perimeter. Lift the first panel and insert its vertical pipes fully into the base receivers. Partial insertion creates instability and panels can pop out under load. Move down the line, placing the next base and inserting both the second side of your first panel and one side of your second panel, creating a continuous chain.
Step 3: Securing Panels with Clamps
With two panels standing side-by-side in their bases, attach a clamp connecting their vertical frames at the top. Align the clamp to grip both pipes firmly, then tighten the bolt. Under-tightening allows dangerous movement while over-tightening can deform pipes and damage clamps. Aim for a snug fit where panels can’t be wiggled apart by hand.
Step 4: Anchoring and Bracing for Canadian Weather
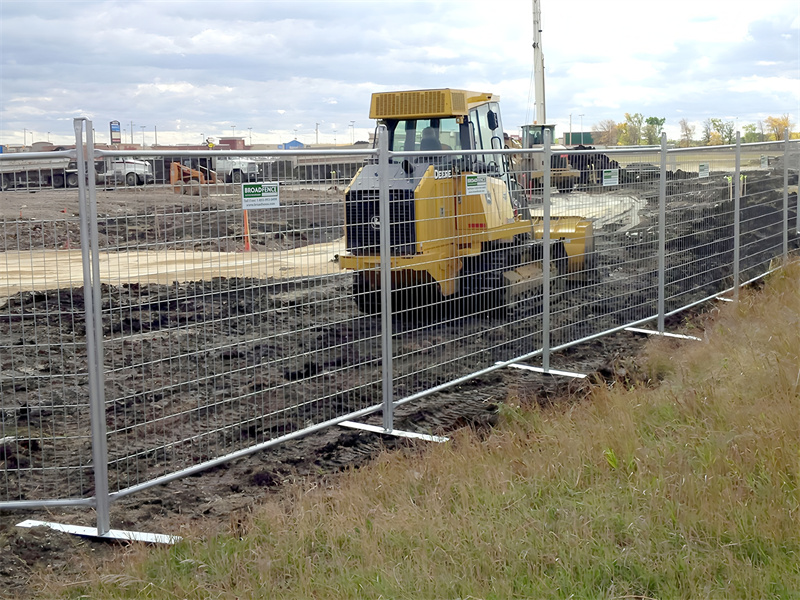
This step requires adapting to the specific ground conditions you identified during planning. For frozen ground where spikes are useless, rely on weight. Use heavy bases and add supplementary ballast like sandbags or concrete blocks. On soft soil or gravel, drive T-bars or ground spikes through designated bracing holes to grip the earth.
When installing on pavement or concrete, use specialized base plates with bolt-down anchors (after utility locates) or rely on heavy ballast systems. For any long, straight fence run, install wind braces at regular intervals—typically every 15 meters—and always at corners. This bracing provides your best defense against wind forces.
The Engineer’s Corner: Advanced Stability Insights
Most installers focus on keeping the fence standing, but pros understand why fences fail. Wind loads can triple with privacy screening, pedestrian pressure creates lateral forces most people ignore, and Factor of Safety ratings separate amateur installations from professional ones.
Understanding the physics of fence failure separates professional installations from amateur attempts. This technical knowledge helps you build temporary fencing that doesn’t just meet compliance requirements but genuinely resists real-world forces.
The Dangers of Privacy Screening: Understanding Wind Load Dynamics
Adding banners, tarps, or privacy screening transforms your fence into a giant sail. The increased surface area dramatically multiplies wind forces trying to push it over. Many people believe cutting “wind slits” into screening helps, but this is a dangerous myth. Engineering studies show these small holes provide statistically insignificant reduction in total wind load.
If you must use screening, standard installation won’t cut it. You need to dramatically increase your defenses. Double the frequency of wind bracing at minimum and use heavier ballast or more robust anchoring at every support point. Ignoring the sail effect causes more large-scale temporary fence failures than any other factor.
What is Factor of Safety and Why Does it Matter?
Many lightweight temporary fencing systems operate with a Factor of Safety of just 1.0, meaning they’re designed to fail precisely at their rated wind speed with no buffer for stronger gusts. Best practice demands a minimum Factor of Safety of 1.5, providing crucial buffer for unpredictable weather conditions.
A Factor of Safety of 1.5 means the system can withstand forces 50% higher than expected maximum load. A fence with adequate Factor of Safety will bend but not break. Ask your rental provider for tested Factor of Safety data for their stability and bracing solutions. Professional suppliers will have this information readily available.
Are You Considering Pedestrian Crowd Loads?
Wind isn’t the only force that can topple temporary fencing. Along public walkways or at events, lateral force from people leaning or pushing against the fence can be immense. This critical design consideration gets almost universally ignored in North American temporary fencing installations.
To resist pedestrian loads, ensure every panel connects securely with neighbors using high-quality clamps. The system needs bracing not just for overturning from wind but also for lateral force applied to mid-sections. A fence that survives Chinook winds but collapses under the weight of curious onlookers represents both design failure and significant liability.
The Preservation Hall: A Year-Round Maintenance & Removal Strategy
Installation isn’t the finish line—it’s the starting gun. Canadian weather constantly attacks your fence through freeze-thaw cycles, snow loads, and ground movement, so proactive maintenance prevents failures and proves you’re managing risk properly.
Temporary fencing is a dynamic structure constantly affected by weather, ground movement, and site activity. Treating it as “set it and forget it” infrastructure is a recipe for problems. A simple year-round maintenance plan extends your fencing assets’ life and keeps your site secure.
Your Seasonal Maintenance Checklist
Each Canadian season brings unique challenges. During winter, perform weekly checks for snow accumulation. Heavy, leaning drifts exert immense pressure, so maintain at least one-foot clearance. Verify that gates remain operational and haven’t frozen shut from ice buildup.
Spring thaw represents the most dangerous time for temporary fencing. As frozen ground heaves and softens, bases can shift and cause panels to lean. During this period, daily visual checks are wise and you should be prepared to readjust panels and add bracing as ground settles. For summer and fall, bi-weekly checks for clamp tightness, base integrity, and damage from site equipment are sufficient.
How to Conduct a Professional Fence Inspection
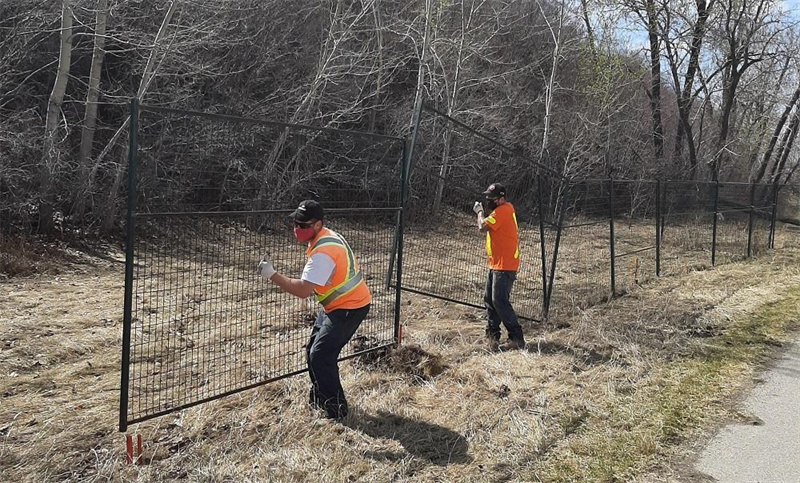
A proper inspection takes 15 minutes and can prevent major problems. Walk the entire perimeter, both inside and out. Look for obvious trouble signs: leaning panels, loose or missing clamps, and compromised or shifted bases. Examine mesh and frame damage more closely, which could indicate impacts or attempted breaches.
Document these inspections in a site log. Note the date, inspector, and any issues found or corrective actions taken. This simple record proves invaluable for demonstrating due diligence and managing liability if incidents occur.
The Teardown: Safe and Efficient Fence Removal & Storage
Dismantling reverses the installation process. Work methodically, removing clamps first, then lifting panels from bases. Inspect each component for damage as you take it down. This is the perfect time to identify panels needing repair or clamps requiring replacement.
Proper storage protects your investment. Stack panels flat on wooden dunnage to keep them off the ground and prevent moisture damage. Store bases and clamps in dry locations. Well-maintained inventory is ready for rapid deployment on your next project, saving time and money.
Reliable Portable Temporary Fencing Built for Canada
DB Fencing offers durable, weather-resistant temporary fence panels designed for quick installation and strong security across Canadian construction sites and events. Benefit from factory-direct pricing, fast response, and customizable solutions that keep your project safe and on track.
Conclusion: Securing Your Professional Reputation
We’ve covered everything from pre-installation planning and component selection to detailed installation processes, advanced stability principles, and year-round maintenance. You now have a complete blueprint for engineering a site safety system that withstands any Canadian season’s rigors.
Well-installed and maintained temporary fencing stands as a visible statement of your professionalism, commitment to public and worker safety, and mastery of site risk management. It secures your site, valuable assets, and hard-earned reputation.
Ready to build a perimeter as resilient as your project? Discuss your site’s specific weather challenges with an expert to ensure your plan is fail-proof from day one.
FAQ: The Curator’s Q&A
Q: How tall does a temporary construction fence need to be in Canada?
A: The standard height is 1.8m (6 feet), but it can be as high as 2.4m (8 feet) for increased security. You must always verify with your specific provincial and municipal regulations, as requirements for sites near public areas or schools can be stricter.
Q: How can I install a temporary fence on frozen ground?
A: Do not attempt to use ground-penetrating spikes or T-bars, as they cannot grip frozen soil. The correct and safe method for frozen ground is to use heavy, wide-footprint bases like rubber or concrete-filled plastic and add significant extra weight with sandbags or concrete ballast blocks on bracing systems to provide stability.
Q: Does adding wind slits to my privacy screening really help prevent the fence from blowing over?
A: No, this is a common and dangerous myth. Engineering studies and wind tunnel tests show that wind slits or vents have a negligible effect on reducing the total wind load. If you use screening, you must compensate with significantly more bracing and ballast weight; there are no shortcuts.
Q: What is a Factor of Safety for wind, and what should I look for?
A: The Factor of Safety tells you how much stronger a system is than the load it’s rated for. A Factor of Safety of 1.0 means the system will fail at its rated wind speed. Best practice, specified by safety authorities, demands a minimum Factor of Safety of 1.5, meaning it can handle gusts 50% stronger than rated. Ask your supplier for the tested Factor of Safety of their stability solutions to ensure you have a true safety margin.
Q: Renting vs. Purchasing: Which is better for Canadian projects?
A: For short-term projects under 10-12 months, renting is typically more cost-effective as it often includes installation and maintenance services. For companies with a steady stream of long-term projects, purchasing high-quality, weather-resistant portable temporary fencing becomes a sound long-term investment, especially considering the harsh wear from Canadian seasons.
Q: How often should I inspect my temporary fence during a Canadian winter?
A: A quick visual walk-through is recommended daily. A detailed inspection of all clamps, bases, and bracing should happen at least weekly, and absolutely after any major snowfall, wind event, or significant temperature swing. The goal is to proactively manage snow load and any shifting caused by freeze-thaw cycles before they become failures.


