 Skip to content
How Can You Easily Install Your Farm Entrance Gates?
Understanding the installation process for farm entrance gates can simplify your fencing project. Not only do these gates ensure security, but they also significantly contribute to the functionality of your agricultural property. In this ultimate guide, I will provide you with practical steps to make the installation easy, regardless of your experience level.
Installing a farm entrance gate is crucial for securing your agricultural property effectively. These gates protect livestock and improve functionalities such as access control and boundary definitions. As the owner of DB Fencing, I’ve witnessed the advantages that the right gate can deliver. In this guide, I will walk you through the entire process, from preparation to installation, helping you achieve a successful project.
Dive into this comprehensive guide, where I will walk you step-by-step through the process of installing your farm entrance gates. You’ll discover everything from choosing the right materials to implementing proper installation techniques. This way, you can enjoy a secure and functional entry point for your property.
Now that we understand the importance of gate installations, let’s delve into the specifics. From tools and measurements to the installation process, this guide aims to cater to everyone—whether you’re a seasoned farmer or a novice wanting to improve your property’s security.
A Case Study
Take, for instance, a local farm in New South Wales that improved its entrance design. By following a structured installation process, the farmer enhanced security and access efficiency significantly. Livestock wandered less, leading to a more manageable and productive farm.
What Tools Do You Need to Install Farm Entrance Gates?
Tools and Materials Overview
Before starting the installation, gathering the necessary tools and materials is crucial for streamlining the process. Here’s a list of what you’ll need:
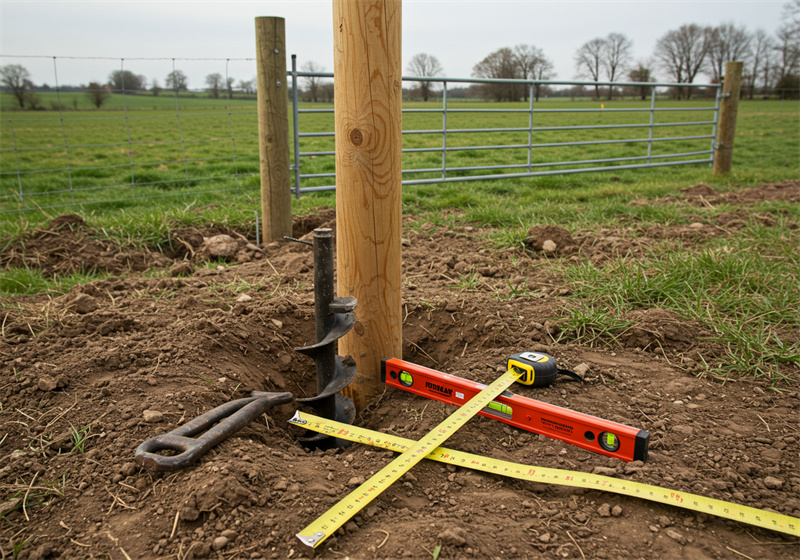
- Post Hole Digger: For digging the holes where the gate posts will be secured.
- Level: To ensure your gate hangs straight.
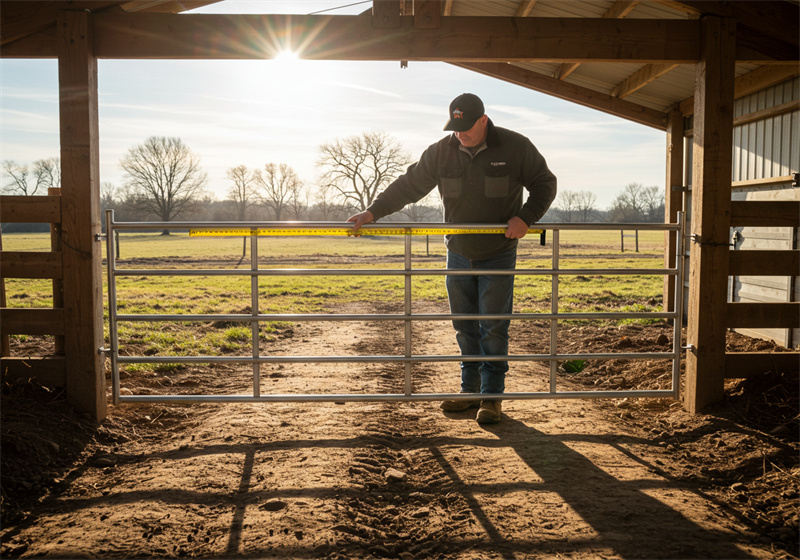
- Measuring Tape: Essential for getting accurate measurements.
- Fasteners: Have screws, bolts, or other fastening materials ready.
- Hinges: Heavy-duty hinges are key for the longevity of the gate.
Dive Deeper into Tool Selection
Selecting the right tools is vital for your installation. A level is particularly important; this tool ensures your gate hangs correctly, which is essential for both functionality and aesthetics. Getting this step right will save you from future hassles related to misaligned gates.
Using quality tools can pay off significantly, leading to a smoother installation process.
A Case Study
A nearby dairy operation completed their installation 30% faster by using the right tools.
How Do You Measure for Your Farm Entrance Gate?
Importance of Accurate Measurement
Proper measurement is critical when preparing for the installation. Getting this right ensures that the gate fits perfectly within the designated space.
Accurate measurements of your entrance width and height are essential. Also, consider the swing radius of the gate and avoid any obstacles that might interfere during operation.
Dive Deeper into Measurement Techniques
Measuring accurately helps prevent common pitfalls, such as ordering a gate that is too wide or too narrow. Use your measuring tape carefully and mark the ground to visualize the space clearly before installation.
A Case Study
At a local farm, incorrect measurements resulted in multiple orders of the wrong size gate, leading to significant increased costs and project delays.
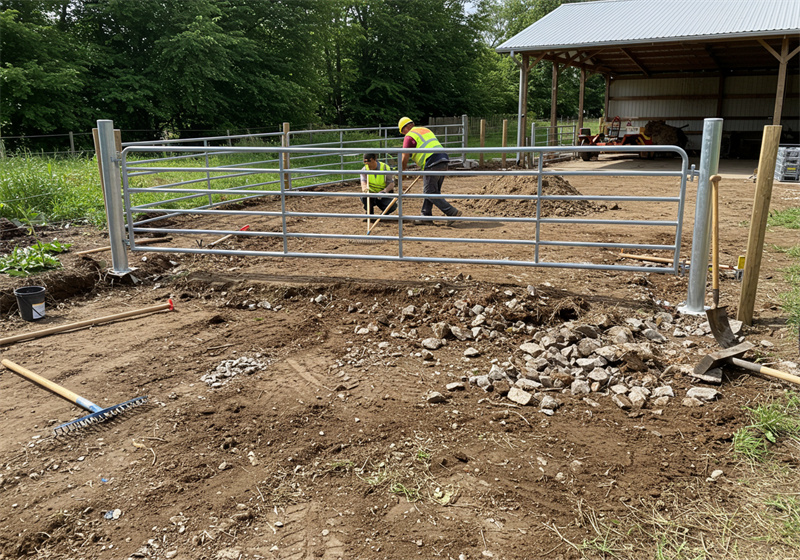
How Do You Prepare the Site for Installation?
Preparing Your Site
Site preparation plays a critical role in a successful gate installation.
Clear the area of debris and level the ground properly. Additionally, remember to mark where your posts will be located to ensure placement accuracy.
Dive Deeper into Proper Site Preparation
Taking the time to prepare your site ensures that your gate will operate smoothly. An uneven surface can lead to issues like sagging or misalignment in the future.
A Case Study
A local agricultural operation that dedicated time to meticulous site preparation found that they completed their gate installation in half the expected time—with excellent results.
What is the Step-by-Step Installation Process for Farm Entrance Gates?
Overview of the Installation Process
Understanding the step-by-step installation process can help alleviate any concerns you might have.
The installation process comprises setting the posts, hanging the gate, ensuring it swings freely, and securing all hardware. Following these steps carefully will result in durability and functionality.
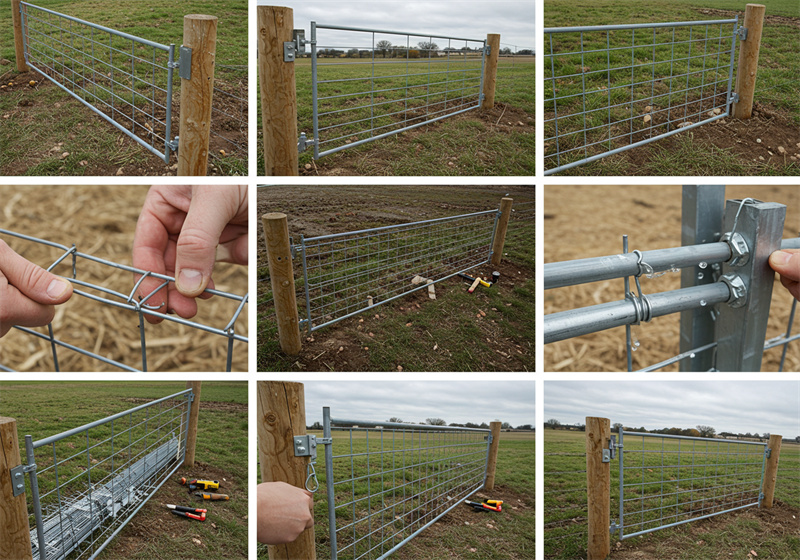
Dive Deeper into Installation Steps
Let’s break down the installation process:
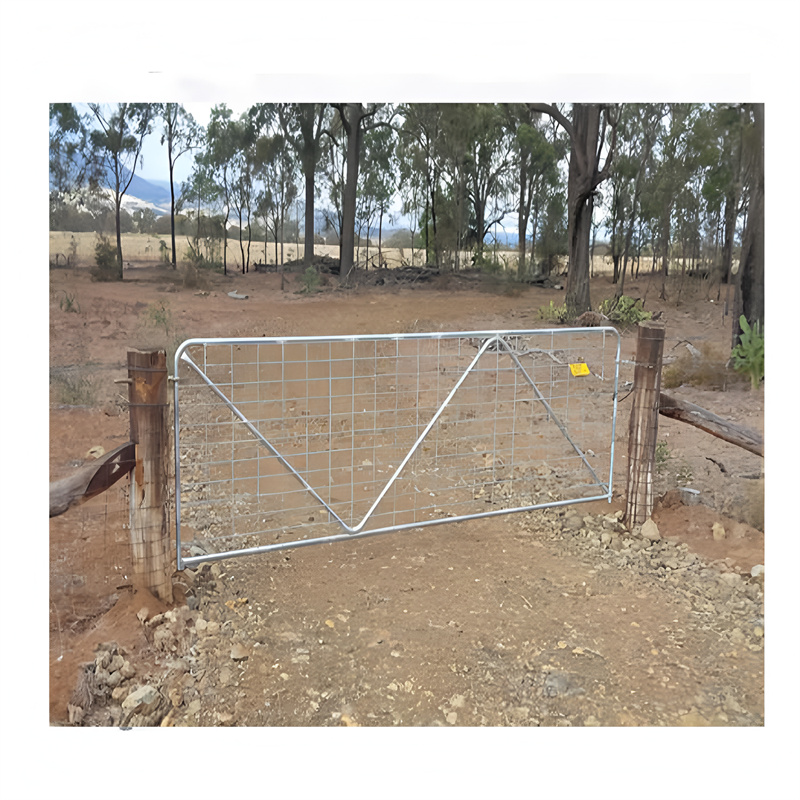
- Confirming the Specifications: Before ordering, confirm the specifications of your farm entrance gate. Options such as length (available as 6′, 8′, 10′, 12′, 14′, and 16′) and height (1170mm) must align with your needs for stability and security. For example, the frame tubes typically have a diameter of 33.4mm or 32mm and a wall thickness of 2.0mm.
- Setting the Posts: Start by digging holes with your post hole digger. Ensure at least one-third of the post’s length goes underground for optimal stability.
- Hanging the Gate: Once the posts are secure, use the heavy-duty hinges to hang the gate. Consider opting for bolt-on hinges, as they allow for easy reversing if needed. Moreover, ensure your gate includes essential components like hinges, lag screws, and chain latches.
- Securing Hardware: After confirming that the gate operates smoothly, secure all fasteners and hardware tightly. Hot-dip galvanizing ensures that your gate has a 300g/m² finish that is fully anti-rust, contributing significantly to its longevity.
A Case Study
A local vineyard that followed these steps installed their gate effectively, managing frequent use without encountering any issues.
Conclusion
Installing your farm entrance gates doesn’t have to be a troubling task. By following the steps detailed in this guide—from preparation to installation—you can assure a successful installation that enhances your property’s security and functionality. Remember, paying attention to detail now saves you from future stress and potential costs.
The Contents of Conclusion
In summary, investing your time in the installation process pays off significantly. You’ll secure a reliable gate that meets your operational needs.
External Links Recommendation
- How to Hang a Farm Gate/Fence: 11 Steps (with Pictures)
- How to Build a Farm Fence | Step 4: How to Hang Gates
- Slagle Fence — How to Install Wood Fence: Easy Step-by-Step Guide
Q: What are the first steps in the gate installation process?
A: The first steps you need to take for a successful gate installation include selecting the right location for your farm gate and ensuring you have all the necessary materials like hinges, bolts, and posts. Make sure to measure the area accurately to choose the best size for your driveway gates.
Q: How do I align my farm gate properly?
A: To align your farm gate properly, start by placing the hinge post securely and ensure that it is level. Use a drill to attach the hinges to the post, and then hang the gate. Adjust the alignment by tightening or loosening the hinges until the gate opens and closes smoothly.
Q: What type of hinge is best for a metal farm gate?
A: For a metal farm gate, heavy-duty hinges are recommended as they provide the durability needed to support the weight of the gate. Look for hinges that can handle the outdoor elements and are resistant to rust and corrosion.
Q: Can I install a driveway gate by myself?
A: Yes! Installing a driveway gate can be a DIY project if you follow the steps carefully. Make sure to have the right tools, such as a drill and level, and consider watching our transcript on YouTube that shows you how to hang the gate easily.
Q: What maintenance tips should I follow for my garden gate?
A: To keep your garden gate in great shape, regularly check and tighten the bolts and hinges to prevent any sagging. Additionally, consider applying a protective coat to prevent rot and insect damage, ensuring your gate remains durable for years to come.
Q: How do I ensure my driveway gates are secure?
A: To ensure your driveway gates are secure, install a sturdy lock and consider adding automatic gate openers that enhance security. Make sure the gate is high enough to act as a barrier to prevent unwanted access while still being aesthetically pleasing.
Q: What should I do if my farm gate doesn’t close properly?
A: If your farm gate doesn’t close properly, check the alignment of the hinges and posts. Sometimes, simply tightening or adjusting the hinges can solve the issue. If not, you may need to reposition the hinge post or adjust the gate itself.
Q: How can I tailor my gate installation to my specific needs?
A: Tailoring your gate installation to your specific needs involves considering the purpose of the gate, whether it’s for cattle or as a decorative garden gate. Choose materials that suit your environment, and consult with fencing experts if you need additional guidance.
Q: What is the best way to prepare the area before installing a gate?
A: Preparing the area before installing a gate includes clearing any debris and marking the location for the hinge post. Make sure the ground is level and stable, and consider using dry concrete for added support.


