 Skip to content
 This comprehensive guide tackles the complex challenge of securing Canadian construction sites with temporary fencing, addressing the $1 billion annual loss from theft and vandalism. We break down the multi-layered regulatory landscape from federal CCOHS guidelines to crucial municipal bylaws, provide expert strategies for weatherproofing installations against Canada’s harsh conditions, and deliver a strategic analysis of when to rent versus buy fencing systems for maximum ROI.
Every year, Canadian construction sites hemorrhage an estimated $1 billion to theft and vandalism. But here’s what most contractors don’t realize – the stolen generator or missing tools are just the tip of the iceberg. The real damage comes from project delays, insurance claims, and the reputation hit that follows a security breach.
Temporary construction fencing isn’t just about throwing up a barrier and calling it good. In Canada, you’re dealing with a complex web of regulations that can trip up even seasoned contractors, plus weather conditions that’ll test any installation to its limits.
This guide cuts through the confusion with actionable insights specifically for Canadian construction sites. We’ll walk you through the regulatory maze from federal guidelines down to those municipal bylaws that can make or break your project timeline, show you how to bulletproof your fence against Canadian weather, and help you make the smart financial call on renting versus buying.
Why Temporary Fencing Isn’t Optional – It’s Your First Line of Defense
Smart contractors know that proper temporary fencing does way more than keep thieves out – it’s your insurance against liability claims, keeps your site running smoothly, and can actually save you money on premiums.
How does proper fencing actually lower your insurance costs?
Here’s something that’ll get your accountant’s attention: a well-documented security plan with quality temporary construction fencing as the foundation can directly impact your insurance premiums. Insurance companies love seeing due diligence, and a proper perimeter fence is physical proof you’re serious about risk management.
Think about it from their perspective. You’ve got deep excavations, heavy machinery, and stacked materials that could seriously hurt someone who wanders onto your site. A solid fence keeps unauthorized people away from these hazards, which means fewer potential claims. Document your security measures properly, and you’ve got leverage when renewal time comes around.
What’s the real cost when someone breaches your site?
That stolen generator? That’s annoying but manageable. The real pain starts with what happens next. You’re looking at project delays while you source replacement equipment, deal with vandalism damage, and wade through insurance paperwork. These delays cascade through your entire schedule, messing up subcontractor timing and pushing back milestones.
Then there’s the reputation damage. Word gets around fast in the construction community when a site gets hit repeatedly. Clients start questioning your ability to manage a project properly, and that can cost you future work.
How does perimeter control make your entire operation more efficient?
A good temporary fence system does more than keep people out – it organizes your entire site flow. When you control entry and exit points, you’re directing all personnel and vehicle traffic through designated areas. This eliminates those random disruptions that eat into productivity.
Your workers stay focused because they’re not dealing with curious passersby or worried about external threats. Vehicle movements become predictable and safe. Materials and equipment stay where you put them. The result? A more organized, efficient job site that actually runs smoother.
Durable Temporary Fencing Built for Canada’s Conditions
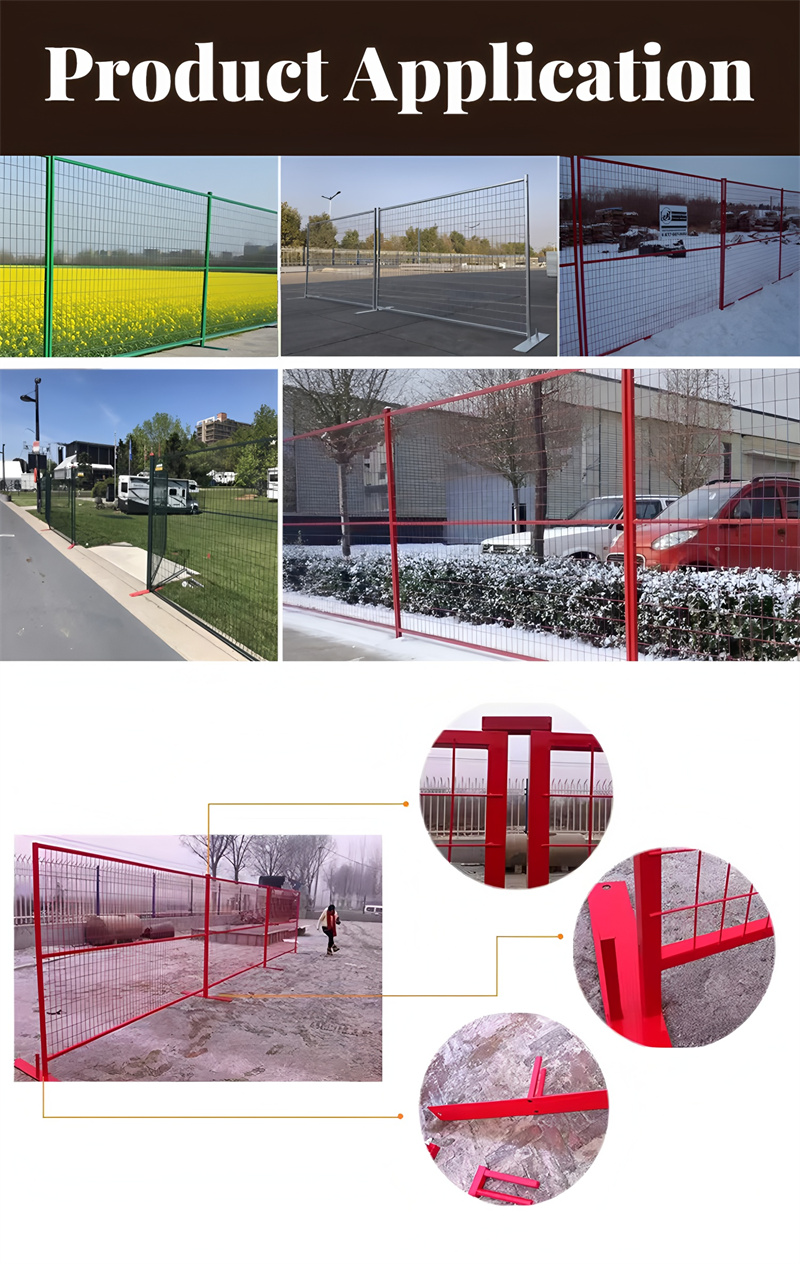
DB Fencing offers premium portable fence panels designed to endure Canadian weather and meet diverse site needs. Benefit from factory-direct pricing, fast response, and customizable solutions to secure your construction, event, or property with confidence.
Navigating Canada’s Construction Fencing Regulations Without Getting Burned
Canadian fencing regulations are like Russian dolls – federal guidelines sit inside provincial rules, which sit inside municipal bylaws that actually have teeth. Miss any layer and you’re looking at fines, delays, and rework orders.
What do federal CCOHS guidelines actually require?
The Canadian Centre for Occupational Health and Safety sets the big-picture framework, but don’t expect detailed specifications here. CCOHS focuses on the employer’s duty to protect workers and the public from site hazards. Their main message is simple: isolate your work area to prevent unauthorized access.
Here’s the catch – CCOHS doesn’t get into the nitty-gritty details like exact fence heights or specific materials. They leave that to the provinces and territories, which means you need to dig deeper to find the real requirements.
How do provincial OH&S Acts spell out the specifics?
This is where the rubber meets the road. Each province enforces its own Occupational Health & Safety Act with actual enforceable standards for construction fencing.
In Ontario, you’re typically looking at 1.8 meters (6 feet) minimum height, and the fence needs to be sturdy enough to actually prevent access – not just suggest it. Alberta and British Columbia lean on general duty clauses but get specific about excavations deeper than 1.2 meters requiring fencing.
Quebec’s CNESST has its own set of rules that emphasize solid barriers around excavation sites to protect the public. The key thing to remember is that these provincial rules carry real enforcement power – inspectors can shut you down if you’re not compliant.
Why checking municipal bylaws first can save your project
Here’s where many contractors get blindsided. Cities have the final say on what flies within their boundaries, and municipal bylaws can be incredibly specific. Toronto, Vancouver, and Calgary don’t just care about safety – they care about how your fence looks, how far it sits from sidewalks, and whether you’ve got proper screening.
For any long-term project or anything that touches public space, you’re almost certainly going to need a hoarding or encroachment permit. The smart move is calling your local city hall before you order anything. A quick conversation with the building department can save you from costly do-overs and project delays.
| Level | What They Control | Where to Find the Rules |
|---|---|---|
| Federal | Big picture guidance on workplace safety and public protection | CCOHS website |
| Provincial | Specific height requirements, structural standards, excavation protection rules | Provincial OH&S Acts (WorkSafeBC, Ontario Ministry of Labour, etc.) |
| Municipal | Permits, setbacks, appearance standards, duration limits | Local building department or bylaw services |
Choosing the Right Temporary Fencing System for Your Canadian Project
Picking the right portable fence panels and components isn’t about finding the cheapest option – it’s about matching your site conditions, security needs, and budget to a system that’ll actually do the job without constant headaches.
Welded mesh panels versus chain-link: which one works better?
You’ve got two main choices for temporary construction fencing in Canada, and each has its sweet spot.
Welded mesh panels are the professional choice. These rigid, powder-coated panels look sharp and offer superior security with their small grid pattern that’s tough to climb or cut. They cost more upfront, but if you’re working on a high-visibility project or need serious security, they’re worth every penny.
Chain-link fencing gives you flexibility and value. It’s perfect for uneven ground because it can conform to slopes and irregular terrain. The downside is that it’s less rigid and more vulnerable to cutting or manipulation than welded mesh systems.
What components do you actually need for a complete system?
A fence is only as strong as its weakest component, so here’s what you need for a system that’ll hold up:
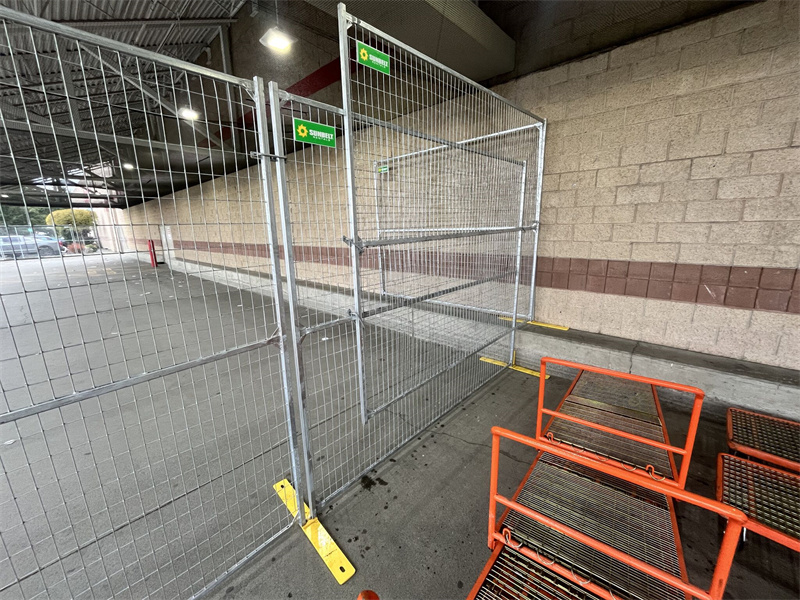
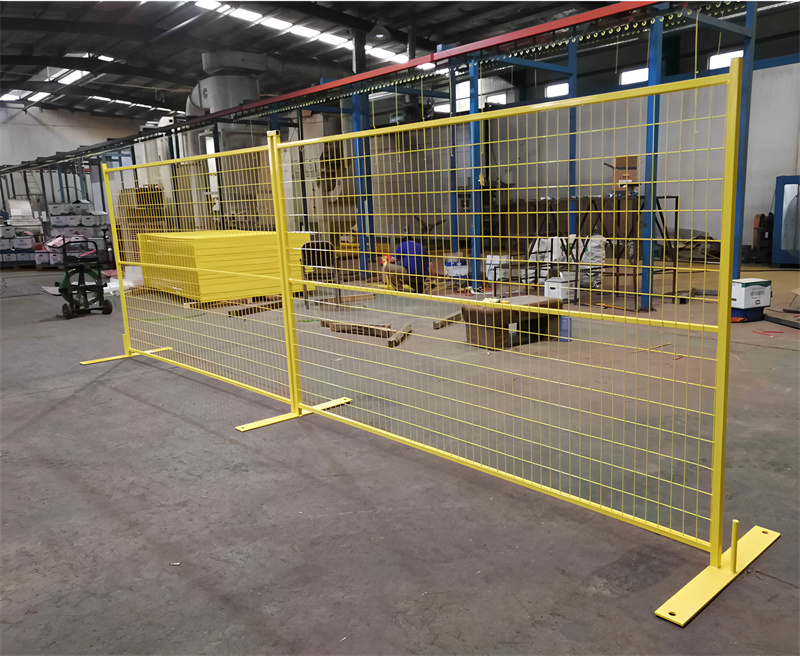
Panels form your primary barrier – typically 6 or 8 feet high and 10 feet long. Bases or feet provide the foundation, whether they’re heavy steel plates or concrete-filled plastic blocks designed to hold panels upright without digging into the ground.
Clamps or couplers connect panels at the top, creating a continuous fence line that’s tough to separate. Gates give you controlled access points for both pedestrians and vehicles. Bracing and stays are your insurance against wind damage – diagonal supports that connect fence panels to secondary weighted bases.
When do you need specialized security and privacy add-ons?
Some sites need extra protection beyond basic perimeter control. Privacy screening or mesh blocks sight lines into your site, which can deter theft of valuable equipment and materials. High-security locations might need barbed wire arms to discourage climbing attempts.
For access control, adding wheels to gates makes them easier to operate, while quality locking mechanisms keep them secure when closed. The key is matching your add-ons to your actual security risks rather than over-engineering the solution.
Mastering Canadian Weather Challenges in Fence Installation
Installing temporary fencing in Canada means engineering for prairie winds, coastal storms, frozen ground, and snow loads that would flatten standard installations – here’s how to build a system that stays put.
How do you brace portable fence panels against serious wind?
A line of fence panels is essentially a giant sail waiting for the wind to knock it over. This is especially true on the prairies or during coastal storms. The secret to wind resistance is triangulation – creating stable triangles with bracing stays.
Every few panels (or every panel in high-wind areas) needs a bracing stay that connects the top-middle of the panel diagonally down to a second weighted base placed behind the fence line. This creates a stable triangle that can handle serious wind loads.
Here’s the critical part: adding privacy screening dramatically increases wind load. If you’re using screening, you need more frequent and robust bracing to handle the increased sail effect.
What’s the best approach for installation on snow and frozen ground?
Welcome to Canadian reality. The golden rule is getting your bases on solid ground. Clear snow down to gravel or soil before setting bases whenever possible. If you’re dealing with frozen, uneven ground, achieving stability gets tricky.
In these conditions, extra sandbags or concrete blocks on every base become mandatory. You need that additional weight to keep the fence stable through freeze-thaw cycles that can shift everything around.
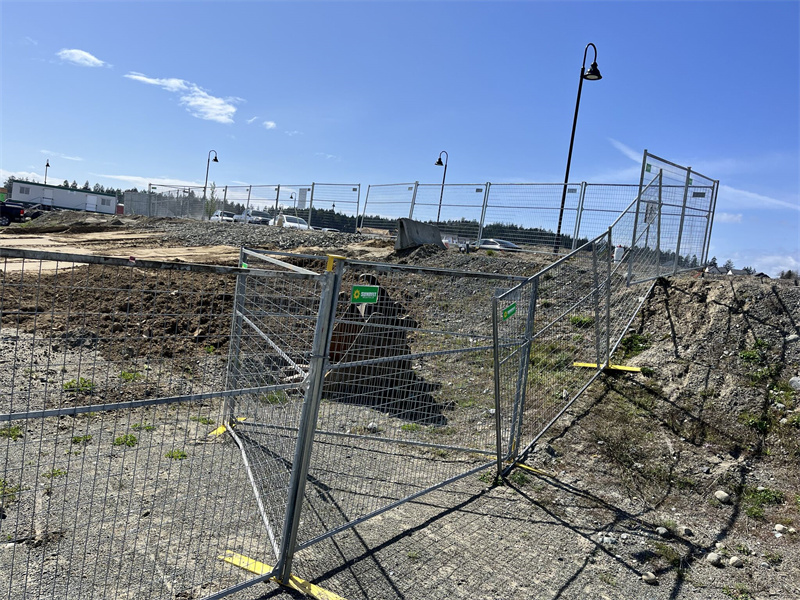
How do you handle uneven terrain and paved surfaces?
Most construction sites aren’t perfectly flat, and that’s where panel-based systems shine. You can step panels up or down slopes, adjusting clamp heights to follow the land’s contour.
For asphalt or concrete surfaces, weighted bases are your default choice because they avoid surface damage. If you’re looking at a very long-term installation where surface damage is acceptable, bolt-down plates can anchor fence bases directly to hard surfaces for maximum stability.
Making the Smart Financial Call: Rent or Buy Your Fencing System
The rent versus buy decision isn’t just about upfront costs – it’s about project frequency, storage capacity, and whether you want to be in the fence management business or focus on your core construction work.
When does renting temporary fencing make financial sense?
Renting is the smart play for one-off projects or companies with unpredictable schedules. If you’re looking at anything less than a year, rental usually wins on pure economics. The convenience factor is huge – most rental companies handle delivery, professional installation, and takedown.
Renting also makes sense if you don’t have dedicated storage space. Hundreds of panels and bases take up serious real estate, and if you’re paying for storage anyway, rental costs start looking more attractive.
When does buying become a better long-term investment?
General contractors and developers with steady project pipelines should seriously consider buying. The upfront cost stings, but it pays for itself over multiple projects, especially when sourcing from competitive Canadian wholesale suppliers. Owning your inventory gives you complete control – you can secure a site immediately without waiting for rental availability.
Buying particularly makes sense for large, multi-year phased projects where fencing will be on-site for extended periods. The longer the deployment, the better the economics of ownership become.
What hidden costs can torpedo your decision?
Look beyond the sticker price to see the real numbers. When buying, you’re taking on transportation costs, storage requirements, maintenance and repairs for damaged panels, and labor costs for your crew to handle installation and takedown.
When renting, watch for delivery and pickup fees, damage charges beyond normal wear and tear, and minimum rental periods that might exceed your actual needs. These extras can quickly change the economics of your decision.
| Factor | Renting Wins | Buying Wins |
|---|---|---|
| Upfront Investment | Low cash requirement | High initial cost |
| Long-Term Economics | Costs accumulate over time | Cost spreads across multiple projects |
| Logistics | Company handles everything | You manage storage and transport |
| Maintenance | Rental company’s problem | Your responsibility and cost |
| Availability | Depends on supplier schedule | Deploy immediately anytime |
| Sweet Spot | Single projects, short durations, limited storage | Steady workflow, long projects, adequate storage |
Durable Temporary Fencing Built for Canada’s Conditions
DB Fencing offers premium portable fence panels designed to endure Canadian weather and meet diverse site needs. Benefit from factory-direct pricing, fast response, and customizable solutions to secure your construction, event, or property with confidence.
Step-by-Step Installation Guide for Canadian Construction Sites
Proper installation isn’t just about following the manual – it’s about adapting proven techniques to Canadian conditions and building in the checks that keep your perimeter secure throughout the project lifecycle.
Step 1: Conducting a thorough site assessment
Before you unload the first panel, walk the entire proposed perimeter with a critical eye. Look for potential problem areas like soft ground, wind exposure, or drainage issues. Note elevation changes and mark the logical locations for personnel and vehicle gates.
This is also when you measure the required linear footage accurately and identify where you’ll need additional bracing. A few extra minutes of planning here can save hours of rework later.
Step 2: Installing for stability and safety
Start with the basics – every base needs to sit on ground that’s as level and stable as possible. Seat each fence panel securely into the base openings, making sure they’re plumb and properly aligned.
As you connect panels, attach the clamps at the top and tighten them properly. A loose clamp is a weak point that’ll come back to bite you during the first windstorm. Take the time to do it right the first time.
Step 3: Building in regular maintenance and inspections
Your job doesn’t end when the fence goes up. Implement a simple weekly inspection routine, with special attention after any major weather event. Look for leaning sections, loose or missing clamps, and any damage that could compromise the fence’s integrity.
Address problems immediately rather than letting them accumulate. A small adjustment today beats a major repair or accident later.
Securing your Canadian construction site with temporary fencing isn’t just about meeting minimum requirements – it’s about building a foundation for project success. When you understand the regulatory landscape, plan for weather challenges, and make smart financial decisions about your fencing system, you transform a basic safety requirement into a competitive advantage. A properly secured site runs smoother, costs less to insure, and builds the professional reputation that wins future projects.
Frequently Asked Questions
How high does temporary construction fencing need to be in Canada?
There’s no single national height requirement, but 1.8 meters (6 feet) is the most common standard across provinces and represents best practice for deterring casual entry. Always verify with your specific provincial OH&S regulations and local municipal bylaws, as requirements can vary significantly.
Do I need permits for temporary construction fencing?
It depends on your location and project duration. Short-term projects on private property often don’t require permits, but long-term construction that affects public spaces like sidewalks almost always needs a permit. Contact your local building department early in the planning process to avoid delays.
Should I rent or buy my temporary fencing system?
Rent if you’re handling single projects, need it for less than a year, lack storage space, or prefer turnkey service. Buy if you’re a contractor with steady project flow, have storage and transport capabilities, and want long-term cost savings over multiple deployments.
How can I make my temporary fence more secure?
Use heavy-duty security clamps, install proper wind bracing, add sandbags to bases for extra weight, ensure gates have quality locks, and conduct regular inspections to address weaknesses immediately. For high-security sites, consider barbed wire arms as an additional deterrent.
Can you install temporary fencing on slopes and uneven ground?
Yes, with proper technique. Panel-based systems work best on uneven terrain because you can step panels to follow the ground contour. Focus on getting bases as level as possible and use the adjustability of clamp connections to create a smooth fence line that follows the natural grade.


