 Skip to content
 Road construction fencing isn’t just about throwing up some barriers and calling it a day. This comprehensive guide walks municipal and construction project managers through the strategic process of building a compliant temporary traffic management plan from the ground up. You’ll learn how to navigate Australia’s complex regulatory framework, classify your worksite using the Austroads road category system, and select the right fencing solutions for everything from quiet suburban streets to high-speed freeways. Most importantly, you’ll discover how to avoid devastating fines, prevent accidents, and keep your project on schedule by matching your barrier strategy to actual risk levels rather than guessing.
- Strategy Over Inventory: Effective road construction fencing is not about knowing a list of fence types; it’s about building a strategic traffic management plan (TMP) from the ground up, based on risk.
- Compliance is Mandatory: The Work Health and Safety (WHS) Act, Australian Standard AS 4687, and the Austroads Guide form a non-negotiable compliance pyramid that protects workers, the public, and your project from severe penalties.
- Road Category Dictates Everything: The Austroads framework for road categories (1, 2, and 3) is the starting point for your strategy. The speed and volume of traffic directly determine the level of protection required.
- Choose the Right Tool for the Job: From simple chain-link panels for site demarcation to crash-tested steel barriers for high-speed zones, each fencing system serves a specific purpose. Matching the system to the risk is critical.
Every year, Australian road construction projects walk a tightrope. Heavy machinery and complex work on one side, public traffic flowing just meters away on the other. A single misstep in your temporary fencing strategy can trigger crushing fines under WHS regulations, lead to devastating accidents, and cause expensive project delays. Most guides simply list fence types, but they fail to offer a strategic roadmap for the municipal and construction project managers who bear the responsibility.
This handbook serves as your expert guide through the architecture of a robust and compliant road construction fencing strategy. We’ll explore not just the what—the various types of barriers—but the critical why and how of professional traffic management. Follow along as we walk through the legal framework, classify your worksite, examine your toolkit of barrier systems, and develop advanced strategies for managing risk.

Foundations of Compliance: Navigating Australian Fencing Regulations
Here’s where we lay the legal groundwork that keeps you out of trouble. Australia’s regulatory framework creates a three-tier system: the overarching WHS Act sets your duty of care, AS 4687 gives you the technical specs, and the Austroads Guide provides the practical roadmap for implementation.
What are your core legal obligations under the Work Health and Safety (WHS) Act?
The Work Health and Safety (WHS) Act sits at the top of your compliance pyramid. It establishes a primary “duty of care” for any Person Conducting a Business or Undertaking (PCBU)—that’s you. This duty doesn’t just protect your workers; it extends to anyone who could be affected by your work, including passing motorists, pedestrians, and even unauthorized visitors. You need to pay special attention to preventing access by children, who often see a worksite as an adventure playground.
When you fail to meet this duty of care, the consequences hit hard. Non-compliance brings substantial fines for individuals and corporations, immediate site shutdowns enforced by safety regulators, and potential legal action if an incident occurs. This fundamental obligation makes a strategic approach to temporary fencing non-negotiable.
Decoding Australian Standard AS 4687: Temporary Fencing and Hoardings
If the WHS Act provides the law, then AS 4687: Temporary Fencing and Hoardings serves as the primary technical manual you must follow. This standard delivers the specific design and performance requirements for road construction fencing systems to be considered fit for purpose. It details criteria for stability, strength, and overall design to ensure a fence can do its job effectively.
The standard outlines key testing procedures that reputable temporary fencing products must pass. These include tests for wind force, ensuring a fence with screening attached won’t become a giant sail, and impact tests to verify its resilience. To keep your project compliant, always ask your supplier for documentation proving their road construction fencing system conforms to AS 4687.
Which other key standards apply to road construction traffic management?
Beyond AS 4687, your strategy must incorporate several other critical documents. Think of it as a compliance pyramid: the WHS Act sits at the peak, supported by specific Australian Standards, which are then guided by national best-practice frameworks and local rules.
- AS 1742.3: This is the Manual of uniform traffic control devices. It’s the essential guide for all road work signage, cones, and devices used to direct traffic safely around your site.
- Austroads Guide to Temporary Traffic Management (AGTTM): This comprehensive set of documents serves as the national best-practice framework. It provides detailed guidance for planning, designing, and implementing temporary traffic management, forming the basis for most state-specific codes.
- State & Local Requirements: Always consult state-based codes of practice (from VicRoads or Transport for NSW) and local council policies. These bodies often have specific requirements for their jurisdictions that you must integrate into your plan.
The Strategic Blueprint: Your Traffic Management Plan (TMP)
Your Traffic Management Plan (TMP) transforms legal obligations into actionable site strategy. Think of it as the master playbook that governs every aspect of your temporary traffic management activities—and it’s not optional.
What is a Traffic Management Plan (TMP) and why is it non-negotiable?
A Traffic Management Plan, or TMP, serves as the master document that governs all temporary traffic management (TTM) activities for your project. It’s a detailed, formal plan that outlines how you will manage risks to workers and the public. This isn’t an optional extra; it’s a required document for any work that impacts a road corridor.
Within the TMP are one or more Traffic Guidance Schemes (TGS). While the TMP provides the overall strategy, a TGS delivers the specific, detailed diagram showing the placement of signs, temporary fencing barriers, and personnel for a particular stage of work. The project manager or principal contractor holds ultimate responsibility for the TMP’s creation and successful implementation.
Who are the key personnel? Understanding the roles of TMD, TMI, and TC.
A compliant TMP requires a team of qualified professionals, each with a distinct role. Understanding these roles ensures your plan gets both designed and executed correctly.
- Traffic Management Designer (TMD): This qualified and accredited professional designs the TMP and the associated TGS diagrams. They conduct the risk assessments and use their expertise to create a safe, compliant plan.
- Traffic Management Implementer (TMI): This qualified individual on-site handles the hands-on work: installing, monitoring, and modifying the TGS as per the plan. They conduct daily checks and ensure the setup remains compliant throughout the workday.
- Traffic Controller (TC): This trained operator directs vehicles with a stop/slow bat. They work under the TMI’s direction and follow the instructions laid out in the TGS.
| Document Type | Purpose |
|---|---|
| Traffic Management Plan (TMP) | The overarching strategic document. It contains risk assessments, stakeholder communications, and contingency plans for the entire project. |
| Traffic Guidance Scheme (TGS) | The detailed implementation diagram. It shows the exact physical layout of signs, cones, barriers, and personnel for a specific work area. |
What are the essential components of a compliant TMP?
A robust TMP goes far beyond a simple site map. To gain approval from a road authority, it must include a range of critical elements that demonstrate thorough planning. These typically include comprehensive risk assessments, analysis of traffic data like vehicle volumes and speeds, and records of consultation with stakeholders such as local businesses and residents.
The plan must also feature detailed Traffic Guidance Schemes for every phase of the project, clear contingency plans for handling incidents or emergencies, and a schedule for regular inspections. Meticulous record-keeping, often in the form of a daily site diary maintained by the TMI, proves ongoing compliance.
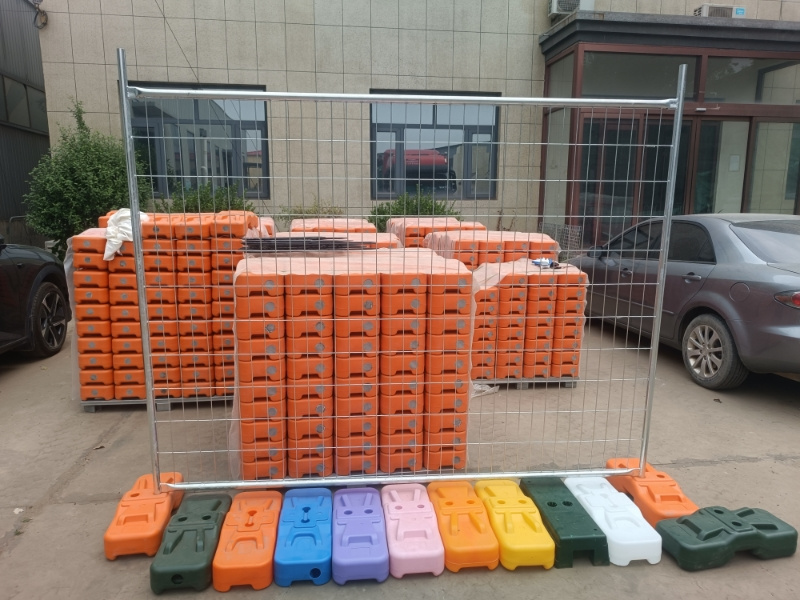
Tough Temporary Fencing Delivered to Australia & New Zealand
Choose high-grade, hot-dip galvanized temporary fence panels built to resist rust and weather. From construction sites to events, our durable fencing solutions offer quick setup, strong security, and custom lengths—all shipped fast from our China factory.
Classifying Your Worksite: The Austroads Framework for Road Categories
The Austroads system breaks roads into three categories based on speed and traffic volume, and this classification drives everything else. Get this wrong, and you’ll either overspend on unnecessary protection or dangerously under-protect your site.
How do road categories dictate your fencing and traffic management strategy?
The foundation of a good TTM strategy starts with understanding your environment. The Austroads Guide to Temporary Traffic Management uses a risk-based system to classify roads, ensuring the complexity of your traffic control matches the complexity of the road. Simply put, the higher the traffic speed and volume, the more stringent your temporary fencing, signage, and personnel requirements become.
Picture a graph plotting traffic volume against posted speed limit. This visual tool, central to the Austroads framework, helps a Traffic Management Designer (TMD) instantly categorize a road and determine the baseline requirements. Many guides mention these categories, but visualizing them makes the concept click: it’s all about quantifying risk.
What defines Category 1, 2, and 3 roads?
The framework divides all roads into three distinct types, each with implications for your worksite. The category impacts everything from the size of your signs and the required training for your personnel to the type of road construction fencing you must use.
- Category 1: These are lower-risk roads. This includes most local urban streets and low-volume rural roads with posted speeds under 60 km/h and traffic volumes below 10,000 vehicles per day (VPD).
- Category 2: This category covers higher-volume, higher-speed arterial roads. Think of multi-lane roads, major connectors, and streets with signalized intersections that handle significant traffic flow.
- Category 3: These are the highest-risk environments, consisting of expressways and freeways. They feature high-volume, high-speed traffic (often 80km/h or more) and grade-separated interchanges where traffic does not intersect at the same level.
The Fencing Toolkit: A Guide to Temporary Barrier Systems
Here’s your complete arsenal of temporary fencing and barrier systems. Each type serves a specific function, from basic site demarcation to life-saving vehicle containment on high-speed roads.
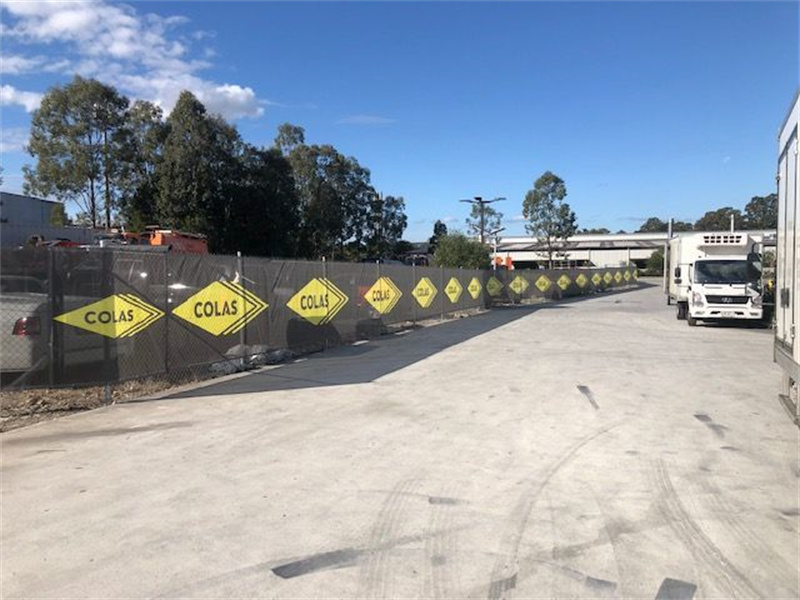
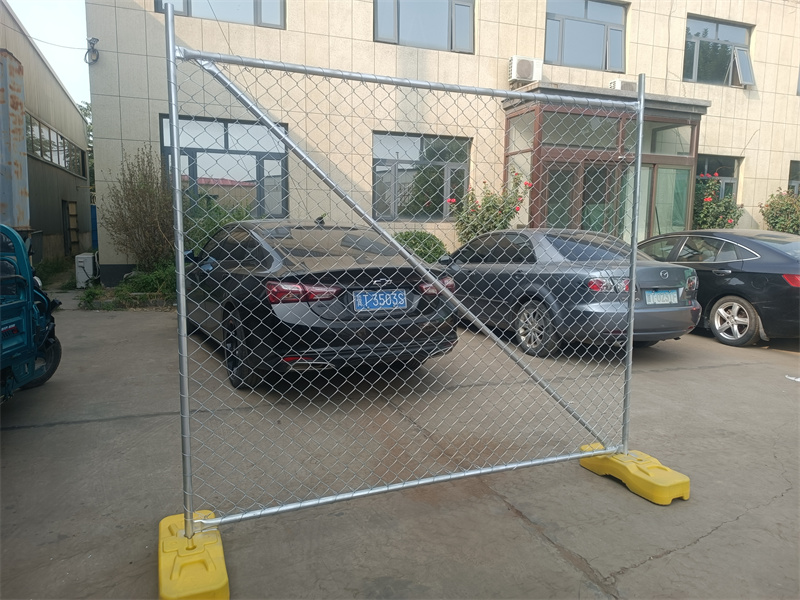
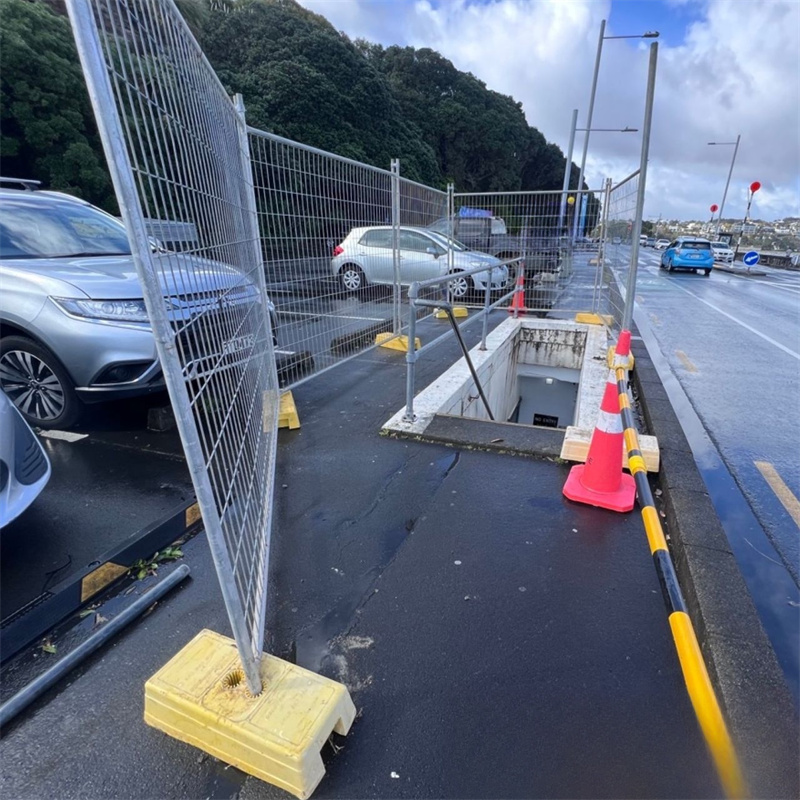
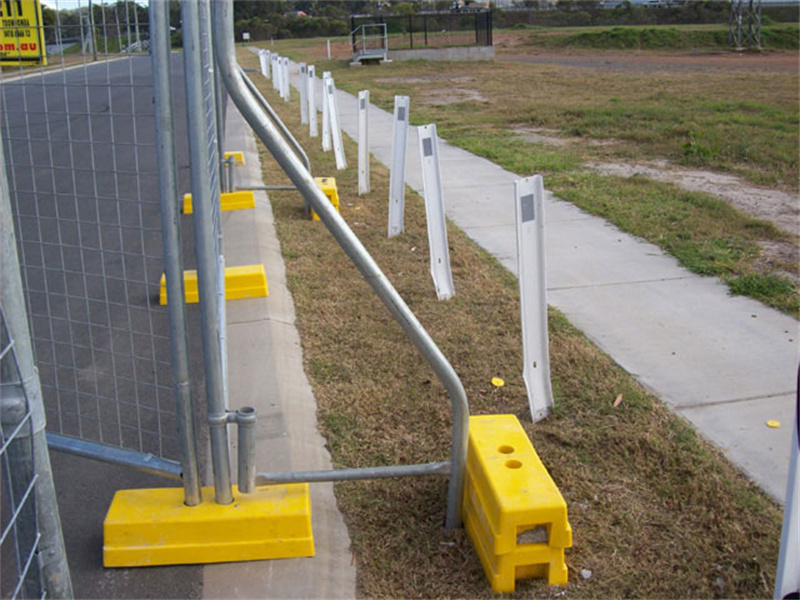
Open Fencing Systems (Chain-link Panels)
These represent the most common type of temporary fence, consisting of interlocking galvanized mesh panels supported by counterweight bases. Their primary function involves general site security and perimeter demarcation. They work excellently for containing light debris on low-risk sites, such as suburban construction or short-term maintenance areas on Category 1 roads. For compliance, they must typically stand a minimum of 1.8 meters high and feature gates that swing inwards, away from public areas. The specifications within AS 4687 govern their use.
Solid Fencing Systems (Hoardings)
Hoardings are solid, self-supporting panels, usually made of plywood or a composite material, that provide a complete visual and physical barrier. They’re required in areas with high pedestrian traffic, like town centers, or where excavations sit directly next to a public footpath. A risk assessment will often mandate their use to prevent public viewing of hazardous work and provide a higher level of security. Key specifications include a minimum 1.8-meter height, a smooth finish with no protrusions, and neutral colors that don’t distract motorists.
Overhead Protective Structures (Gantries or Hoarding with Overhead)
When work, such as demolition or high-rise construction, occurs directly above a public footpath or roadway, a simple vertical barrier won’t cut it. An overhead protective structure, commonly called a gantry, combines a solid hoarding with a reinforced horizontal platform. This setup protects the public from falling debris. These structures must receive certification from a qualified structural engineer and provide adequate head clearance (2.2 meters) and lighting underneath for pedestrian safety.
Barrier Systems (Water-Filled, Concrete, and Steel)
When you need to actively redirect vehicles or provide positive separation between traffic and the work zone, you turn to barrier systems. These heavy, interlocking units can withstand vehicle impacts. They channelize both pedestrian and vehicular traffic and become mandatory when separating active high-speed traffic lanes from workers. The type of barrier—whether water-filled, concrete, or steel—depends on the speed and energy of the traffic it needs to contain.
Choosing Your System: A Comparative Analysis for Roadworks Projects
This decision framework cuts through the confusion and helps you select the right temporary fencing or barrier system based on actual project risk, not guesswork.
How do you select between open mesh, solid hoarding, and heavy-duty barriers?
Choosing the right system requires strategic thinking based on risk level, location, and project duration. An open mesh fence may work fine for a quiet street, but it’s completely inadequate for a freeway. The following table provides a comparative framework to guide your selection.
| System Type | Primary Application | Public Safety Level | Traffic Control Capability | Wind Load Concern | Typical Road Category |
|---|---|---|---|---|---|
| Open Mesh Fencing | Site security, perimeter demarcation | Low to Medium | Low (Delineation only) | High (with shade cloth) | Category 1, some 2 |
| Solid Fencing (Hoarding) | Visual screening, public protection in high-traffic pedestrian areas | Medium to High | Low (Delineation only) | Very High | Category 1, 2 |
| Water-Filled Barriers | Pedestrian/vehicle channelization, low-speed traffic separation | High | High | Medium | Category 1, 2 |
| Concrete/Steel Barriers | High-speed traffic separation, positive protection for workers | Very High | Very High | Low | Category 2, 3 |
What are the crucial differences between water-filled, concrete, and steel barriers?
When “positive protection” becomes necessary, not all barriers perform equally. Each type has distinct advantages and limitations that a TMD must consider.
- Water-Filled Barriers: Their main advantage lies in portability and rapid deployment. They work ideally for short-term works in low-to-medium speed environments. Their primary disadvantage involves lower impact resistance compared to concrete; a high-speed impact can rupture them, releasing the water and compromising the barrier’s integrity.
- Concrete Barriers: These offer extremely high impact resistance and serve as the traditional choice for providing positive protection on high-speed roads. Their downside comes from their weight; they require cranes for placement and take time to install and remove, making them better suited for long-term projects.
- Steel Barriers: Modern steel barrier systems can offer high levels of containment, often meeting the same crash-test standards as concrete but with less weight. This can make them faster to install. Their main drawbacks include higher initial cost and specific requirements for end treatments to prevent spearing in an impact.
Beyond the Basics: Advanced Fencing Strategies for High-Risk Scenarios
When you’re dealing with high-speed zones, night works, or complex intersections, basic strategies won’t protect anyone. These advanced planning techniques help you manage the most challenging scenarios safely.
How do you manage fencing in high-speed zones (80km/h+)?
In high-speed environments like Category 3 roads, the focus shifts to “positive protection.” This means using crash-tested concrete or steel barriers that can physically prevent an errant vehicle from entering the work zone. Water-filled barriers generally aren’t permitted in these situations. Safety buffer zones—the lateral space between the barrier and the work area—must be correctly calculated, and taper lengths for merging traffic must be extended to give drivers more time to adjust.
What are the key considerations for night works and adverse weather?
Visibility becomes the paramount concern during night works or in poor weather. All barriers, signs, and delineation devices must have high-grade retro-reflectivity to remain clearly visible under headlights. Gantries and other overhead structures must include proper lighting underneath to ensure pedestrian safety. A significant and often overlooked risk involves wind load. Hoardings and mesh fences fitted with banner mesh act like sails in high winds and require additional bracing or specific engineering certification to prevent collapse.
How should you handle complex intersections and temporary access points?
Work near intersections or that requires temporary site access gates demands careful planning. The layout of any road construction fencing must maintain clear sight lines for all road users, including motorists, cyclists, and pedestrians. Temporary gates for construction vehicle access must swing inward, into the site, never outward into the path of traffic. Crucially, the plan must always account for emergency service vehicle access, with designated and unobstructed passages included in the TGS.
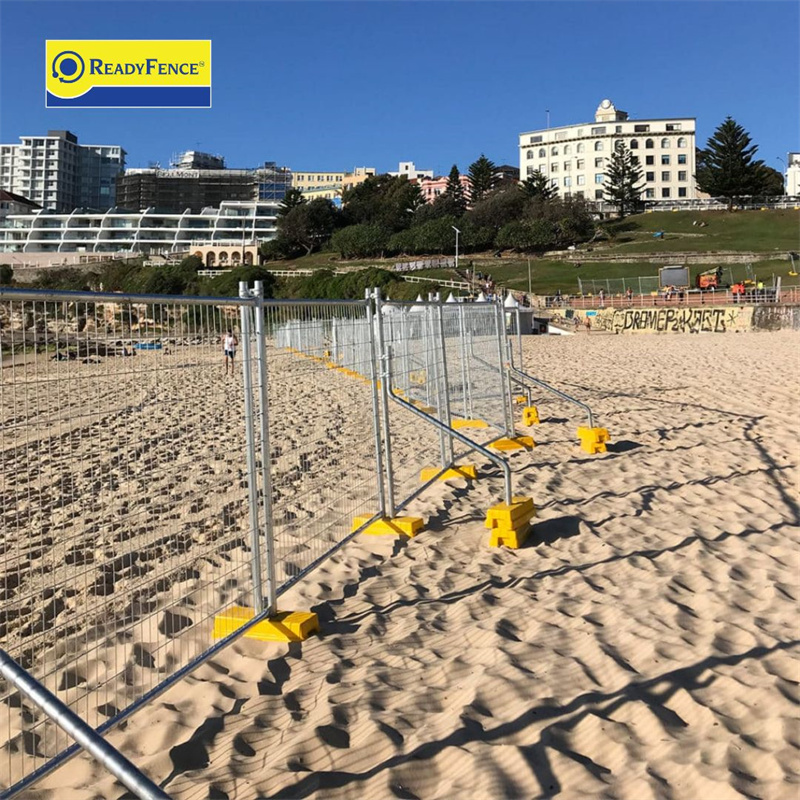
Tough Temporary Fencing Delivered to Australia & New Zealand
Choose high-grade, hot-dip galvanized temporary fence panels built to resist rust and weather. From construction sites to events, our durable fencing solutions offer quick setup, strong security, and custom lengths—all shipped fast from our China factory.
Installation and On-Site Management: From Setup to Teardown
Even the best plan fails without proper execution. This section covers the nuts and bolts of compliant setup, regular inspection protocols, and systematic removal procedures that keep you on the right side of the law.
What does a compliant site setup look like?
A compliant setup begins with the TMI methodically following the sequence of operations detailed in the TGS. This usually means installing advance warning signs first, working in the direction of traffic. All temporary fencing panels must sit on secure, stable footing, especially on uneven ground, and all clamps and connectors must be properly fastened. Before work starts, the TMI must walk the site to verify that all clearances, buffer zones, and taper lengths match the specifications in the approved TGS.
How often should you inspect your temporary fencing?
A temporary traffic management setup isn’t a “set and forget” system. The TMI must conduct regular inspections—at minimum, before each shift begins and after any significant weather event. During these checks, they look for any signs of damage, dislodged bases, loose fittings, graffiti that obscures visibility, or any other non-conformance. Any identified issue must be fixed immediately, and all inspections and repairs must be logged in a daily diary as proof of diligence.
What is the correct procedure for removal?
Just as installation follows a sequence, so does removal. To ensure safety, signs and devices typically get removed in the reverse order of installation. The work area gets cleaned up first, and then the traffic control is progressively withdrawn, starting from the point closest to the worksite and moving outward. All components—including bases, clamps, and pickets—must be fully removed from the road corridor to eliminate any residual trip or vehicle hazards. The site must be left in a condition that meets the reinstatement requirements of the council or road authority.
Effective road construction fencing represents far more than an item on a pre-start checklist; it serves as the physical expression of your entire traffic management strategy. By moving from a reactive, compliance-focused mindset to a proactive, strategic approach, you actively protect your workers, the public, and your project’s schedule and budget. This journey—from understanding legal duties and classifying your site to selecting the right systems and planning for complex scenarios—equips you to manage your worksite with confidence and authority.
Ready to put this strategy into action? A well-prepared plan serves as the cornerstone of a safe project. Consider creating a “TMP Pre-Flight Checklist” to ensure every critical element gets covered before your next project begins.
FAQ
What is the minimum height for temporary fencing on a construction site?
Generally, a minimum of 1.8 meters is required as per AS 4687 for perimeter fencing. However, specific requirements for solid hoardings or barriers used for traffic channelization may differ based on the risk assessment and approved TMP. Always refer to your project-specific plan.
Can I use shade cloth or branding mesh on my temporary fencing?
Yes, but you must account for the significant increase in wind loading this creates. Attaching any fabric or solid covering to an open mesh fence dramatically increases the force it must withstand. This often requires additional bracing and may need a structural engineer’s certification to ensure the fence remains stable and compliant with AS 4687.
What is the difference between a TMP and a TGS?
A Traffic Management Plan (TMP) serves as the comprehensive strategic document outlining all traffic management risks, procedures, and controls for an entire project. A Traffic Guidance Scheme (TGS), also known as a Traffic Control Plan (TCP) in some states, provides a detailed diagram within the TMP that shows the exact layout of signs, barriers, and devices for a specific work area or phase.
Do I need a certified Traffic Management Designer (TMD) for my project?
For any work that isn’t considered a simple, short-term, or routine maintenance task, yes. Any project that requires a project-specific TGS, impacts traffic on higher-volume Category 2 or 3 roads, or involves complex staging will require a qualified and accredited TMD to design and sign off on the TMP.
Are water-filled barriers approved for use on high-speed roads?
Typically, no. Water-filled barriers generally handle pedestrian channelization and low-to-medium speed traffic management. High-speed roads (usually Category 2 and 3, over 80 km/h) require “positive protection” from crash-tested concrete or steel barrier systems that can safely contain and redirect a high-speed vehicle impact.
How do I manage access for residents or businesses affected by my worksite?
This must be planned for within your TMP during the design phase. It involves clear communication and consultation with affected parties well before work begins. The plan should include providing safe, clearly marked alternative access routes and may require the use of dedicated traffic controllers to manage entry and exit points for local traffic.


