 Skip to content
 Professional temporary fence installation demands more than just connecting panels—it requires thorough site assessment, smart component selection, and solid engineering principles. Wind load becomes your biggest enemy, especially when you add shade cloth, and you need proper bracing to fight back. Modern standards like Australia’s AS 4687:2022 give you flexible, risk-based approaches to prove your fence can handle the forces it’ll face, whether through design calculations or hands-on testing. For bulletproof security, always add advanced reinforcements like triangular braces and anti-lift devices that keep your perimeter locked down tight.
Professional Heavy-Duty Temporary Fence Installation: Your Complete Guide to Engineering Standards and Bulletproof Security
Your construction site’s security isn’t just about keeping people out—it’s about protecting your equipment, maintaining liability coverage, and avoiding costly project delays. A sloppy temporary fence installation can become your worst nightmare when insurance claims get denied or equipment walks off the job site. Most installation guides show you how to snap panels together, but they completely miss the engineering that keeps everything standing when Mother Nature throws her worst at you.
This guide cuts through the basics and gets straight to what construction managers, site supervisors, and event organizers actually need to know. We’re talking real-world temporary fencing solutions that handle wind, weather, and the daily beating of an active worksite. No fluff, just proven methods that work.
What You’ll Master:
- Site Assessment Mastery: Read your terrain like a pro and plan layouts that actually make sense.
- Component Selection: Choose the right gear for your specific conditions and budget.
- Professional Installation Process: Follow the step-by-step method that delivers rock-solid results.
- Engineering Standards Decoded: Understand compliance requirements using Australia’s AS 4687:2022 as your gold standard.
- Advanced Security Techniques: Deploy bracing and reinforcement that keeps your perimeter bulletproof.
You’re about to build temporary fencing that doesn’t just look professional—it performs like it.
Foundation Planning: Site Assessment and Strategic Layout
Smart temporary fence installation starts before you touch a single panel. Your site assessment determines whether you’ll have a rock-solid perimeter or a wobbly mess that fails when you need it most.
Every temporary fencing disaster starts the same way—someone skipped the planning phase and jumped straight into installation. Five minutes of proper site assessment saves you hours of rework and prevents the headaches that come with unstable fencing. Your fence line is only as strong as the weakest point in your planning.
How to Conduct a Professional Site Assessment
Start by walking your entire proposed perimeter and categorizing your ground conditions. Concrete and asphalt give you the best foundation, but most job sites throw you a mix of soil, gravel, mud, and uneven terrain. Each surface type demands different foundation strategies, so map them out before you order materials.
Watch for the hazards that kill fence stability. Steep slopes create nightmare installation conditions and ongoing stability issues. Drainage areas turn into muddy sinkholes that swallow fence feet. Underground utilities limit your staking options and can create expensive surprises if you hit them. Mark these problem areas on your site plan so you can route around them or plan special reinforcement.
Evaluate wind exposure and traffic patterns. A fence line facing open fields catches more wind than one tucked behind buildings. Heavy vehicle traffic creates vibration and potential impact zones that need extra bracing. Public sidewalks and roads demand higher stability standards because failure puts civilians at risk.
Strategic Layout Planning That Actually Works
Map your exact perimeter to maximize security while minimizing material costs. Every extra panel adds cost and installation time, so optimize your route to use natural barriers like existing walls or elevation changes. Smart routing can save you 10-20% on materials without compromising security.
Position gates strategically for workflow efficiency. Vehicle gates need wide turning radius clearance and solid ground that won’t rut under truck traffic. Pedestrian gates work best near natural foot traffic patterns, but avoid placing them in corners where visibility is poor. Bad gate placement creates bottlenecks that slow down your entire operation.
Avoid the classic layout mistakes that create problems later. Never run fencing through low-lying areas that flood during rain. Skip unstable ground like fresh excavation or steep slopes unless you’re prepared for heavy-duty reinforcement. Keep your fence line on the highest, most stable ground available within your security requirements.
Heavy-Duty System Components: Choosing Your Arsenal
Temporary fencing isn’t one product—it’s a system of interconnected components where each piece determines your overall strength and performance. Cheap out on any single component and your entire perimeter becomes the weak link.
Thinking of temporary fencing as just panels and bases sets you up for failure. Professional installations use carefully matched components that work together as an integrated system. Each piece handles specific forces and stresses, so understanding what each component does helps you build smarter, stronger perimeters.
Fence Panels and Mesh Selection
Heavy-duty temporary fence panels use galvanized steel construction to fight rust and corrosion in harsh job site conditions. Hot-dip galvanizing provides superior protection compared to painted or powder-coated alternatives, especially in coastal areas where salt air accelerates corrosion. The difference shows up in year two when cheaper panels start falling apart while galvanized units still look new.
Welded wire mesh beats chain-link for temporary applications because it’s harder to climb and more rigid under stress. Standard commercial panels measure 2.1 meters high by 2.4 meters wide, providing good security height while staying manageable for two-person installation teams. Frame gauge and mesh spacing affect both strength and cost, so match your specs to your actual security needs rather than over-building.
Foundation Systems for Different Conditions
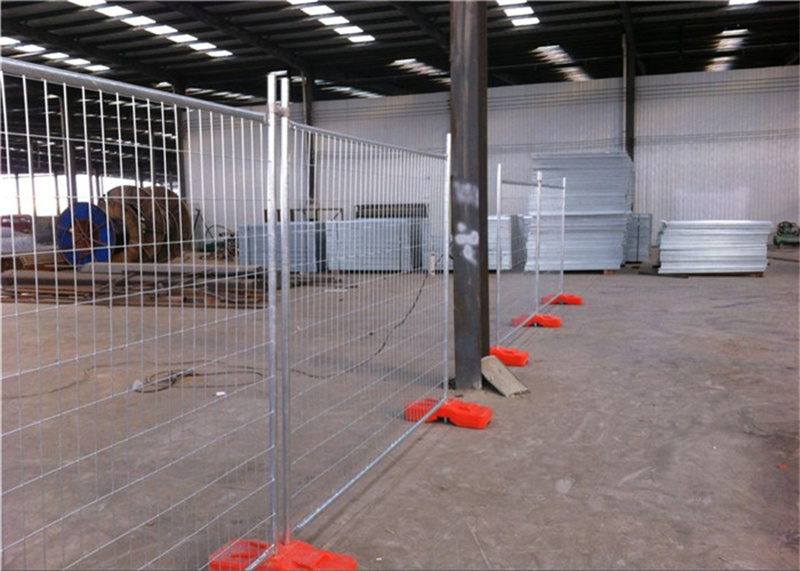
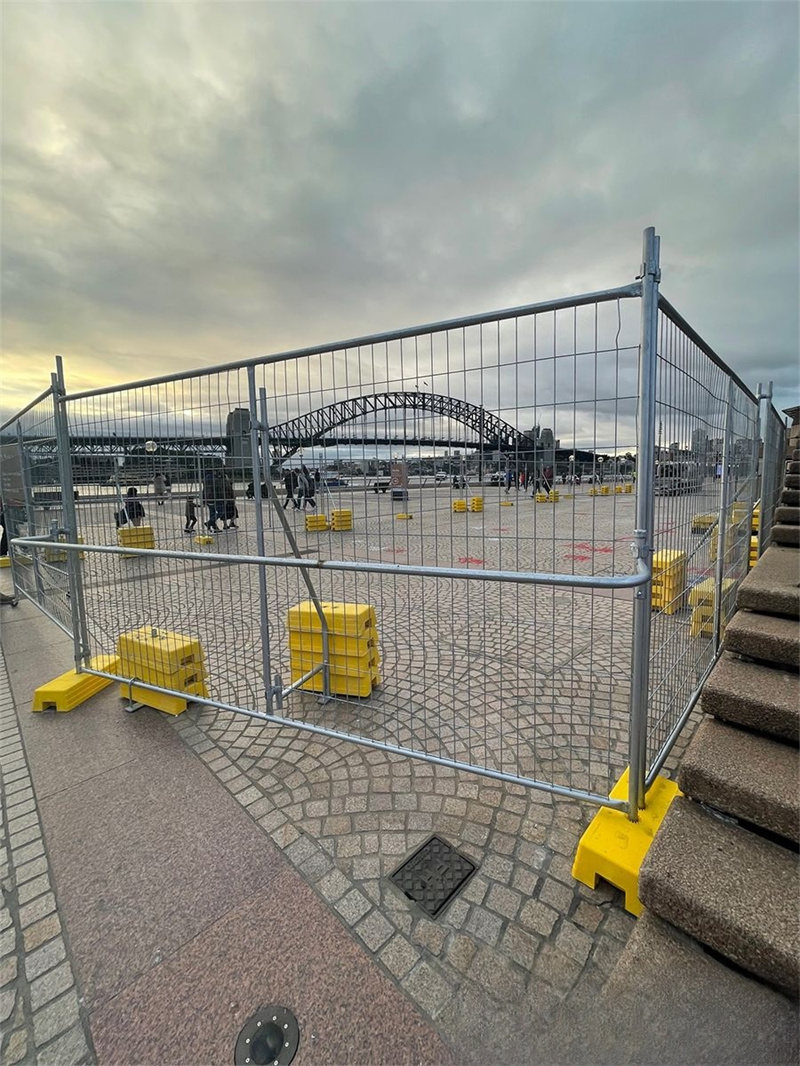
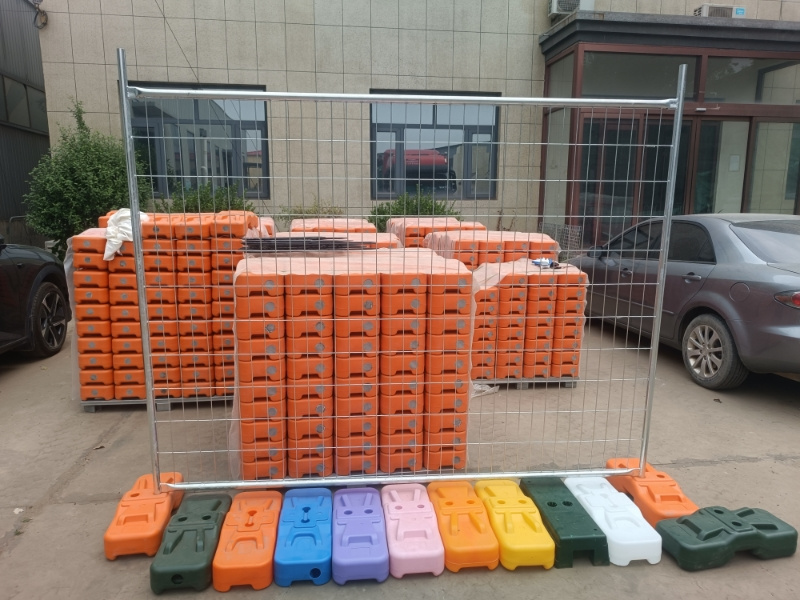
Your foundation choice makes or breaks stability, especially when weather conditions deteriorate. Concrete-filled blow-molded feet provide maximum stability for construction sites and rough terrain. Their bright colors improve visibility for safety, and the low center of gravity resists tipping better than top-heavy alternatives.
Steel plate bases work best on paved surfaces where their low profile prevents tripping hazards and provides clean aesthetics for public events. Water-filled bases offer portability advantages because they ship empty and fill on-site, but they’re vulnerable to freezing in cold climates and puncture damage in industrial environments.
| Foundation Type | Best Applications | Key Advantages | Limitations |
|---|---|---|---|
| Concrete Feet | Construction sites, rough terrain | Maximum stability, weather resistant, highly visible | Heavy shipping costs, storage space requirements |
| Steel Plates | Events, paved areas | Low profile, quick deployment, professional appearance | Can slide on smooth surfaces, limited soil use |
| Water-Filled | Temporary crowd control | Lightweight shipping, adjustable weight, bright colors | Freezing damage, puncture vulnerability |
Durable Temporary Fencing Tailored for Australian Conditions
Secure your site with high-quality, hot-dip galvanized fencing panels designed for quick setup and lasting protection. Ideal for construction, events, farms, and more across Australia and New Zealand.
Professional Installation Process: Step-by-Step Excellence
Rock-solid temporary fencing comes from following a disciplined installation process where each step builds on the last. Skip steps or rush the process, and you’ll end up with a wobbly mess that embarrasses your operation.
Installation looks straightforward until you see the difference between amateur and professional results. Pros follow a systematic approach that ensures alignment, stability, and longevity. Every shortcut you take during installation creates problems you’ll deal with later, usually at the worst possible time.
Step 1: Foundation Positioning and Spacing
Lay out your fence feet along the planned perimeter with laser focus on spacing accuracy. Measure center-to-center distances to match your panel width exactly—typically 2.4 meters for standard panels. Even small spacing errors create stress points that weaken connections and make panels difficult to align properly.
Use string lines or laser levels to keep your foundation row straight and properly positioned. Crooked foundation lines create zigzag fence runs that look unprofessional and create weak points at every bend. Take extra time on foundation positioning because everything else builds from this baseline.
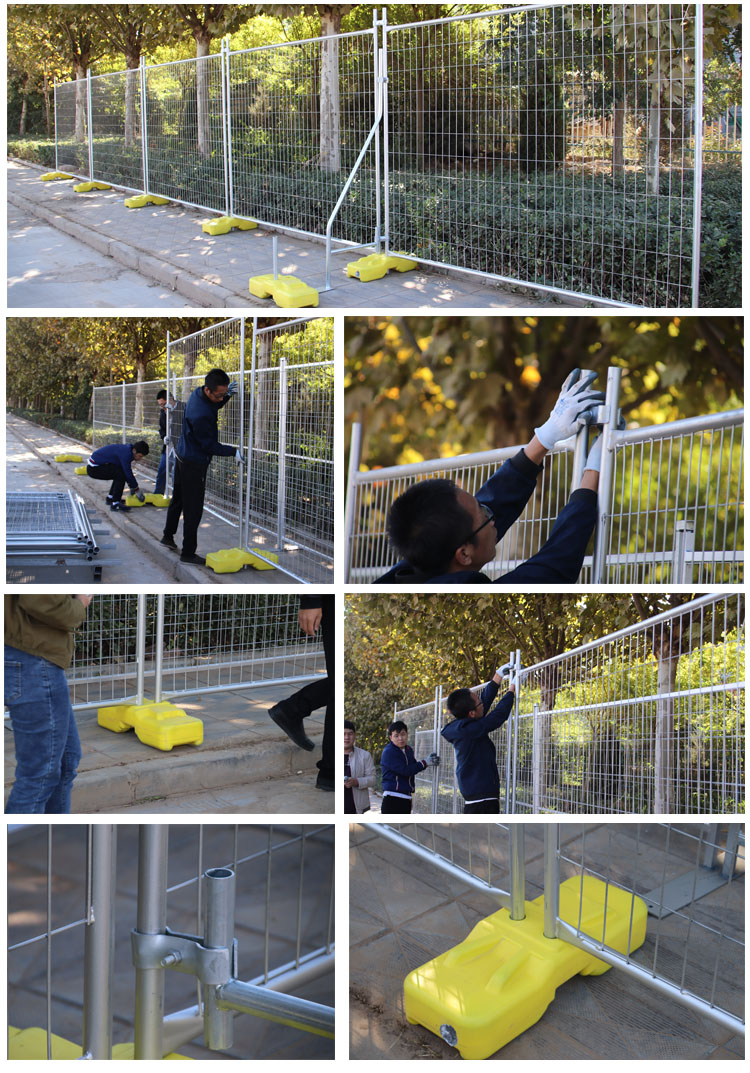
Step 2: First Panel Installation and Alignment
Install your first panel with two workers lifting and positioning it into the foundation slots. Use a level to ensure perfect vertical alignment because this panel sets the standard for your entire fence line. A leaning first panel creates a domino effect that makes every subsequent panel harder to align properly.
Double-check that the panel sits fully into both foundation feet and doesn’t rock or shift when you apply light pressure. Loose connections here telegraph through the entire fence system and create failure points under wind loading or physical stress.
Step 3: Progressive Panel Connection
Install each subsequent panel into its new foundation foot and the shared foundation with the previous panel. Use high-quality panel clamps to create rigid connections between adjacent panels. Position clamps so bolt heads face the public side and nuts stay on the secure side, making tampering more difficult.
Tighten every clamp with proper torque using hand tools rather than impact drivers that can over-stress the connection points. Walk back every few panels to recheck alignment and connection tightness because thermal expansion and installation vibration can loosen early connections.
Step 4: Gate Integration and Final Quality Control
Install pedestrian and vehicle gates at your planned access points using the same connection principles as standard panels. Test gate operation under load to ensure smooth opening and closing without binding or excessive play in the hinges.
Conduct a complete perimeter inspection by walking the fence line and physically testing every connection point. Shake each panel to identify loose connections or unstable foundations. This final quality check catches problems before your site goes operational and prevents emergency repairs later.
Engineering Standards and Compliance: Decoding Professional Requirements
Modern engineering standards like Australia’s AS 4687:2022 separate professional installations from amateur attempts by focusing on real-world forces and risk-based design approaches. Understanding these principles lets you build temporary fencing that actually performs when tested.
Engineering standards aren’t just paperwork—they’re hard-won knowledge about what works and what fails under real conditions. Australia’s AS 4687:2022 represents the most advanced thinking in temporary fence engineering and provides a roadmap for building systems that handle whatever nature throws at them.
Risk-Based Design Approach
Old-school standards treated every temporary fence the same, regardless of application. Modern standards recognize that a crowd control barrier at a street festival needs different engineering than a construction perimeter next to a highway. Risk-based design lets you match your fence specifications to actual hazard levels rather than over-building every installation.
High-risk applications include construction sites adjacent to public areas, highway work zones, and events with large crowds. These installations demand engineered solutions with calculated wind resistance and proven stability. Low-risk applications like rear property lines or internal site divisions can use standard configurations without extensive analysis.
Wind Load Calculations and Management
Wind creates the most dangerous forces temporary fencing faces, and shade cloth or privacy screening multiplies these forces dramatically. Adding shade cloth transforms your fence panels into sails that catch every wind gust and transfer massive overturning forces to your foundation system.
AS 4687:2022 provides detailed calculation methods for determining wind loads based on geographic location, fence height, and screening materials. The standard requires testing from both directions because wind patterns change and fencing must resist forces from either side. Understanding these calculations helps you design bracing systems that actually work instead of guessing and hoping.
Compliance Verification Methods
Modern standards offer multiple pathways to prove your temporary fence installation meets engineering requirements. You can choose the method that best fits your project complexity and available resources.
Design analysis uses structural engineering calculations to prove mathematical compliance before installation. This approach works best for complex installations or when you need documented compliance for insurance or regulatory approval. Physical testing applies real loads to installed fencing to demonstrate actual performance under controlled conditions.
Hybrid approaches combine calculation and testing for maximum confidence in critical applications. You might use design analysis for initial planning and physical testing for final verification, especially when dealing with unusual site conditions or non-standard configurations.
Advanced Reinforcement and Security Systems
Standard temporary fence installation provides baseline security, but high-wind areas and critical security applications demand advanced reinforcement techniques that transform your perimeter from adequate to bulletproof.
Basic temporary fence installation handles normal conditions, but certain applications push systems beyond standard limits. Wind-exposed sites, installations with privacy screening, and high-security perimeters need reinforcement systems that provide the extra margin of safety required for professional applications.
Bracing Systems for Wind Resistance
Triangular bracing systems provide the most effective wind resistance for temporary fencing installations. These supports extend from the back of fence panels to create a wider, more stable footprint that resists overturning forces. Install braces at regular intervals based on wind exposure and screening materials—typically every third panel for moderate conditions and every panel for extreme exposure.
Additional weighting systems work alongside bracing to lower the fence system’s center of gravity. Sandbags, concrete blocks, or water-filled barriers placed on foundation feet provide extra resistance to tipping forces. In soft ground conditions, pin foundations to the earth using steel stakes driven through mounting holes in the fence feet.
Security Enhancement Options
Anti-lift devices prevent unauthorized removal of panels from their foundations. These simple brackets attach to fence feet and physically prevent lifting panels out of their mounting slots. The devices add minimal cost but provide significant security improvement for installations in public areas or overnight storage.
Privacy screening materials serve dual purposes by blocking sight lines and reducing dust transmission, but they dramatically increase wind loading and require corresponding bracing systems. Never install screening materials without engineering analysis or proven bracing configurations because the wind forces can easily overwhelm standard foundation systems.
Perimeter deterrents like barbed wire or anti-climb extensions provide maximum security for critical applications, but check local regulations before installation. Some jurisdictions restrict or prohibit these additions, especially in public areas or residential zones. When permitted, these deterrents significantly improve security against determined intrusion attempts.
Durable Temporary Fencing Tailored for Australian Conditions
Secure your site with high-quality, hot-dip galvanized fencing panels designed for quick setup and lasting protection. Ideal for construction, events, farms, and more across Australia and New Zealand.
Mission Complete: Building Professional-Grade Perimeter Security
You now have the complete roadmap for professional temporary fence installation that goes far beyond basic assembly. Understanding site assessment, component selection, systematic installation, and engineering principles separates amateur attempts from professional results that stand up to real-world conditions.
The key insight is treating temporary fencing as an engineered system rather than a collection of parts. Every component must work together to resist wind forces, maintain stability, and provide reliable security throughout the installation period. Modern standards like AS 4687:2022 provide the framework for making informed decisions based on actual risk rather than guesswork.
Your temporary fence installation now represents a calculated response to specific site conditions and security requirements. From strategic layout planning to advanced bracing systems, every element serves a purpose in creating perimeter security that performs when you need it most.
Don’t leave your site security to chance or amateur installation methods. Apply these professional techniques to build temporary fencing that protects your investment and maintains your reputation for quality work.
Professional Installation Questions and Answers
Can I add shade cloth or banners to temporary fencing safely?
Yes, but you must install proper bracing systems to handle the increased wind loads. Shade cloth acts like a sail and can generate enough force to overturn standard installations. Use triangular bracing, additional weighting, and follow engineering guidelines for your specific screening materials and wind exposure.
Should I buy or rent temporary fencing for my projects?
Buying makes financial sense if you use temporary fencing regularly because rental fees add up quickly and you avoid damage charges from rental companies. Ownership gives you immediate access for urgent needs and eliminates scheduling conflicts with rental availability. Most businesses break even after three to four projects.
How do I install temporary fencing on slopes and uneven ground?
Follow the natural ground contours as much as possible and use additional bracing on the downhill side of each panel. Fill large gaps under panels with gravel or blocking to maintain security and prevent undermining. Avoid running fence lines across steep slopes unless you engineer specific solutions for the challenging conditions.
What is wind region classification and why does it matter?
Wind regions define maximum expected wind speeds for engineering calculations in specific geographic areas. Standards like AS 4687 use unified wind regions to simplify compliance and ensure your temporary fence can handle local weather conditions. This classification determines the bracing and foundation requirements for safe installation.
How do I choose between design analysis and physical testing for compliance?
Design analysis works best when you have engineering resources and need documented compliance before installation. Physical testing provides hands-on verification of actual performance and works well for standard configurations. Choose based on your project complexity, available expertise, and regulatory requirements.
What are the most critical safety checks after installation?
Walk your entire perimeter and physically test every panel connection for tightness and stability. Verify that all panels stand vertically without leaning and all foundations sit securely on the ground. Check that required bracing is properly installed and all gates operate smoothly. A thorough final inspection prevents problems before your site becomes operational.


