 Skip to content
 Installing temporary fencing in Canada isn’t just about following basic instructions—it’s about engineering a solution that can survive brutal winters, spring thaws, and relentless winds. This comprehensive guide walks construction professionals through every aspect of Canadian temporary fence installation, from proper site assessment and material selection to advanced techniques for frozen ground anchoring and snow load management. You’ll discover why standard wind speed ratings mislead installers, learn the engineering principles that separate amateur setups from professional installations, and master the seasonal maintenance practices that keep your perimeter secure year-round.
Key Takeaways
Proper Planning is Paramount: A strong fence starts with a thorough site assessment. Analyze terrain, soil conditions, and wind exposure before placing a single panel.
Materials Matter: For Canadian climates, choose hot-dipped galvanized steel with 360-degree welds. This construction resists road salt, moisture, and rough handling, ensuring a longer service life.
Master Extreme Weather Techniques: Learn to anchor fences in frozen ground, manage heavy snow loads, and brace effectively against high winds. Standard installation is not enough.
Understand True Stability: Don’t fall for misleading wind speed ratings. A professional fence requires a Factor of Safety (FoS) of at least 1.5 and must account for pedestrian loads, not just wind.
A bitter winter wind howls across your construction site. In the morning, you find your temporary fence line has collapsed, creating a dangerous and costly security breach. This isn’t just an inconvenience—it’s a liability that can halt projects and drain budgets. In Canada, standard fence installation isn’t enough. You need a strategy built for extreme weather.
This guide serves as your definitive blueprint for success. Unlike other articles that offer generic advice or focus on product features, we walk you through a complete, step-by-step installation process designed specifically for Canadian conditions.
You’re about to explore five critical areas:
- Pre-Installation Planning: Laying the groundwork for a resilient perimeter.
- Step-by-Step Installation: The core how-to for a flawless setup.
- The Canadian Challenge: Advanced techniques for conquering frozen ground, snow, and high winds.
- The Science of Stability: A unique look at why most fences fail and how to ensure yours won’t, based on critical engineering principles.
- Lifecycle Management: Mastering seasonal maintenance and safe dismantling.
Prepare to build a fence that doesn’t just stand, but endures.
Pre-Installation Blueprint: Planning for Success
Smart planning beats brute force every time—your fence’s strength gets determined long before you lift the first panel, making this phase absolutely critical to avoiding expensive failures down the road.
Before you unload a single panel, careful planning can prevent most common installation failures. A strong temporary fence system requires every component to match your site’s specific challenges. Taking time to assess, select, and plan properly is the first and most important part of any job.
How do you perform a proper site assessment?
Your perimeter’s strength depends entirely on the ground it stands on. Start by walking the entire proposed fence line with a critical eye. Map the terrain, noting slopes, low spots where water might pool, and uneven ground that could destabilize the bases. Different soil conditions—from hard pavement and loose gravel to saturated soil or even muskeg—will directly inform your choice of anchors and bases. Finally, assess wind and snow exposure by identifying natural wind funnels between buildings or open fields where drifts typically accumulate.
What are the best temporary fence materials for Canadian climates?
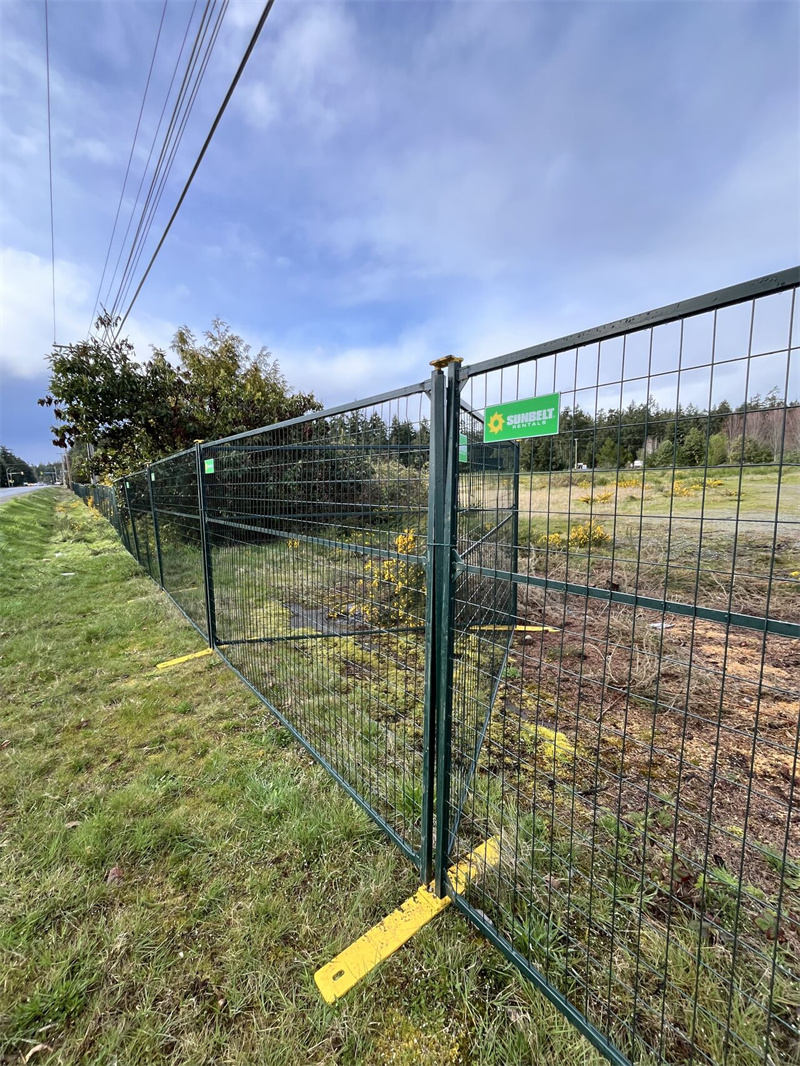
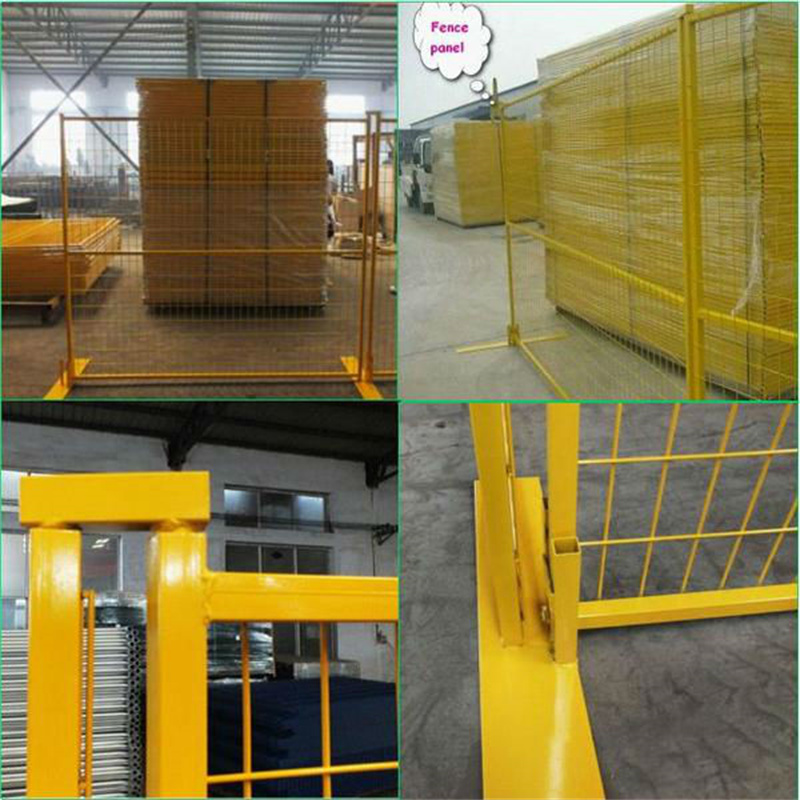
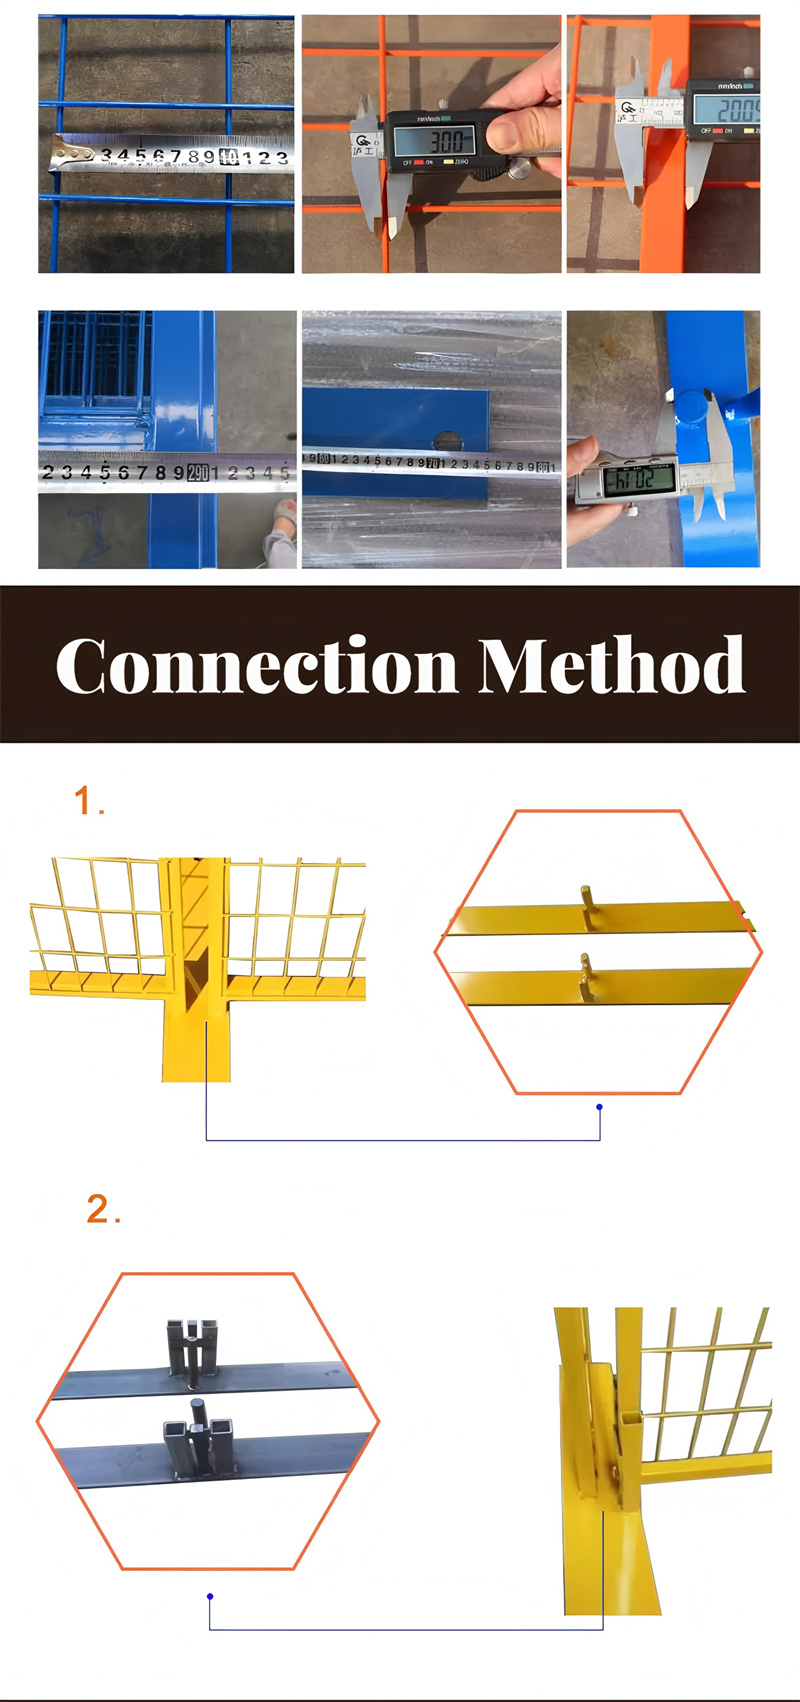
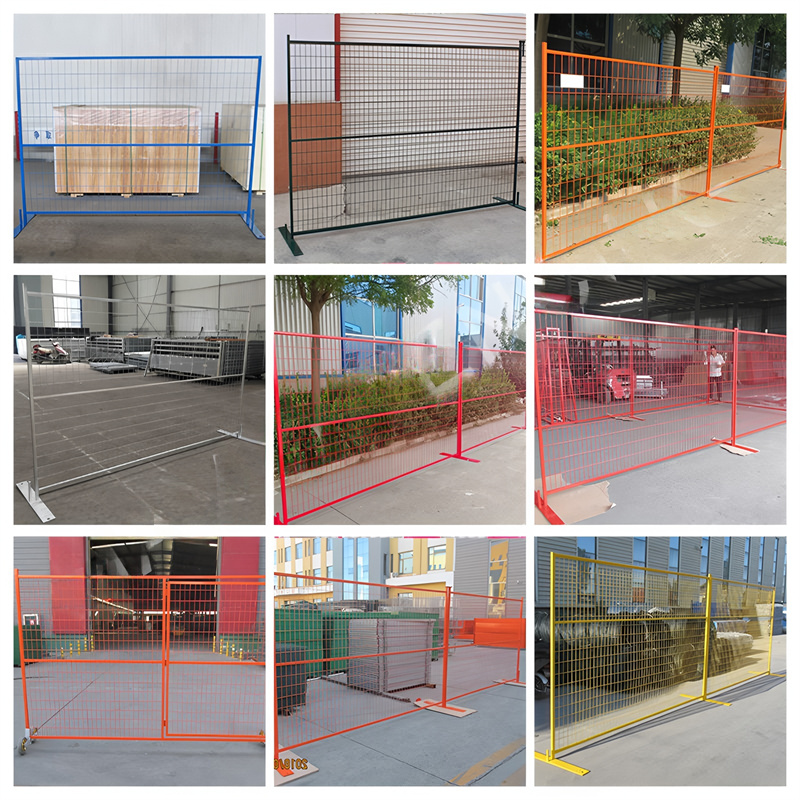
The materials you choose must withstand uniquely harsh environments. Insist on panels with hot-dipped galvanization over 42 microns. This thick coating isn’t negotiable for resisting corrosion from road salt and constant moisture. When comparing mesh types, welded mesh offers superior durability and security over chain-link alternatives, which can unravel or stretch. Pay close attention to frame construction. Look for 360-degree welds at every joint, as these provide much greater structural integrity than simple spot welds. Advanced manufacturing like SmartWeld technology can produce joints that are up to 70% stronger—a significant advantage in demanding conditions.
How do you choose the right bases and bracing for maximum stability?
Your fence operates as a system, and panels need solid foundations. High-density weighted bases made from plastic or recycled rubber provide mass and wide footprints for stability. Bracing choice proves equally important. Support stays and outriggers should be deployed at all corners, gate ends, and regular intervals along straight runs. For soft or uncertain ground, ground anchoring options like driven stakes, pins, or concrete blocks provide essential extra security that prevents the fence from shifting or lifting.
Durable Temporary Fencing Tailored for Canadian Conditions
DB Fencing delivers premium portable fence panels designed to withstand harsh weather and meet local safety requirements. Benefit from factory-direct pricing, customizable options, and fast nationwide shipping to secure your site efficiently.
| Ground Type | Anchoring Solution | Best For | Pros & Cons |
|---|---|---|---|
| Frozen Soil | Weighted Base + Sandbags | Winter conditions where driving stakes is impractical. | Pros: Non-penetrating, fast setup. Cons: Can slide on ice without added friction; requires significant weight. |
| Muddy/Saturated | T-Bar Stake or Screw Pile | Spring thaw or rainy conditions. | Pros: Deep anchoring below the soft top layer. Cons: Requires more labor to install and remove. |
| Gravel | Weighted Base + Driven Pin | Compacted gravel lots or roadsides. | Pros: Base provides surface stability; pin prevents sliding. Cons: Pin may be difficult to drive in highly compacted areas. |
| Asphalt/Concrete | Surface-Mounted Anchor Plates | Permanent surface installations where drilling is permitted. | Pros: Extremely secure connection. Cons: Requires drilling into the surface; less flexible. |
The Main Event: A Step-by-Step Installation Guide
Follow this methodical workflow and you’ll turn a pile of components into a rock-solid security perimeter—skip steps or cut corners, and you’re asking for trouble when the weather turns nasty.
With planning complete, assembly can begin. A disciplined approach to layout, base placement, and panel connection transforms components into a robust security perimeter. Following these steps minimizes rework and ensures the fence performs as designed.
Step 1: Mapping and Laying Out the Perimeter
Precision at the start prevents problems later. Use string lines or marker paint to create clear, straight guides for your fence line. This simple action ensures your fence aligns correctly and looks professional. As you map the line, strategically plan for access by marking locations for personnel and vehicle gate panels. Lastly, confirm your fence line maintains safe clearance from job site hazards like overhead power lines, open excavations, and material storage zones.
Step 2: Distributing and Placing the Fence Bases
Bases form the foundation of your fence’s stability. Distribute them along your marked line, ensuring spacing correctly matches your panel lengths (e.g., 8, 9.5, or 10 feet). Orient each base so its longest axis runs perpendicular to the fence line, creating the widest and most stable footprint. On uneven ground, take time to ensure each base sits level. Use sturdy shims or small amounts of compacted gravel to eliminate any wobble before setting panels.
Step 3: Setting the Panels and Securing Connections
With bases ready, you can set panels. Use proper lifting techniques—lift with your legs and keep your back straight to avoid injury. Slot vertical pipes of each panel firmly into receivers on the bases. Once a pair of panels is in place, immediately secure them at the top with fence clamps. Ensure clamps are fully engaged and tightened with a wrench until snug. This connection unifies individual panels into a strong, continuous barrier.
The Canadian Challenge: Advanced Techniques for Extreme Weather
Standard procedures won’t cut it when temperatures drop below freezing and winds start howling—these battle-tested techniques are what separate amateur installations from professional-grade perimeters that actually survive Canadian winters.
A fence that holds strong in July might easily fail in February. Canada’s climate presents unique challenges that demand more than standard installation. These advanced techniques are essential for building perimeters that can withstand the harshest conditions.
How do you anchor temporary fences in frozen or thawing ground?
Frozen ground can feel like concrete, making traditional anchoring impossible. One effective method uses gas-powered augers to drill pilot holes for driven posts or T-bar stakes. For non-penetrating solutions, weighted block systems work ideally—double up on heavy-duty bases and add sandbags over feet to significantly increase anchoring mass. During spring thaw, when ground becomes soft and unstable, these weighted systems also excel. For installation on already frozen concrete or asphalt, you can use specialized surface-mounted anchor plates bolted directly to hard surfaces.
What is the professional strategy for managing snow loads and drifts?
Snow isn’t just a nuisance—its weight and pressure can easily topple fence lines. Be proactive with placement. Whenever possible, install fences upwind of major obstacles like trailers or material piles to minimize snow drifting against panels. In areas where drifts can’t be avoided, add extra bracing to reinforce those fence sections. Most importantly, maintain clearance protocols. Keep minimum one-meter clear spaces on both sides of fences to prevent heavy, packed snow from pushing directly against panels and causing lateral failures.
How do you brace a temporary fence against high winds?
Wind creates relentless force on large, flat surfaces like fence panels. The key to resistance is proper bracing. Always install support braces at 45-degree angles from panels to ground, as this provides optimal resistance to tipping forces. For frequency, place braces at all corners, both ends of gates, and at least every three to five panels on long, straight runs. If you must use wind screens or privacy mesh, be extremely cautious. These additions act like sails, dramatically increasing wind load. You must compensate by doubling bracing frequency and using the heaviest available bases.

The Science of Stability: Why Fences Fail (And How to Ensure Yours Won’t)
Most temporary fence failures happen because installers trust marketing claims instead of understanding basic physics—once you grasp these simple engineering principles, you’ll never install a fence that fails again.
Many temporary fences get installed based on assumptions, not science. This leads to failures that are both predictable and preventable. By looking at fences as engineering systems, you can avoid common pitfalls and build barriers that are safe and reliable.
Are you falling for the Wind Speed Rating trap?
Here’s an insight from the engineering world: many manufacturers cite wind speed ratings that are dangerously misleading. These ratings often get calculated using Factors of Safety (FoS) of 1.0, which represents exact failure points, or “limit states.” This leaves zero margin for error, wind gusts, or unexpected loads. For temporary works, professional guidance such as that from the Temporary Works Forum recommends minimum FoS of 1.5. This means fence systems should be designed to withstand 1.5 times expected forces. Always ask suppliers for test data and specifically inquire about Factors of Safety used in calculations.
Beyond Wind: Calculating for Pedestrian and Material Loads
Wind isn’t the only force fences must resist. Hidden dangers often come from pedestrian pressure in crowds or from materials and equipment being leaned against panels. In some cases, these loads can exert far more force than strong winds. Best practices, often referencing standards like British Standards for temporary structures, demand that fences in public areas be designed for foreseeable crowd loads. As a simple rule of thumb, significantly reinforce any fence lines near public walkways, event spaces, or material storage areas with additional bracing and anchoring.
Why are individual component checks crucial?
Fence systems are only as strong as their weakest links. Panels made of high-strength steel become useless if held by flimsy clamps or set on undersized bases. Before and during installation, conduct quick visual inspections of all components. Check clamps for cracks or warping, bases for damage, and panel welds for any signs of stress or fatigue. Single failing components can trigger cascading failures along entire fence lines. By ensuring every piece of the system is sound, you prevent small problems from becoming major security breaches.
Durable Temporary Fencing Tailored for Canadian Conditions
DB Fencing delivers premium portable fence panels designed to withstand harsh weather and meet local safety requirements. Benefit from factory-direct pricing, customizable options, and fast nationwide shipping to secure your site efficiently.
Beyond Installation: Seasonal Maintenance & Safe Dismantling
Your fence installation is just the beginning—smart seasonal maintenance keeps your perimeter rock-solid through weather changes, while proper dismantling protects your investment for the next job site.
Temporary fences are working pieces of site equipment that require attention throughout their deployment. Simple seasonal checklists keep fences secure, while methodical dismantling processes protect your investment for the next job.
What is the essential seasonal maintenance checklist for your temporary fence?
Your fence needs to adapt as seasons change. Here’s a simple checklist to follow:
- Fall: Before first snowfall, perform pre-winter reinforcement. Add extra bracing in drift-prone areas and check all components for corrosion or damage.
- Winter: Regularly monitor snow loads and clear heavy accumulations. Keep clamps and gate hinges free of ice to ensure they function correctly.
- Spring: During thaw, ground shifts. Walk the line to re-level any bases that have become unstable and inspect for damage caused by frost heave.
- Summer: Thermal expansion and contraction can cause clamps to loosen over time. Check for and tighten any loose connections. Manage vegetation growth along fence lines to maintain clear access and visibility.
How do you dismantle and store fence panels safely and efficiently?
When projects are complete, dismantle fences in reverse order of assembly. Begin by removing top clamps, which allows you to lift panels out one by one. This approach is safer and more controlled than removing bases first. As you collect components, use proper stacking and banding techniques to secure them for transport. Flat-stacking panels on dunnage prevents bending, and banding them tightly minimizes shifting. Finally, conduct post-project inspections to identify any damaged components that need repair or replacement, ensuring your kit is ready for the next job.
Installing temporary fences in Canada is more than a task—it’s a battle against the elements. You’ve now explored the complete process, from meticulous planning and step-by-step assembly to advanced strategies for extreme weather and critical stability science. You’re no longer just putting up fences; you’re engineering safe, secure, and resilient perimeters. By applying these principles, you protect your site, your team, and your bottom line.
Don’t leave your project’s security to chance. If you’re facing uniquely challenging sites or need expert evaluations of your wind and snow load requirements, contact our specialists for complimentary site stability assessments.
Frequently Asked Questions
What is the best type of base for Canadian winters?
For frozen ground, combinations of heavy-duty, wide-footprint recycled rubber or plastic bases (minimum 25kg) paired with additional sandbags prove highly effective. In thawing conditions, their flexibility helps accommodate ground shifts better than rigid alternatives.
How often should I brace my temporary fence for high winds?
At minimum, brace all corners and gate ends. For long, straight runs, install support braces every 3 to 5 panels (approximately every 30-50 feet) for moderate wind exposure. In open fields or areas known for high winds, increase this to every 2-3 panels.
Can I add privacy screens or banners to my fence in winter?
You can, but with extreme caution. Privacy screens act like sails, dramatically increasing wind loads on fences. If you must use one, you must double your bracing frequency and use heavier bases to compensate for added force. It may be prohibited on some sites by safety officers.
Are temporary fence regulations the same across all Canadian provinces?
No. While safety principles are universal, specific requirements for height, placement, and signage can vary by province and even municipality. Always consult local Occupational Health and Safety (OH&S) regulations and municipal bylaws before starting.
How do I prevent theft of my temporary fence panels?
Use high-quality, tamper-resistant clamps and consider orienting bolt heads towards the inside of your site to make them harder to access. For high-risk areas, a few tack welds on clamp nuts can be effective (though less flexible) deterrents.


