 Skip to content
 https://youtu.be/I6NaYnAimik
The new AS 4687:2022 standard completely rewrites the rules for temporary fence wind safety, replacing outdated one-size-fits-all approaches with rigorous engineering requirements. Engineers must now assess three distinct risk categories called Importance Levels, calculate site-specific wind loads based on local conditions, and design systems that resist forces from both directions. The biggest game-changer is recognizing that adding shade cloth or banners transforms a simple fence into a massive sail, dramatically increasing wind forces and requiring specialized bracing solutions. This comprehensive guide walks engineers through the entire process, from understanding the new regulatory framework to performing actual wind load calculations and selecting compliant structural systems.
A temporary fence toppling in high winds isn’t just an inconvenience – it’s a critical safety failure, a massive liability risk, and potentially a project-stopping event. The new AS 4687:2022 standard fundamentally changes how we assess wind loads on temporary fencing. Those simple old-school checks? They’re not just outdated – they’re unsafe.
This guide serves as your complete engineering blueprint for navigating these new requirements. We’re not just going to tell you what the regulations say. We’ll walk you through the core engineering principles, show you a step-by-step calculation process, and connect those calculations to real-world structural solutions that actually work.
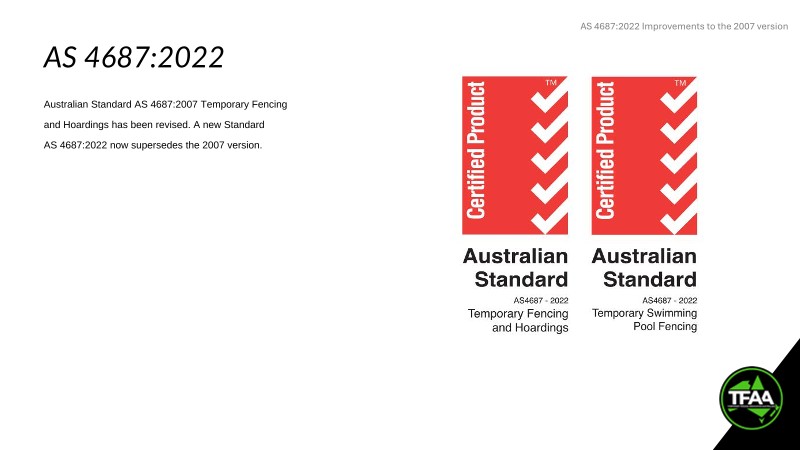
The New Mandate: What AS 4687:2022 Actually Changes
The updated standard throws out the simple one-size-fits-all approach and replaces it with a risk-based engineering framework that demands real analysis, not just guesswork.
The updated standard doesn’t just tweak a few numbers – it completely restructures how we think about temporary fence safety. Instead of a single benchmark that supposedly works everywhere, we now have a sophisticated framework that forces you to actually think about what happens if your fence fails.
Four Parts Instead of One: The New Structure
AS 4687:2022 splits into four distinct parts instead of the old single document. Part 1 covers General Requirements and acts as your foundation – you need to read this alongside everything else. Part 2 handles Temporary Fencing, Part 3 covers solid Hoardings, and Part 4 deals with Temporary Pool Fencing. For most construction and event applications, you’ll focus on Parts 1 and 2.
Three Risk Categories Replace the Old Minimum
Here’s where things get serious. The standard now forces you to assess what actually happens if your temporary fencing fails.
- Stability Class: This is basically the old minimum standard – roughly equivalent to withstanding 54 km/h winds. You can only use this for sites with negligible risk to people or property, like a remote construction site with no public access.
- Importance Level 1: For sites with low risk to human life or minor economic consequences if failure occurs. This requires a much more robust system than basic Stability Class.
- Importance Level 2: The highest category, reserved for sites where failure could endanger lives, cause serious injury, or create major economic, social, or environmental consequences. Think fencing along busy streets, near schools, or on major infrastructure projects.
| Feature | AS 4687:2007 (Old) | AS 4687:2022 (Current) |
|---|---|---|
| Structure | Single document for everything | Four-part standard with specific applications |
| Risk Assessment | One minimum requirement | Three tiers: Stability Class, Importance Level 1, Importance Level 2 |
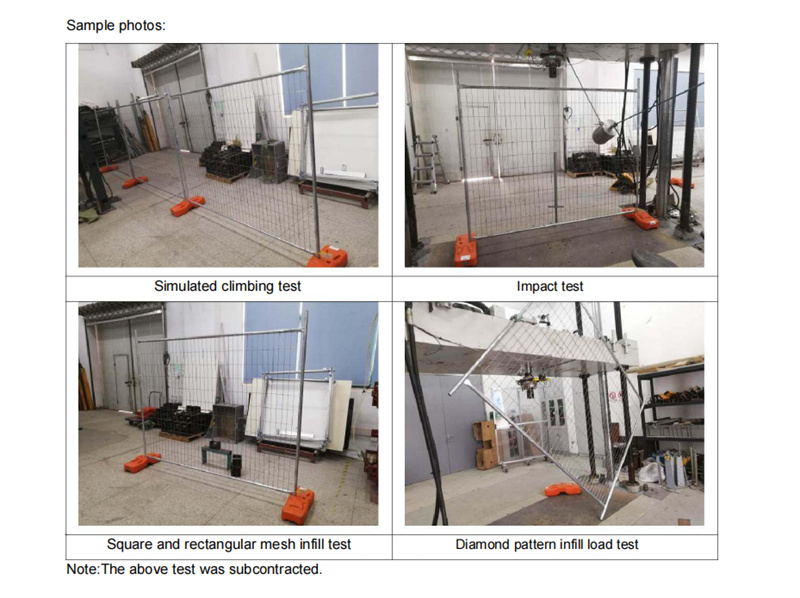
| Compliance Options | Mainly physical testing | Design Analysis (calculations) or physical testing |
| Wind Direction | Tested from one direction | Must resist forces from both sides |
Calculate or Test: Two Paths to Compliance
The old standard heavily emphasized physically testing fence systems until they failed. While that’s still valid, the 2022 revision formally recognizes design analysis as an equally acceptable pathway. This means a qualified engineer can use structural mechanics principles and the standard’s formulas to calculate forces and design systems to resist them. You don’t need to conduct expensive physical testing for every unique configuration.
Understanding Wind Forces: Why Fences Actually Fail
Wind doesn’t hit every fence the same way – your site’s specific conditions dramatically affect the forces your temporary fencing system must handle.
A fence doesn’t exist in isolation. Its stability depends entirely on the wind it experiences and how it’s built. The standard now requires engineers to calculate a specific Design Site Wind Speed based on the immediate environment, not just use some generic number.
Five Site Conditions That Change Everything
To determine your Design Site Wind Speed, the standard identifies five local conditions that act like multipliers, adjusting baseline wind speeds up or down:
- Importance Level: Higher-risk Importance Level 2 sites require higher design wind speeds from the start.
- Terrain Category: This describes the “roughness” of the surrounding 500m area. Open, flat ground like an airfield offers no wind resistance, while dense city centers create friction that slows wind down.
- Shielding Class: Nearby buildings or trees provide protection. A fully exposed fence has no shielding, while one behind a row of houses has significant protection.
- Topography: Hills and slopes matter enormously. Wind accelerates traveling up hills, reaching maximum speed near the top. Fences on or near hill crests experience much higher forces.
- Proximity: This quantifies the effect of being close to hilltops or cliffs, where wind speeds amplify significantly.
The Shade Cloth Disaster: Understanding the Sail Effect
The single biggest mistake on construction sites is adding shade cloth or advertising banners to standard, unbraced temporary fencing. An open-mesh fence panel lets most wind pass through, creating minimal force. Add fabric covering – even porous material – and you’ve essentially created a solid surface. This is the sail effect.
Wind can no longer pass through, so its energy converts into powerful pushing force against the entire structure. This often causes immediate overturning if the system isn’t properly counterweighted or braced.
Two-Sided Forces: The New Reality
Fences don’t just face wind from one direction. AS 4687:2022 requires considering combination of actions – wind plus accidental impact or crowd pressure. More importantly, designs must resist forces from both directions. A system with stays or braces on one side might handle pushing forces well, but strong gusts from the opposite direction can easily pull it over. This two-sided requirement exposes weaknesses in many traditional bracing setups.
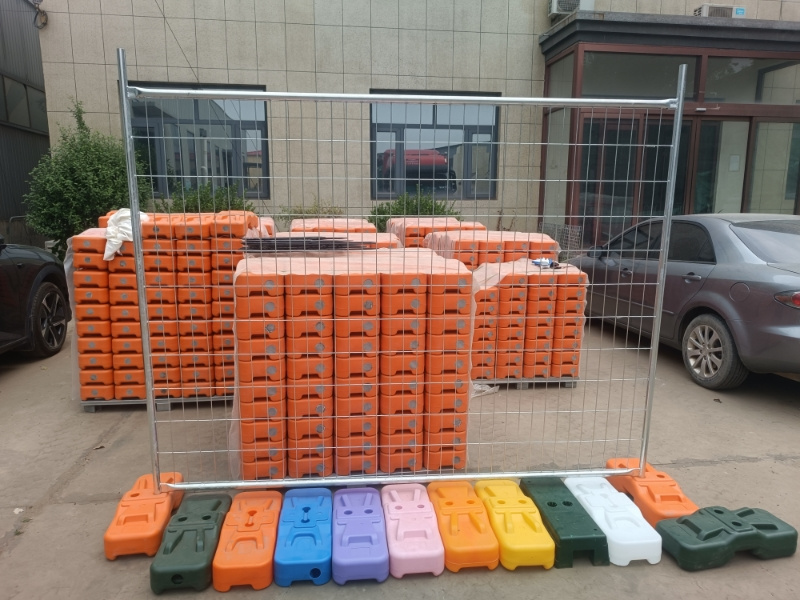
Reliable Temporary Fencing Straight from the Source
DB Fencing offers durable, hot-dip galvanized temporary fencing manufactured in China and shipped directly to Australia and New Zealand. Ideal for construction sites, events, farms, and more, our high-quality panels and accessories provide strong security and quick installation at competitive prices.
Step-by-Step Wind Load Calculation: A Real Example
Here’s exactly how to translate site conditions into actual forces your temporary fencing system must resist – no more guesswork, just solid engineering calculations.
This walkthrough shows how theoretical principles apply in real situations. While we’re using simplified examples, the process mirrors what a certifying engineer does using the full tables and equations in AS 4687:2022.
Step 1: Define Your Project and Risk Level
Let’s work with a real scenario. We’re installing 2.1m high temporary fencing covered with 80% blockage shade cloth. The fence runs along a suburban street directly adjacent to a primary school playground. Since failure could endanger children, this clearly falls under Importance Level 2.
Step 2: Calculate Design Site Wind Speed
Now we determine environmental factors using our scenario like a decision tree:
- Importance Level: We’ve established Level 2
- Terrain Category: Typical suburban area with houses and trees fits TC3
- Shielding: The fence beside a school playground is relatively open, so Medium Shielding
- Topography: Flat ground gives us a topographic multiplier of 1.0
With these inputs (Importance Level 2, TC3, Medium Shielding, flat topography), an engineer consults the standard’s lookup tables to find the corresponding Design Site Wind Speed. For this example, that results in a Design Site Wind Speed of 25 m/s (90 km/h).
Step 3: Convert Wind Speed to Actual Forces
Next, we convert wind speed into pressure. Using the standard’s simplified formula (p = 0.6 x Vdes²), our design pressure becomes 0.6 x (25)² = 375 Pascals. We then calculate total force on a single fence panel (typically 2.4m wide x 2.1m high). Accounting for area and drag factors, this pressure creates significant overturning force on each panel that the foundation system must resist. This calculated force is many times greater than what the same fence would experience without shade cloth.
Structural Solutions: Building Systems That Actually Work
Once you know the forces, you need hardware that can handle them – this goes way beyond just adding more concrete blocks.
Once you know the overturning force, your job is specifying a system that can safely resist it. This moves beyond simply adding more concrete blocks into genuine engineered structural solutions.
Foundation and Anchoring Options
The classic plastic or concrete foot rarely works on its own for clad temporary fencing. Several methods provide necessary stability:
- Counterweights: Calculate the total mass of concrete, water-filled blocks, or other weights needed to prevent overturning. Required mass directly relates to calculated wind force.
- Stays and Bracing: Props or supports that transfer wind load from fence panels down to the ground or additional counterweights placed behind the fence line.
- Ground Anchors: For ultimate stability, anchors provide direct ground connection. These include large steel pins driven into soil or turf, or mechanical fixings drilled into concrete or asphalt surfaces.
Advanced Bracing for Two-Way Forces
Bracing isn’t just about preventing push-over failures. Good systems must also resist pull forces. A basic A-frame stay might only work in one direction. Advanced engineered systems use hook stays or integrated bracing that connects stays, panels, and counterweights into single, cohesive units. These configurations handle the push-pull dynamics the new standard requires.
Certified Engineered Systems: The Smart Shortcut
Some suppliers offer fully engineered systems where they’ve already done the hard work. They provide pre-packaged combinations of panels, feet, and specific bracing configurations that have been physically tested or analyzed by third-party engineers. These systems come with certificates stating capacity for given wind speeds and configurations (like with 80% shade cloth). This saves project engineers significant time – you only need to ensure the certified capacity meets or exceeds your site’s calculated wind load requirements.
Reliable Temporary Fencing Straight from the Source
DB Fencing offers durable, hot-dip galvanized temporary fencing manufactured in China and shipped directly to Australia and New Zealand. Ideal for construction sites, events, farms, and more, our high-quality panels and accessories provide strong security and quick installation at competitive prices.
Proving Compliance: Documentation That Actually Works
A solid design means nothing if you can’t prove it meets regulations – here’s how to prepare documentation that satisfies building surveyors and regulatory bodies.
Sound design isn’t enough – you must prove it works. The final step involves preparing correct documentation to satisfy regulatory bodies and ensure complete compliance records.
Regulation 126 Certificates: What Building Surveyors Need
In Victoria and under similar regulations in other states, certain works require Certificates of Compliance for temporary structures. To satisfy a Relevant Building Surveyor, a structural engineer’s report must be clear and comprehensive. It should include full wind load calculations, references to AS 4687:2022, site-specific parameters used (Terrain Category, Importance Level, etc.), and detailed drawings of the specified fencing system, including panel types, bracing, and anchoring methods.
Using Physical Test Reports
If you’re using a manufacturer’s pre-engineered system, they’ll often provide NATA-accredited lab test reports. These reports are powerful evidence, but you must read them carefully. Ensure the tested system exactly matches what you’re installing on-site. The report must cover the correct configuration (tested with shade cloth if you’re using it) and its certified wind speed must exceed the Design Site Wind Speed you calculated for your project. A generic test report for a different configuration won’t satisfy compliance requirements.
Successfully engineering temporary fencing for Australian wind conditions has fundamentally changed. It’s no longer about simply adding extra concrete blocks on windy days. It’s a systematic process of risk assessment, calculation, and system selection as defined by AS 4687:2022. By understanding the new importance levels, accurately calculating site-specific wind loads, and selecting verified structural solutions, you move from guesswork to guaranteed compliance. This protects the public and your workers while safeguarding your project from significant financial and legal risks of structural failure.
Frequently Asked Questions
What is the biggest mistake people make with temporary fence wind safety?
Adding shade cloth or banners to standard fence installations (panel and two concrete feet) without any engineering analysis. This fundamentally changes load dynamics and causes most failures.
Can I still use basic Stability Class fencing?
Yes, but only in very specific, low-risk situations where there’s negligible risk to people, property, or vehicles if failure occurs, and where there’s limited pedestrian or vehicle traffic. An empty, remote field might qualify – a city construction site wouldn’t.
How many concrete blocks do I need?
There’s no single answer. Required counterweight mass depends entirely on calculated design wind speed for your specific site, fence height, and whether it’s clad with shade cloth. It must be calculated by an engineer or you must use a pre-certified system.
My supplier gave me an engineering certificate. Is that enough?
You must verify the certificate covers the exact system you’re using (panels, feet, bracing) and for wind speed and configuration (with or without shade cloth) that meets or exceeds your site’s calculated requirements. Generic certificates aren’t sufficient.
Why does the new standard use one wind region for all of Australia?
To simplify the process. Instead of complex regional maps, the standard provides base wind speeds and relies on local site condition factors (terrain, shielding, topography) to determine final design wind speed. It still requires fences be dismantled or made safe during cyclone warnings.


