How to Attach Cattle Panels to Wood: A Comprehensive Guide for DIY Enthusiasts
Are you looking to create a sturdy and versatile fence or trellis using cattle panels and wood? You’ve come to the right place! This comprehensive guide will walk you through the process of attaching cattle panels to wood, providing you with expert tips, techniques, and creative ideas to make your project a success. Whether you’re a seasoned DIY enthusiast or a beginner, this article will equip you with the knowledge and confidence to tackle this project head-on.
Why Should You Read This Article?
- Learn multiple methods for securely attaching cattle panels to wood
- Discover creative applications for cattle panel and wood structures
- Gain insights into proper tools, materials, and safety considerations
- Explore expert tips for ensuring longevity and stability of your project
Let’s dive in and explore the world of cattle panel and wood construction!
What Are Cattle Panels and Why Use Them?
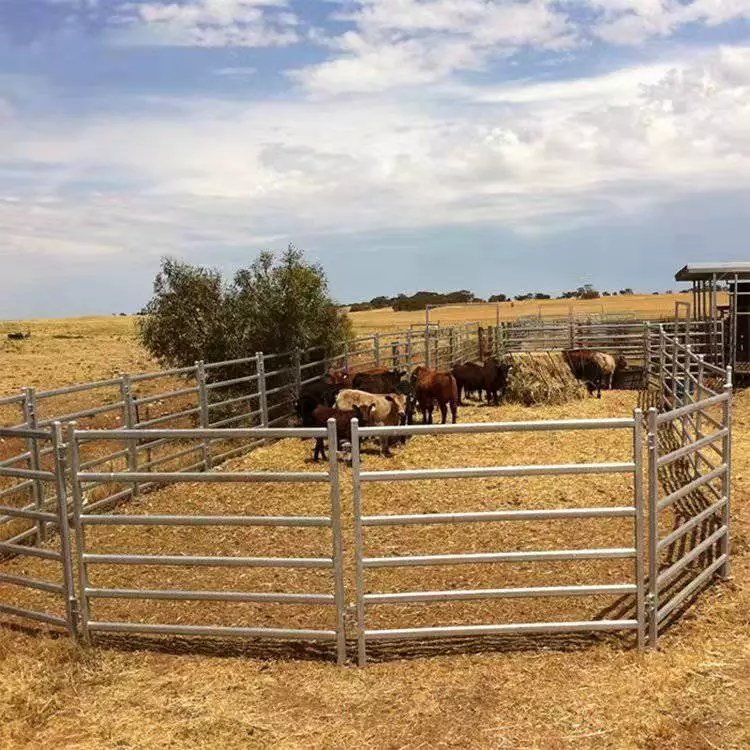
Before we delve into the attachment methods, let’s briefly discuss what cattle panels are and their benefits:Cattle panels, also known as livestock panels or hog panels, are sturdy wire mesh panels typically made of galvanized steel. They’re designed for containing livestock but have gained popularity in various DIY projects due to their versatility and durability.Benefits of using cattle panels:
- Strong and durable
- Resistant to rust and weathering
- Versatile for multiple applications
- Cost-effective compared to other fencing options
- Easy to work with and manipulate
How Do You Choose the Right Wood for Your Project?
Selecting the appropriate wood is crucial for the success and longevity of your cattle panel structure. Here are some factors to consider:
- Durability: Choose wood that can withstand outdoor conditions, such as cedar, redwood, or pressure-treated lumber.
- Size: Ensure the wood posts or frame are sturdy enough to support the weight of the cattle panels.
- Aesthetics: Consider the visual appeal of the wood and how it complements your overall design.
- Budget: Balance cost with quality to find the best wood for your project and budget.
What Tools and Materials Will You Need?
Before you begin attaching cattle panels to wood, gather the following tools and materials:Tools:
- Drill with appropriate bits
- Saw (circular or hand saw)
- Fita métrica
- Nível
- Hammer
- Alicates de corte
- Safety glasses and gloves
Materiais:
- Cattle panels
- Wood posts or frame (size depends on your project)
- Parafusos ou pregos
- Fence staples
- U-nails or fencing clips
- Zip ties (optional)
How Do You Prepare the Wood for Attaching Cattle Panels?
Proper preparation of the wood is essential for a secure and long-lasting attachment. Follow these steps:
- Cut the wood to the desired length and width for your project.
- If using wood posts, dig holes and set them in concrete for added stability.
- Ensure all wood pieces are level and properly aligned.
- Apply a weather-resistant sealant or paint to protect the wood from moisture and decay.
What Are the Different Methods for Attaching Cattle Panels to Wood?
There are several effective methods for securing cattle panels to wood. Let’s explore the most popular options:
1. Using Fence Staples
Fence staples are a quick and easy method for attaching cattle panels to wood:
- Position the cattle panel against the wood frame or posts.
- Use a hammer to drive fence staples over the wire of the cattle panel and into the wood.
- Space staples every 12-18 inches along the wood for secure attachment.
Prós:
- Fast and simple installation
- Inexpensive
- Allows for easy panel removal if needed
Contras:
- May not be as secure for heavy-duty applications
- Staples can work loose over time
2. Screws and Fencing Clips
This method provides a more secure attachment:
- Align the cattle panel with the wood frame or posts.
- Attach fencing clips to the panel wire using pliers.
- Secure the clips to the wood using screws.
- Space clips every 12-18 inches for optimal support.
Prós:
- Very secure attachment
- Allows for easy panel removal if needed
- Adjustable tension
Contras:
- More time-consuming than using staples
- Slightly more expensive
3. U-Nails or Fencing Staples
U-nails, also known as fencing staples, offer a strong and durable attachment:
- Position the cattle panel against the wood.
- Place U-nails over the wire of the panel.
- Hammer the U-nails into the wood, ensuring they’re flush with the surface.
- Space U-nails every 12-18 inches along the wood.
Prós:
- Strong and secure attachment
- Resistant to pulling out
- Relatively inexpensive
Contras:
- Can be difficult to remove if needed
- May split wood if not installed carefully
4. Zip Ties (for Temporary or Lightweight Applications)
While not suitable for all projects, zip ties can be useful for temporary or lightweight structures:
- Align the cattle panel with the wood frame.
- Thread zip ties through the panel wire and around the wood.
- Tighten the zip ties securely.
- Trim excess zip tie length.
Prós:
- Instalação rápida e fácil
- Inexpensive
- Easily adjustable and removable
Contras:
- Not suitable for heavy-duty or permanent structures
- May degrade over time when exposed to sunlight and weather
How Do You Ensure a Secure and Long-Lasting Attachment?
To maximize the stability and longevity of your cattle panel and wood structure, consider these tips:
- Use multiple attachment points: Don’t rely on a single method. Combine techniques for added security.
- Properly space attachments: Ensure even distribution of stress by spacing attachments consistently.
- Check for proper alignment: Use a level to ensure the panels are straight and properly aligned with the wood.
- Consider overlap: When joining multiple panels, overlap them by one square and secure the overlap to the wood.
- Regular maintenance: Inspect attachments periodically and tighten or replace as needed.
What Are Some Creative Applications for Cattle Panels and Wood Structures?
Now that you know how to attach cattle panels to wood, let’s explore some inspiring project ideas:
- Garden trellis: Create a sturdy support for climbing plants and vines.
- Raised garden beds: Use cattle panels as sides for elevated planting areas.
- Fencing: Build a durable and attractive fence for your property or livestock.
- Outdoor privacy screens: Combine panels and wood for a unique outdoor divider.
- Chicken coops or animal enclosures: Construct safe and secure housing for your animals.
- Decorative garden arches: Form panels into arches for a beautiful garden feature.
- Compost bins: Build a functional and attractive compost system.
- Greenhouse frames: Use panels as a base for a DIY greenhouse structure.
Conclusion: Bringing Your Cattle Panel and Wood Project to Life
Attaching cattle panels to wood opens up a world of possibilities for DIY enthusiasts and gardeners alike. By following the methods and tips outlined in this guide, you’ll be well-equipped to create sturdy, functional, and attractive structures for your home, garden, or farm.Remember to prioritize safety, choose quality materials, and take your time to ensure proper attachment. With a little creativity and effort, you can transform simple cattle panels and wood into beautiful and practical additions to your outdoor space.Key takeaways:
- Choose the right wood and prepare it properly
- Select the appropriate attachment method for your project
- Ensure secure and evenly spaced attachments
- Regular maintenance is crucial for longevity
- Let your creativity flow with various project applications
Now it’s time to gather your materials, put on your safety gear, and bring your cattle panel and wood project to life!Check out our selection of high-quality cattle panels for your next project!Explore our range of fencing tools and accessories to make your installation easier.
