Revolutionize Your Farm with DIY Cattle Panel Fencing: A Comprehensive Guide
Are you looking for an affordable, durable, and versatile fencing solution for your farm or homestead? Look no further than DIY cattle panel fencing! This comprehensive guide will walk you through everything you need to know about creating your own cattle panel fence, from materials and tools to installation techniques and creative uses. Whether you’re a seasoned farmer or a beginner homesteader, this article will equip you with the knowledge to transform your property with this innovative fencing option.
Why Choose Cattle Panel Fencing?
Before we dive into the nitty-gritty details, let’s explore why cattle panel fencing has become increasingly popular among farmers and homesteaders:
- Versatility: Cattle panels can be used for various purposes beyond just containing livestock.
- Durability: Made from sturdy galvanized steel, these panels can withstand harsh weather conditions and animal pressure.
- Cost-effectiveness: Compared to traditional fencing options, cattle panels offer excellent value for money.
- Easy installation: With the right tools and techniques, you can install cattle panel fencing quickly and efficiently.
- Customizability: These panels can be easily modified to suit your specific needs and property layout.
Now that we’ve piqued your interest, let’s explore the world of cattle panel fencing in more detail!
What Are Cattle Panels?
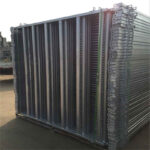
Cattle panels, also known as livestock panels or hog panels, are pre-fabricated sections of welded wire fencing. Typically made from galvanized steel, these panels are designed to be strong, durable, and resistant to rust. The standard dimensions for cattle panels are:
- Length: 16 feet
- Height: 50-52 inches
- Wire spacing: Varies, but commonly 4 inches by 4 inches or 6 inches by 8 inches
These panels are versatile and can be used for various purposes beyond just containing cattle, making them a popular choice for farmers and homesteaders alike.
Tools and Materials Needed for DIY Cattle Panel Fencing
Before you start your fencing project, gather the following tools and materials:
Tools:
- حفار أو مثقاب حفر الأعمدة
- Hammer or post driver
- قواطع الأسلاك
- كماشة
- شريط قياس
- مستوى
- Safety glasses and gloves
مواد:
- Cattle panels
- Wooden or metal fence posts
- Fencing staples or wire clips
- Concrete (optional, for setting posts)
How to Install Cattle Panel Fencing: Step-by-Step Guide
Follow these steps to create your DIY cattle panel fence:
- Plan your fence line and mark post locations
- Dig post holes
- Set and secure fence posts
- Attach cattle panels to posts
- Secure panels and finish the fence
Let’s break down each step in more detail.
1. Plan Your Fence Line and Mark Post Locations
Before you start digging, it’s crucial to plan your fence line carefully. Consider the following factors:
- Property boundaries
- Terrain and obstacles
- Purpose of the fence (e.g., containing livestock, creating garden beds)
- Local zoning regulations and building codes
Once you’ve determined your fence line, mark the locations for your fence posts. For cattle panel fencing, posts should be spaced approximately 8 feet apart to provide adequate support.
2. Dig Post Holes
Using a post hole digger or auger, dig holes for your fence posts. The depth of the holes should be about 1/3 the length of your posts, plus an additional 6 inches for gravel drainage. For example, if you’re using 8-foot posts, dig holes approximately 32-34 inches deep.Pro tip: Call your local utility companies before digging to ensure you don’t hit any underground lines or pipes.
3. Set and Secure Fence Posts
Place a layer of gravel at the bottom of each hole for drainage. Then, set your posts in the holes, making sure they’re plumb (vertical) using a level. You can either backfill the holes with soil or use concrete for added stability. If using concrete, allow it to cure for 24-48 hours before attaching the panels.
4. Attach Cattle Panels to Posts
Once your posts are secure, it’s time to attach the cattle panels. Start at one end of your fence line and work your way down. Lean the panel against the posts and secure it using fencing staples or wire clips. Make sure the panel is level and taut between posts.
5. Secure Panels and Finish the Fence
Continue attaching panels along your fence line, overlapping them slightly at the joints for added strength. Once all panels are in place, double-check that they’re securely fastened to the posts and make any necessary adjustments.
Creative Uses for Cattle Panel Fencing
While cattle panels are excellent for containing livestock, their versatility allows for numerous creative applications around your farm or homestead. Here are some innovative ideas:
- Garden trellises: Arch cattle panels to create sturdy supports for climbing plants like peas, beans, and cucumbers.
- Raised bed frames: Use panels as the sides of raised garden beds for a long-lasting and attractive solution.
- Chicken runs: Create a secure outdoor area for your chickens using cattle panels and chicken wire.
- Compost bins: Build a simple and effective compost bin using panels as the sides.
- Temporary animal pens: Quickly set up temporary enclosures for livestock or pets using cattle panels and t-posts.
Maintenance and Care for Your Cattle Panel Fence
To ensure your DIY cattle panel fence stands the test of time, follow these maintenance tips:
- Regularly inspect your fence for damage or loose connections
- Tighten any loose staples or wire clips
- Remove any vegetation growing on or around the fence
- Touch up any scratches or bare spots with galvanized paint to prevent rust
- Replace any damaged panels promptly to maintain the fence’s integrity
Frequently Asked Questions About Cattle Panel Fencing
- How long do cattle panels last? With proper care and maintenance, cattle panels can last 20 years or more.
- Can cattle panels be used for horses? While cattle panels can be used for horses, it’s generally recommended to use taller, sturdier panels specifically designed for equine fencing.
- Are cattle panels suitable for all types of livestock? Cattle panels are versatile and can be used for various livestock, including cattle, sheep, goats, and pigs. However, smaller animals may require additional modifications to prevent escape.
- Can I paint cattle panels? Yes, you can paint cattle panels to match your aesthetic preferences or to provide additional protection against rust. Use a paint designed for galvanized metal for best results.
- How do I cut cattle panels if needed? Use heavy-duty wire cutters or bolt cutters to trim cattle panels. Always wear safety glasses and gloves when cutting metal.
Conclusion: Transform Your Property with DIY Cattle Panel Fencing
DIY cattle panel fencing offers a cost-effective, versatile, and durable solution for your farm or homestead. By following this comprehensive guide, you’ll be well-equipped to tackle your fencing project with confidence. Remember to prioritize safety, plan carefully, and don’t be afraid to get creative with your cattle panel applications. With a little effort and ingenuity, you can revolutionize your property and create functional, attractive spaces for your livestock, gardens, and more.Ready to start your cattle panel fencing project? Check out our selection of high-quality galvanised cattle panels to get started on transforming your property today!
Key Takeaways:
- Cattle panel fencing is versatile, durable, and cost-effective
- Proper planning and preparation are crucial for successful installation
- Regular maintenance ensures the longevity of your fence
- Cattle panels can be used creatively for various farm and garden projects
- Always prioritize safety when working with metal fencing materials
By implementing these tips and techniques, you’ll be well on your way to creating a functional and attractive cattle panel fence that will serve your property for years to come.[Image: A well-constructed cattle panel fence surrounding a lush pasture with grazing livestock]
